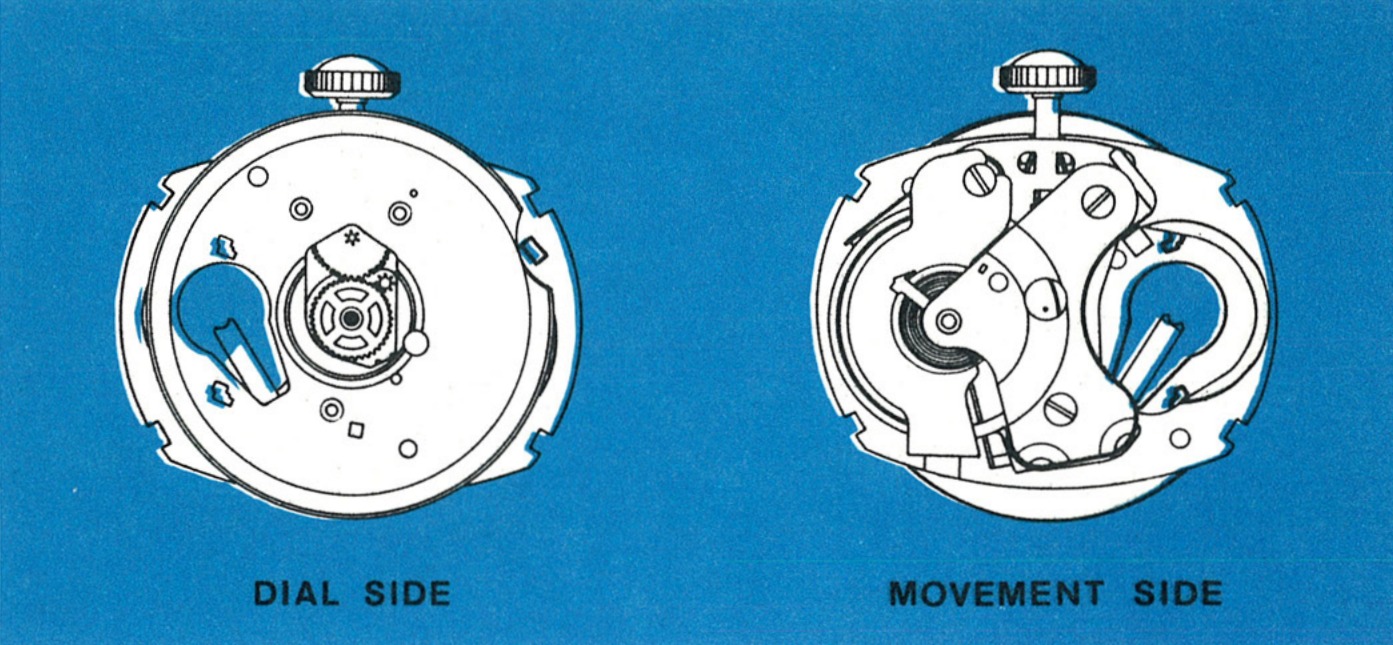
High Frequency, New Numbers
The Timex Model 260 is an 11¾ by 12¾ ligne electric watch movement featuring a high frequency balance system. It operates at a rate of 28,800 beats per hour. The rate can be checked on recorders having a setting for 28,800 beats per hour, or on some recorders using a setting for 14,400 or 21,600 beats per hour.
The Model 260 is powered by a Timex Type A energy cell which provides power for at least one year.
The Timex code number on the edge of the dial gives the catalog number, movement number and year of manufacture.
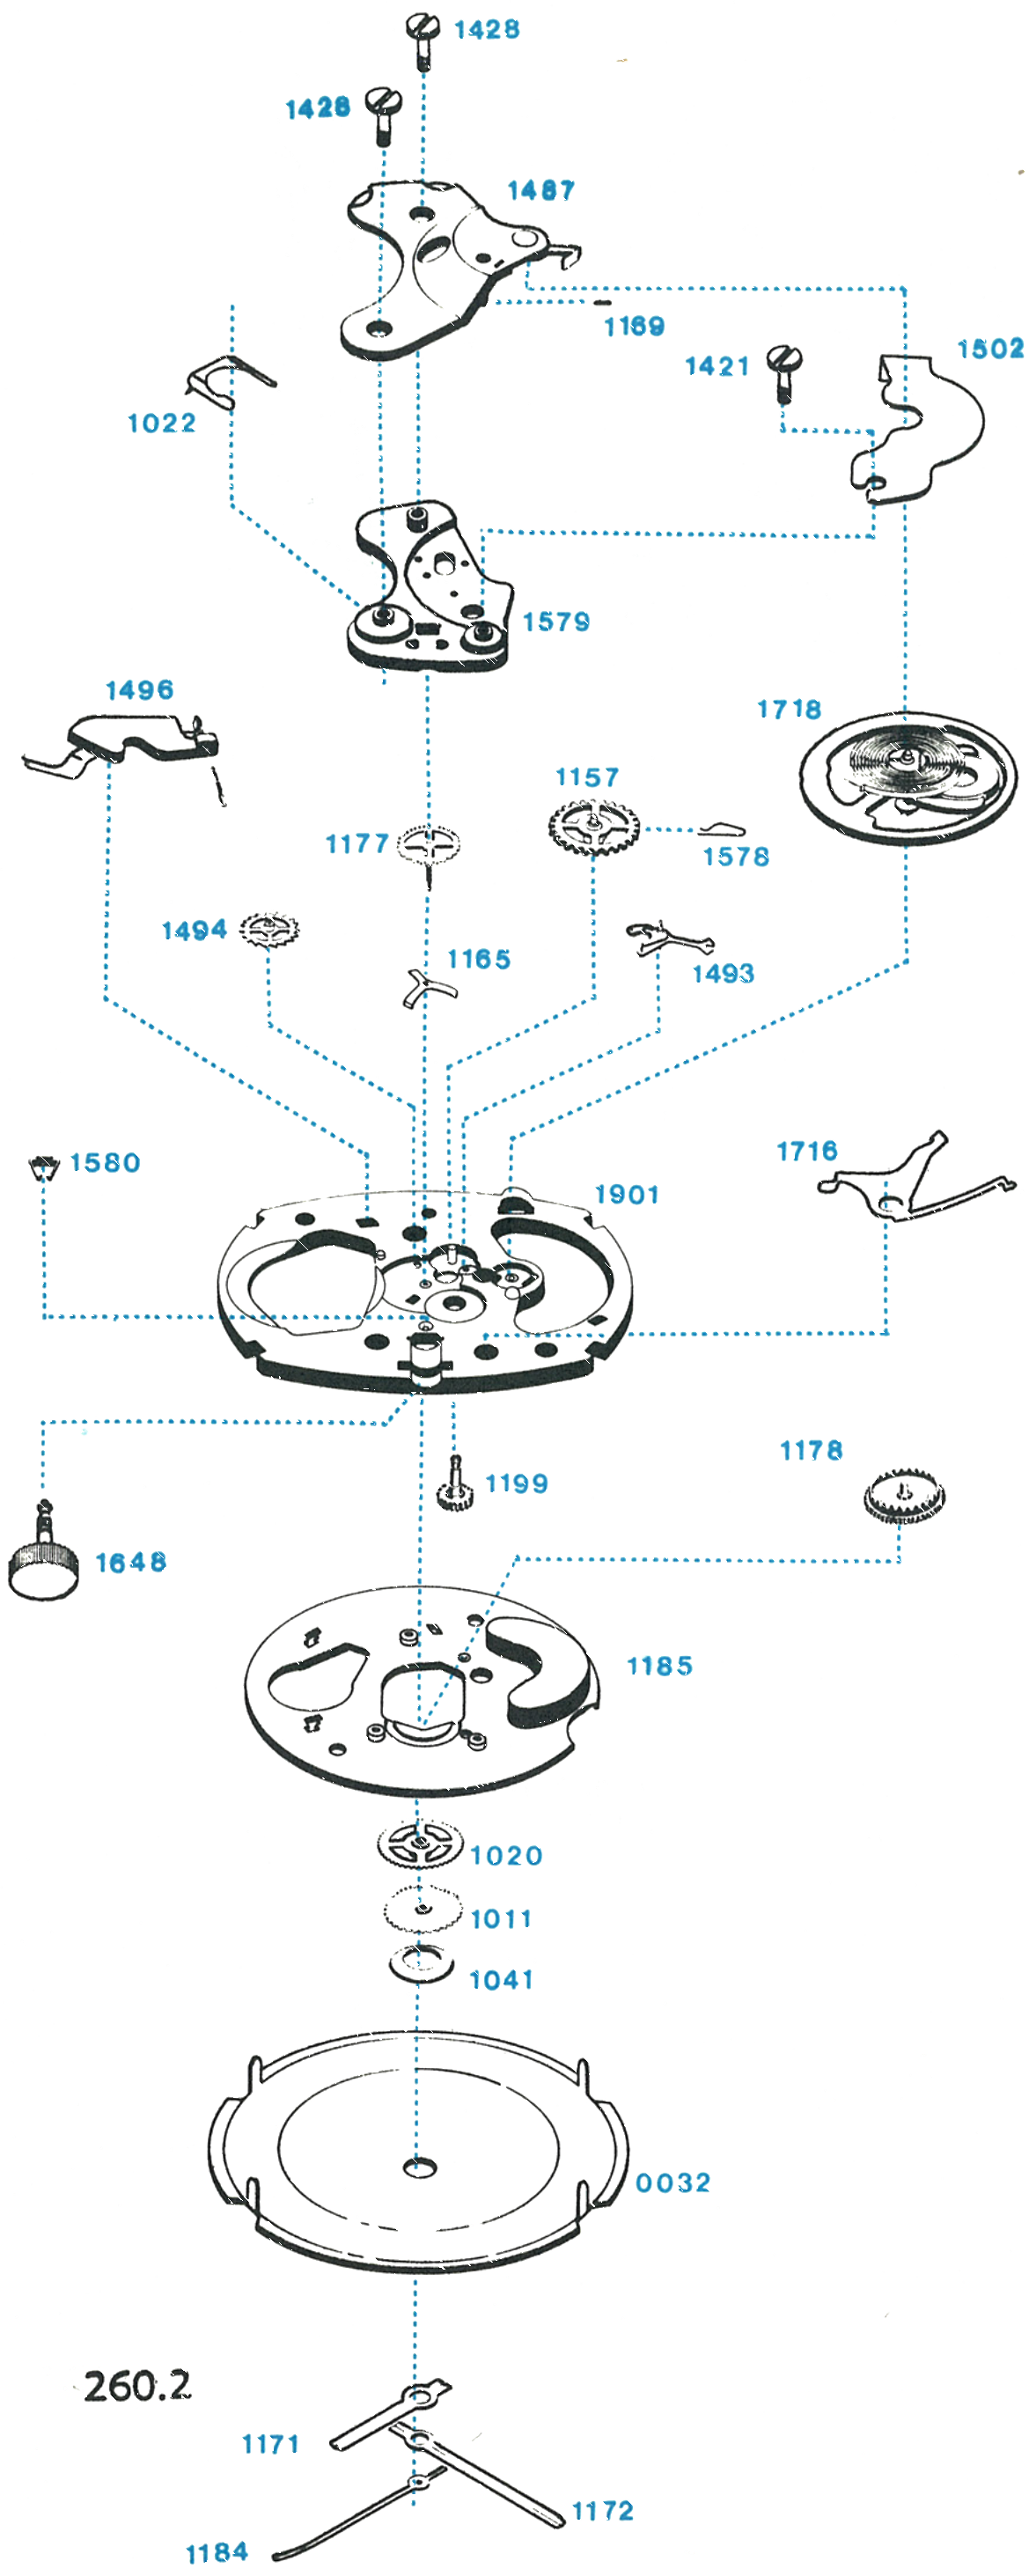
Exploded View
Disassembly
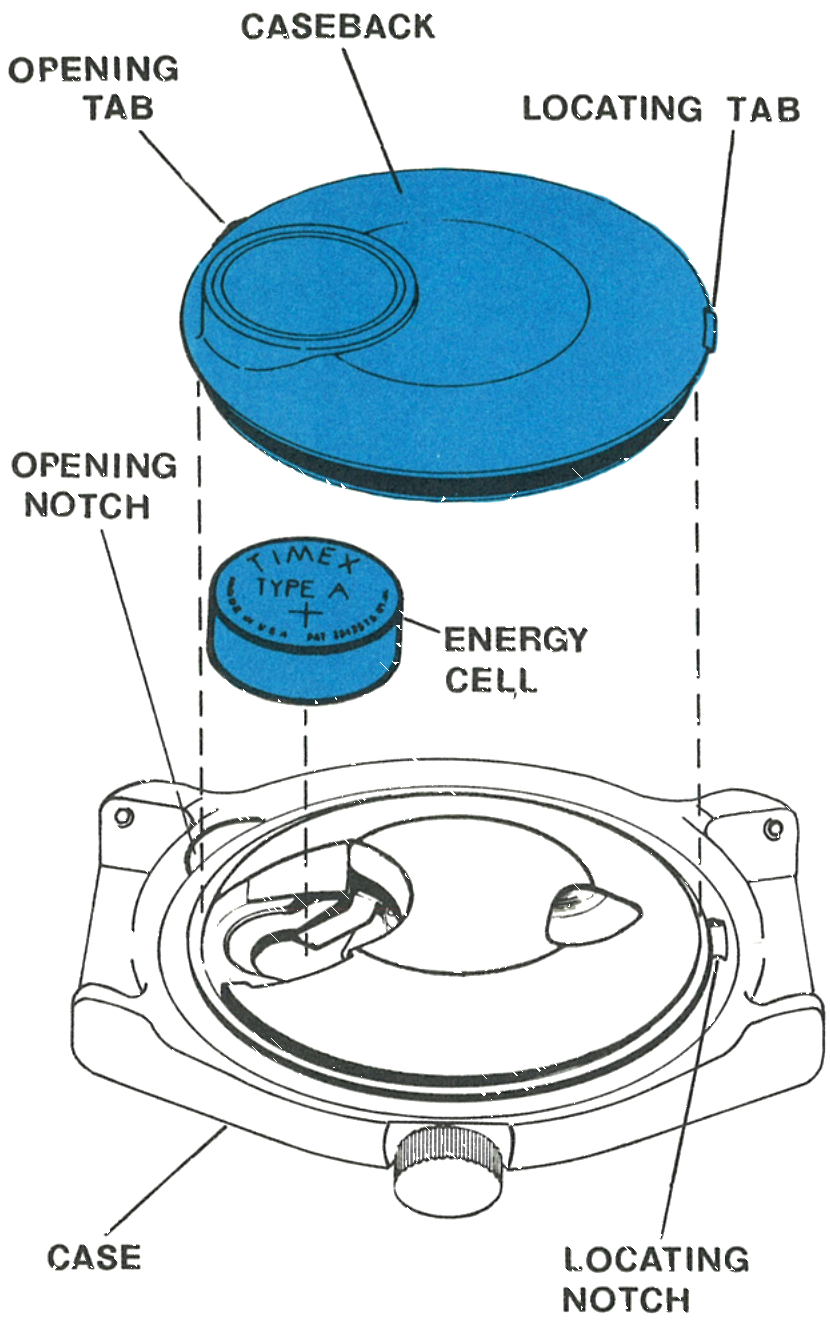
The Caseback and Cell
Insert a blade into the opening on the bezel and pry the caseback off. The locating tab on the caseback is used for orientation of the back during reassembly.
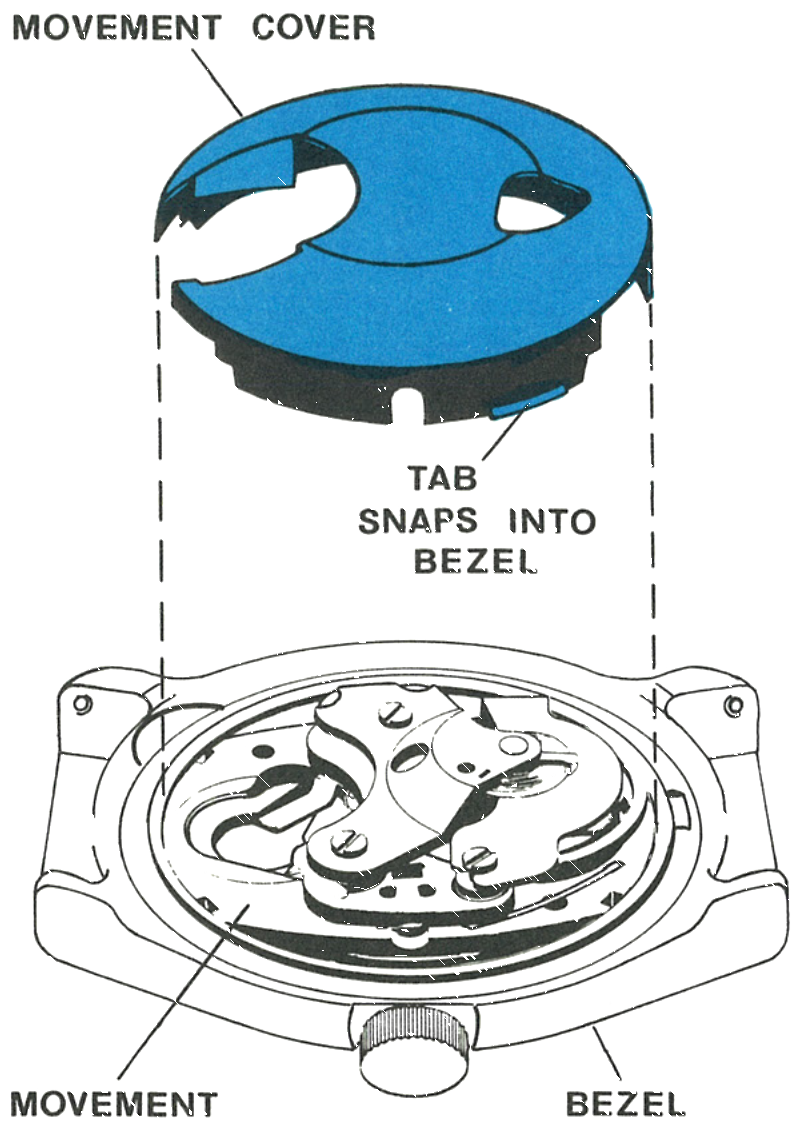
Remove the energy cell, then lift off the movement cover. The cover is held in place by two tabs which snap into recesses in the bezel.
The Movement Cover
The cover and the tab which snaps into the bezel, with the movement beneath.
Releasing the Stem
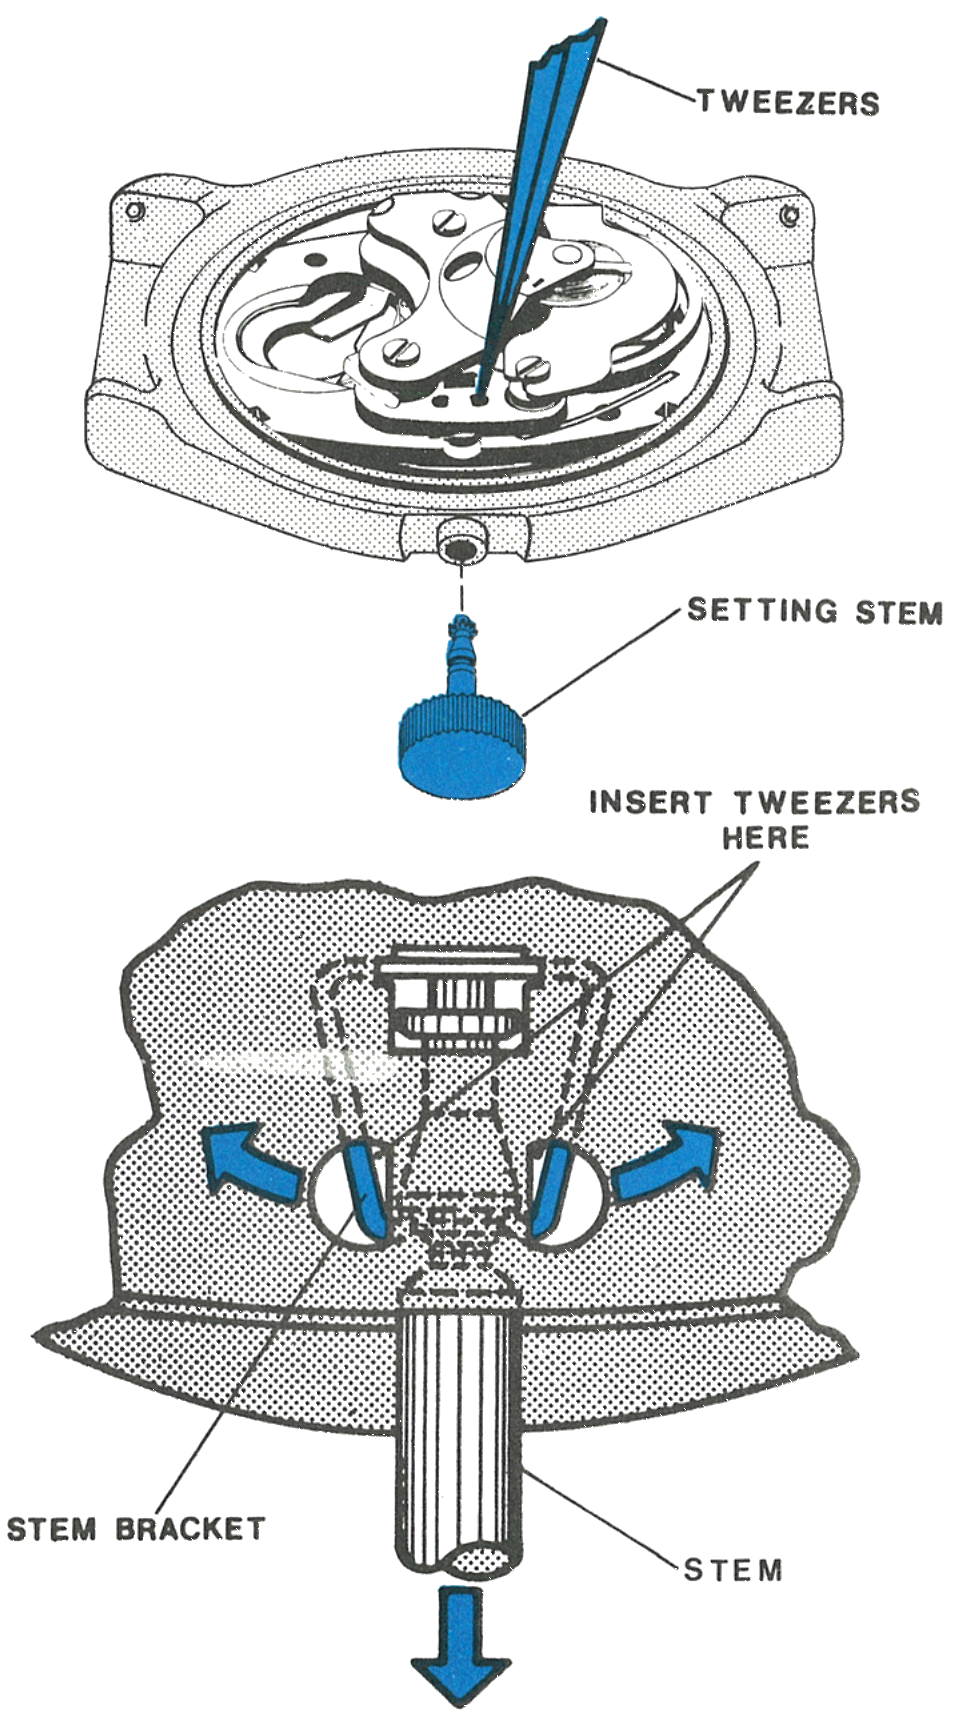
The stem is held in position by the stem bracket. Pull the stem out into the set position and continue to maintain a slight outward pull.
Place the points of a tweezer into one side of the stem bracket and push the bracket aside to release one side of the stem. Continue to pull the stem outward and use the tweezer points to release the other side. The stem will now pull free of the movement and bezel.
Out Through the Crystal
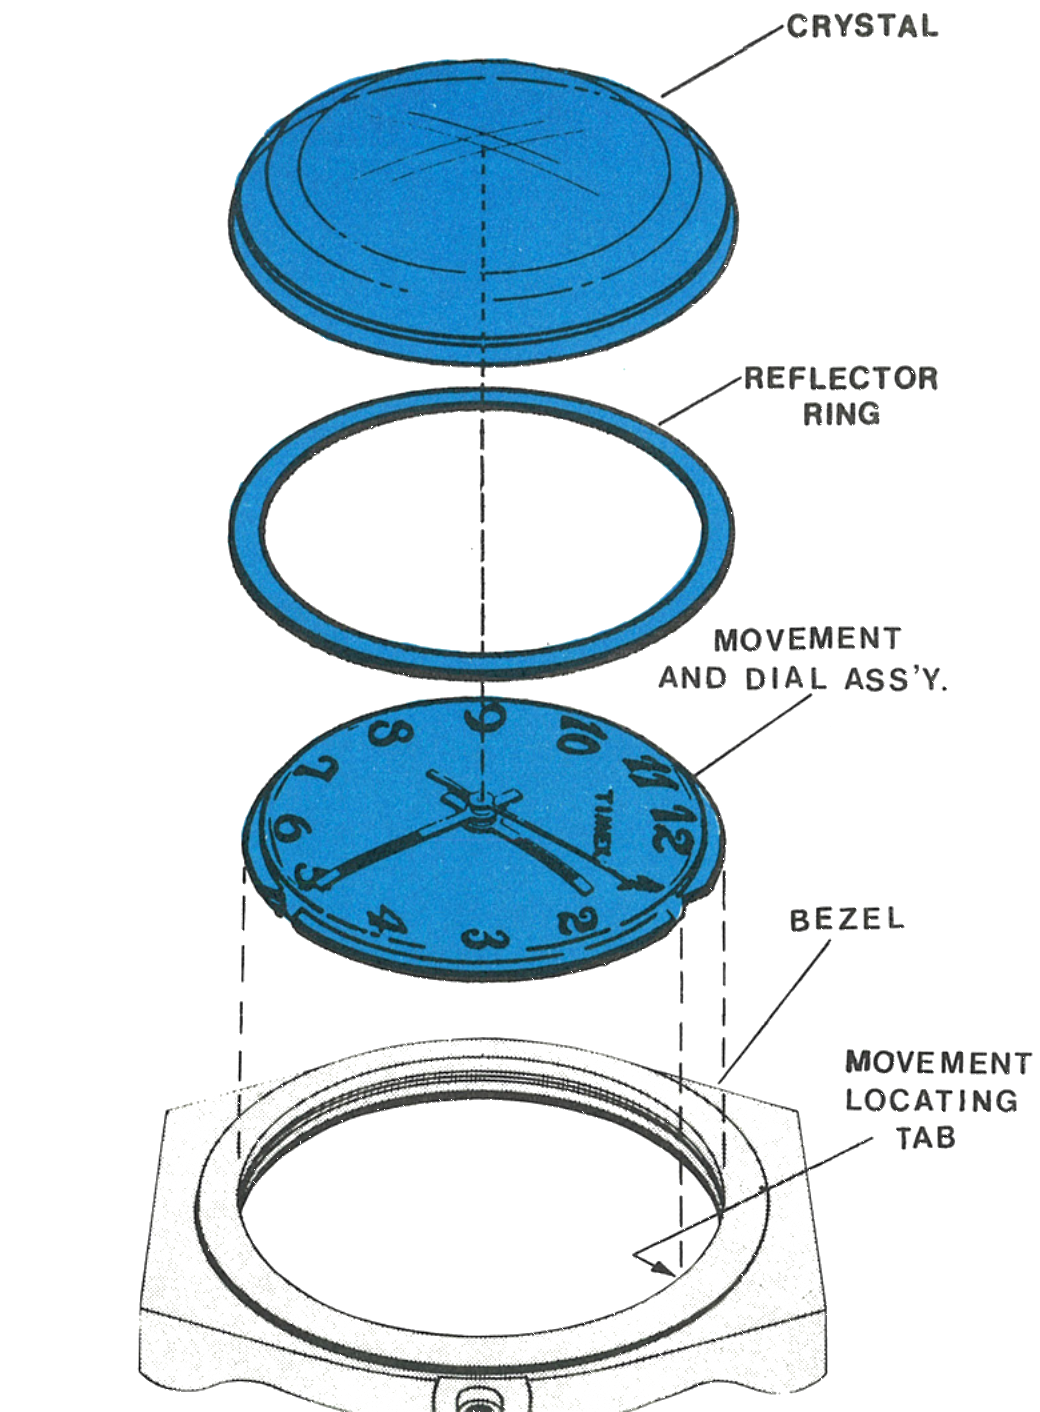
After the stem is removed, the movement can be removed through the crystal side of the bezel. Remove the crystal with a crystal seating tool and then lift the reflector ring and movement free of the bezel.
The Dial
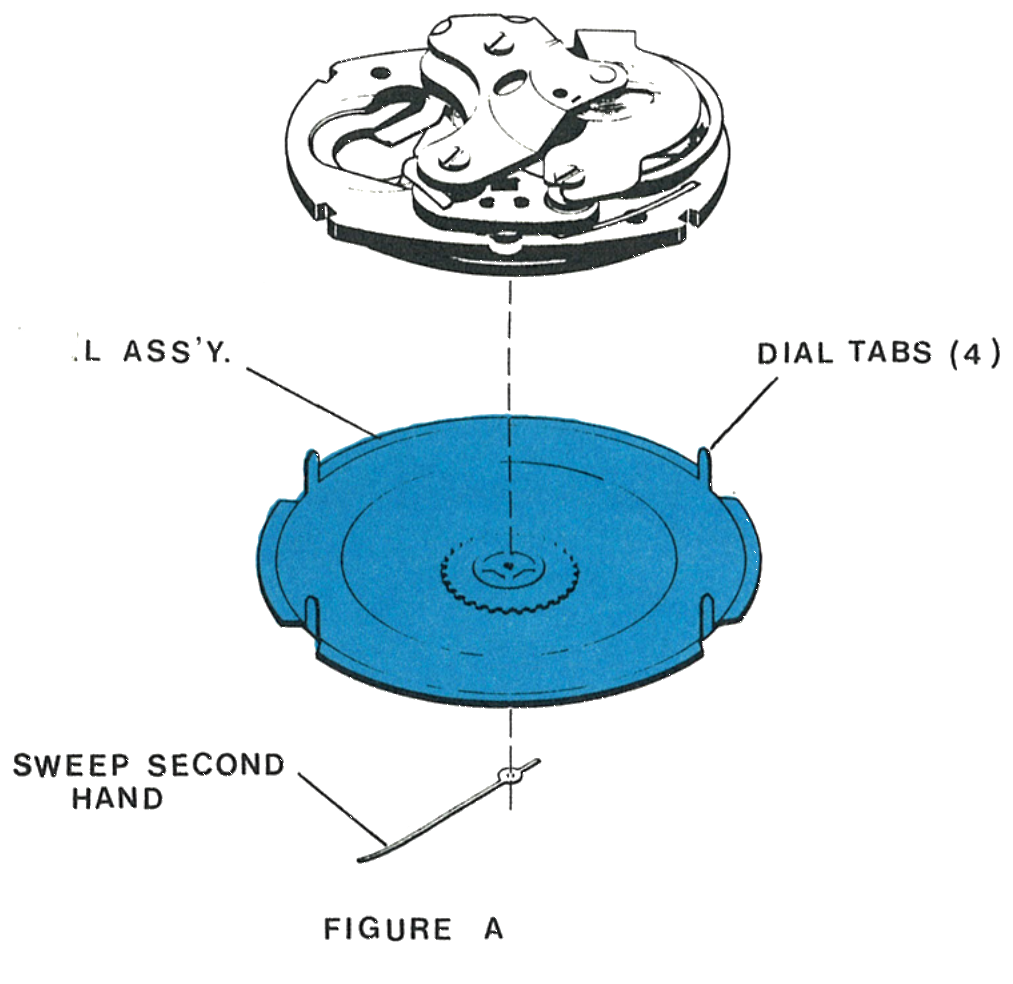
Remove all hands. Straighten the dial tabs enough to remove the dial from the movement.
Turn the assembly over and lift off the dial. Lift off the hour wheel washer and hour wheel assembly.
The Shunt Bridge
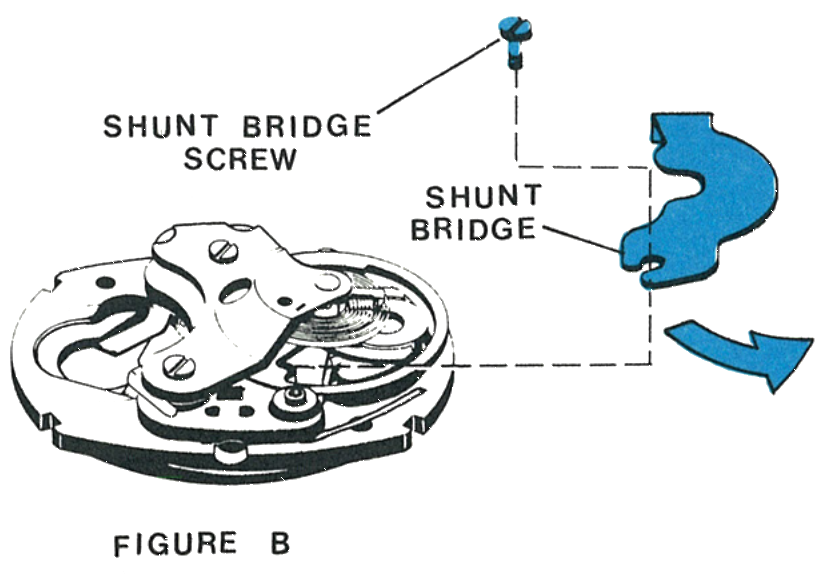
Turn the movement over and remove the shunt bridge screw. Lift the screw end of the shunt bridge off its post and carefully slide the shunt bridge from the movement, noting the tab on its end which engages the plate.
Replace the shunt bridge screw.
The Balance
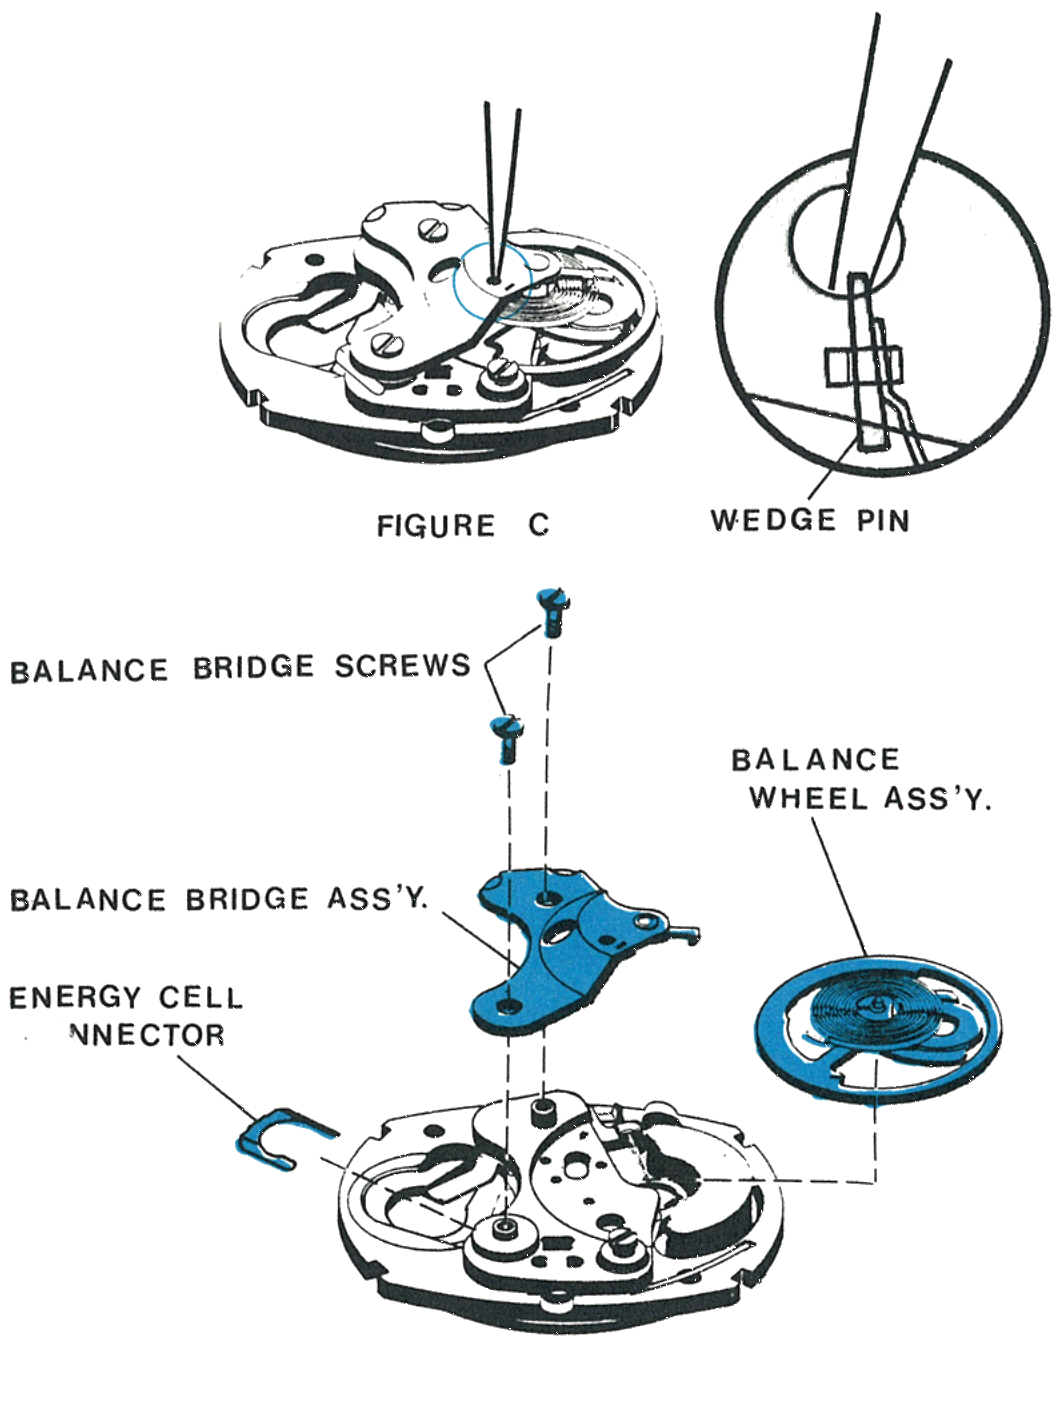
Remove the hairspring wedge pin; do not distort either the pin or the hairspring. Note the hole in the balance bridge which permits access to the wedge pin.
Rotate the balance wheel carefully until the hairspring tail is free of the hairspring bracket and the regulator.
Note the position of the energy cell connector by sliding it out. Remove the two balance bridge screws, lift off the balance bridge assembly and carefully remove the balance wheel assembly.
Cleaning
The best way to clean the Model 260 movement is to disassemble it only to the point of removing the balance bridge and the balance wheel assembly. The movement should be placed in the watch cleaning machine, including ultrasonic baths, preferably on edge to insure proper drainage of the fluids. The movement must be immersed in two sets of rinsing fluid, and the final rinsing solution must be absolutely clean. After cleaning is completed, the movement must be thoroughly dried.
The balance wheel assembly must be cleaned separately in order to prevent damage to the balance staff points, the hairspring and the coil. Other metal parts may be cleaned in the same manner as the movement. Only standard watch cleaning solutions should be used.
Lubrication
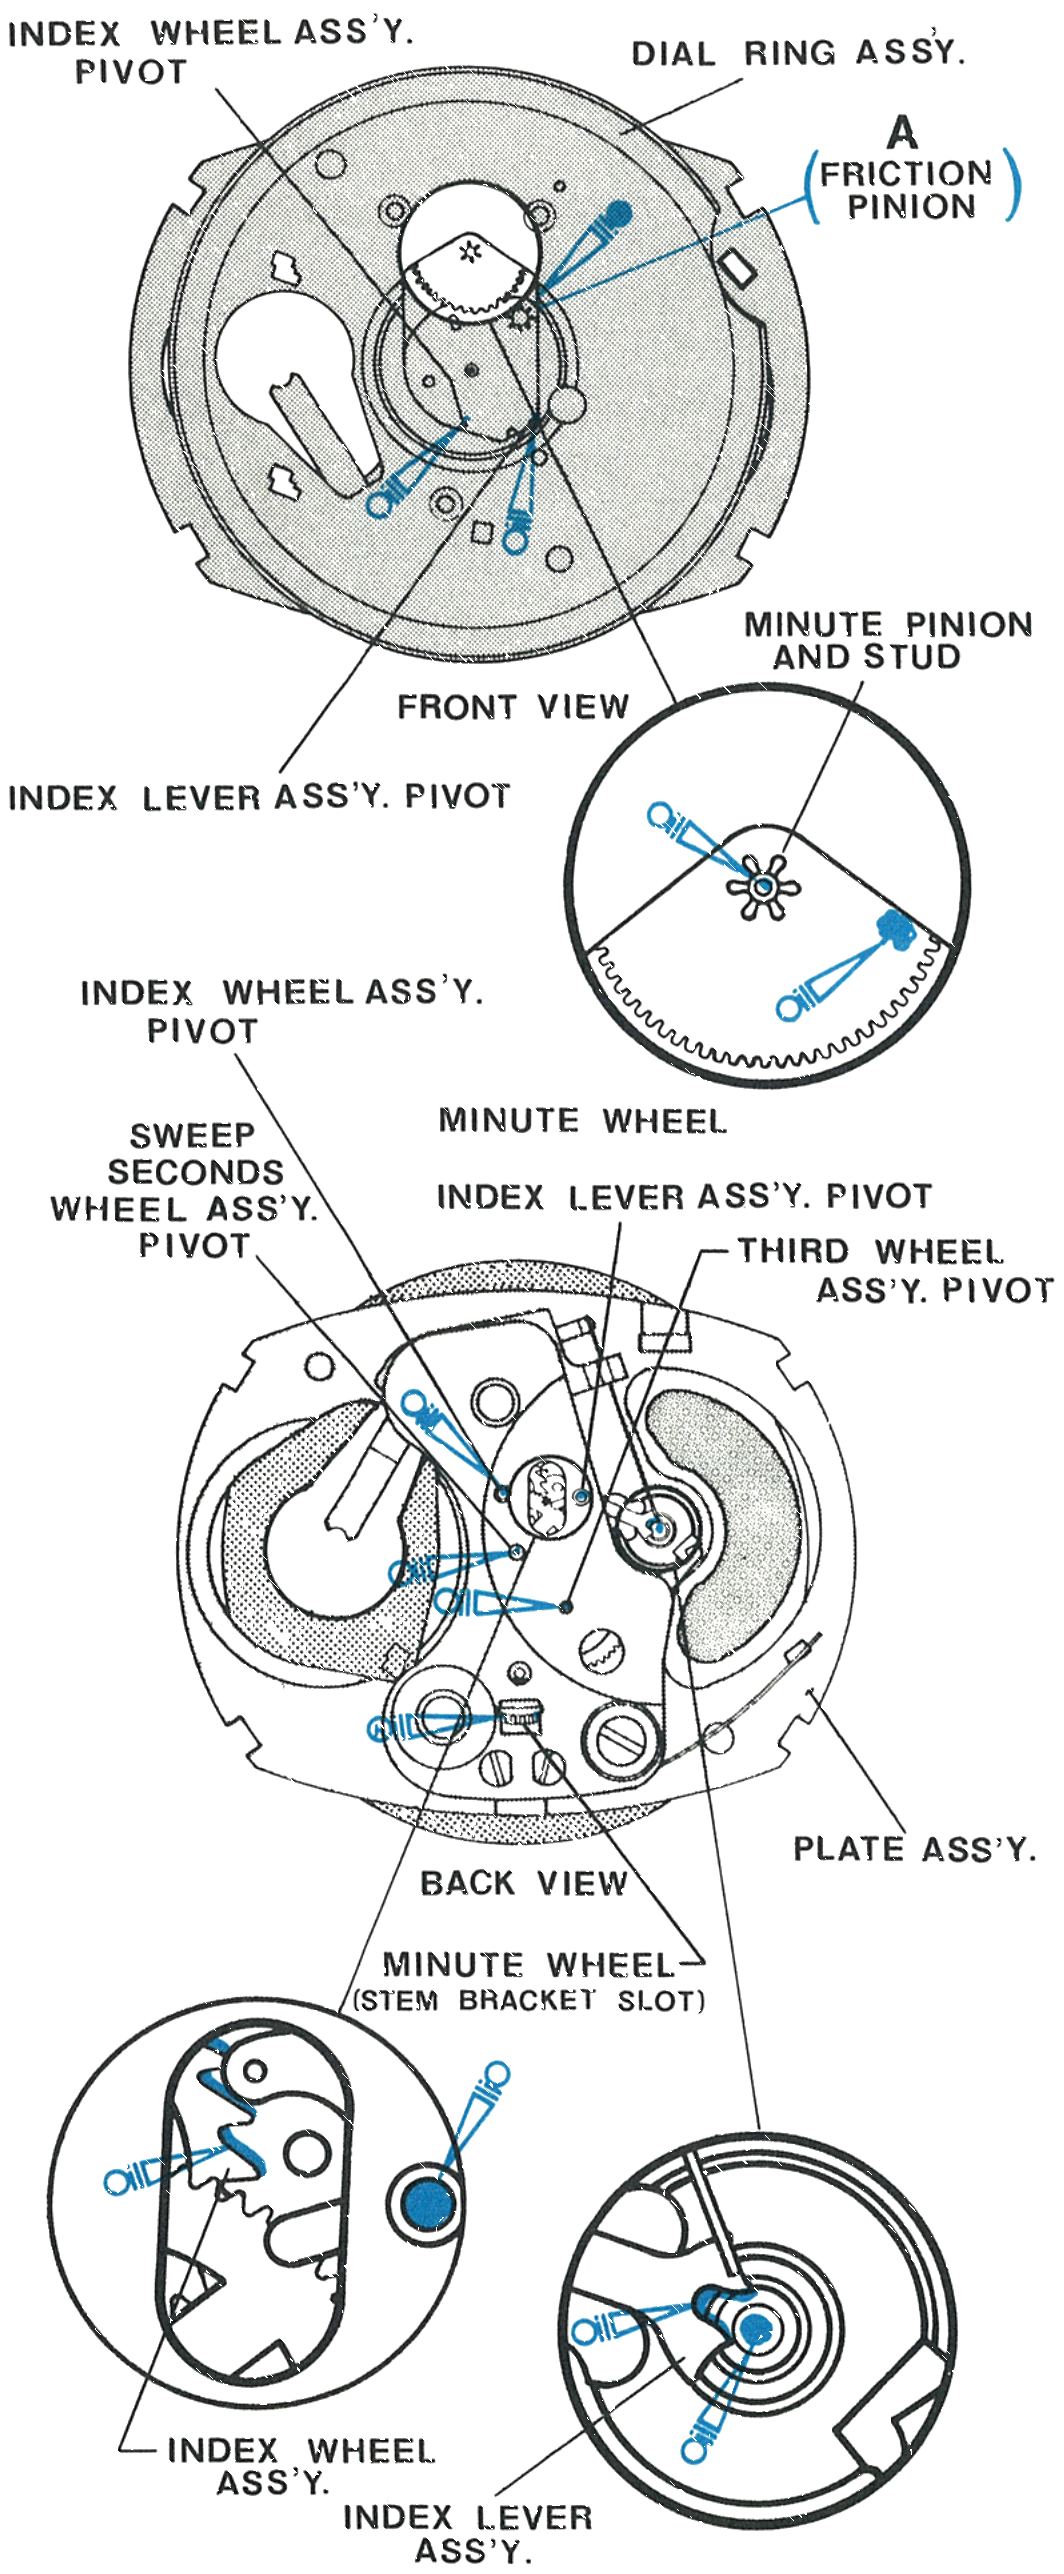
Apply non-spreading type oil, Moebius Synt-A-Lube in the factory, to the minute pinion stud at the top face of the minute pinion; both pivots of the index lever assembly; both pivots of the index wheel assembly; both pivots of the sweep seconds wheel assembly; the back pivot of the third wheel assembly; the junction of the minute wheel with the dial ring assembly; the junction of the minute wheel with the plate assembly; the index wheel on the driving face of three teeth; and the index lever fork where it engages the impulse pin.
Front and Back Views
The index wheel assembly pivot, dial ring assembly, friction pinion, minute pinion and stud, index lever assembly pivot, sweep seconds wheel assembly pivot, third wheel assembly pivot, plate assembly and minute wheel through the stem bracket slot.
Filling the V-Conic Bearings
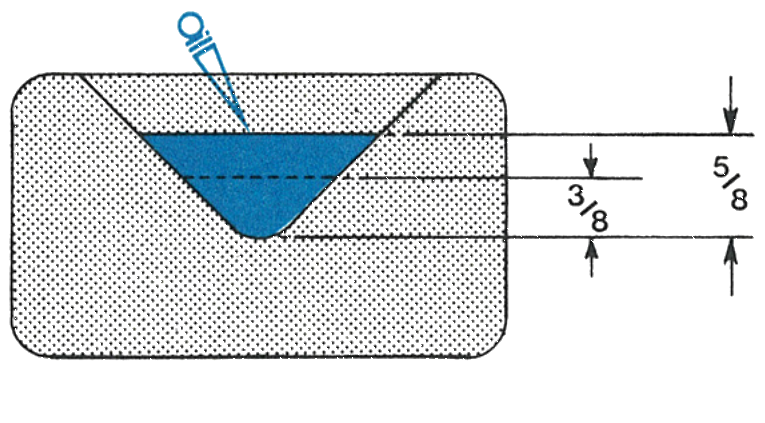
Fill the V-conic bearings three eighths to five eighths full, by depth.
Apply spreading type oil, Woods AAAA in the factory, to the friction pinion at its junction with the plate assembly, point A. Apply watch grease, Hamilton PML in the factory, to the set stem teeth and bearing surface below the teeth, prior to assembly of the stem to the watch head.
Reassembly
Refitting the Balance
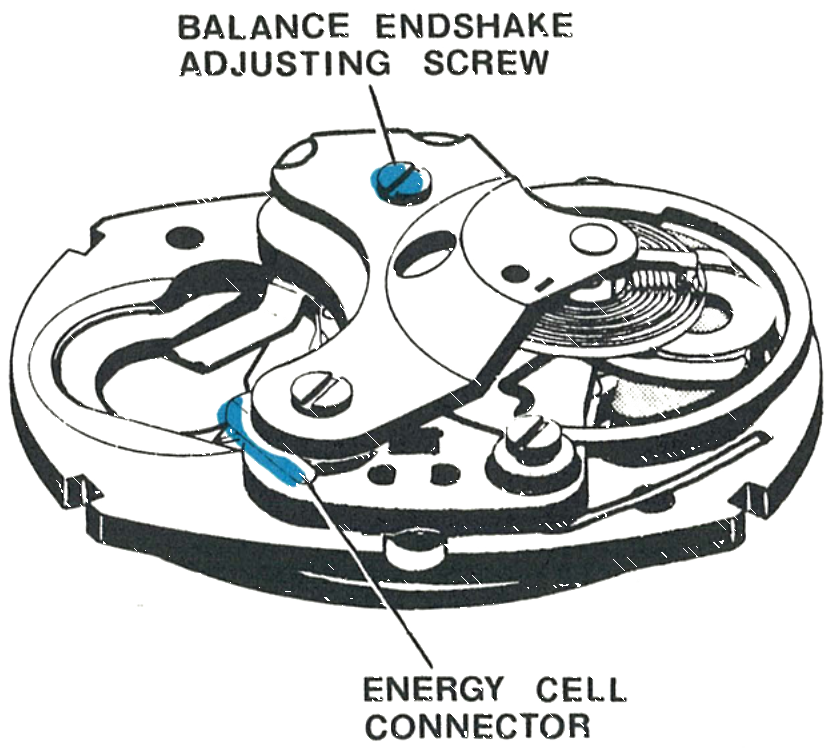
Insert the balance wheel assembly, impulse-disc end into the V-conic bearing in the plate assembly. Assemble the balance bridge and the two balance bridge screws, being careful to assure proper engagement of the balance pivots in their respective V-conic bearings.
Do not tighten the balance endshake adjusting screws completely. They should be tightened only enough to hold both balance pivots securely engaged in the V-conic bearings.
Slide the energy cell connector into place.
The Hairspring and Regulator
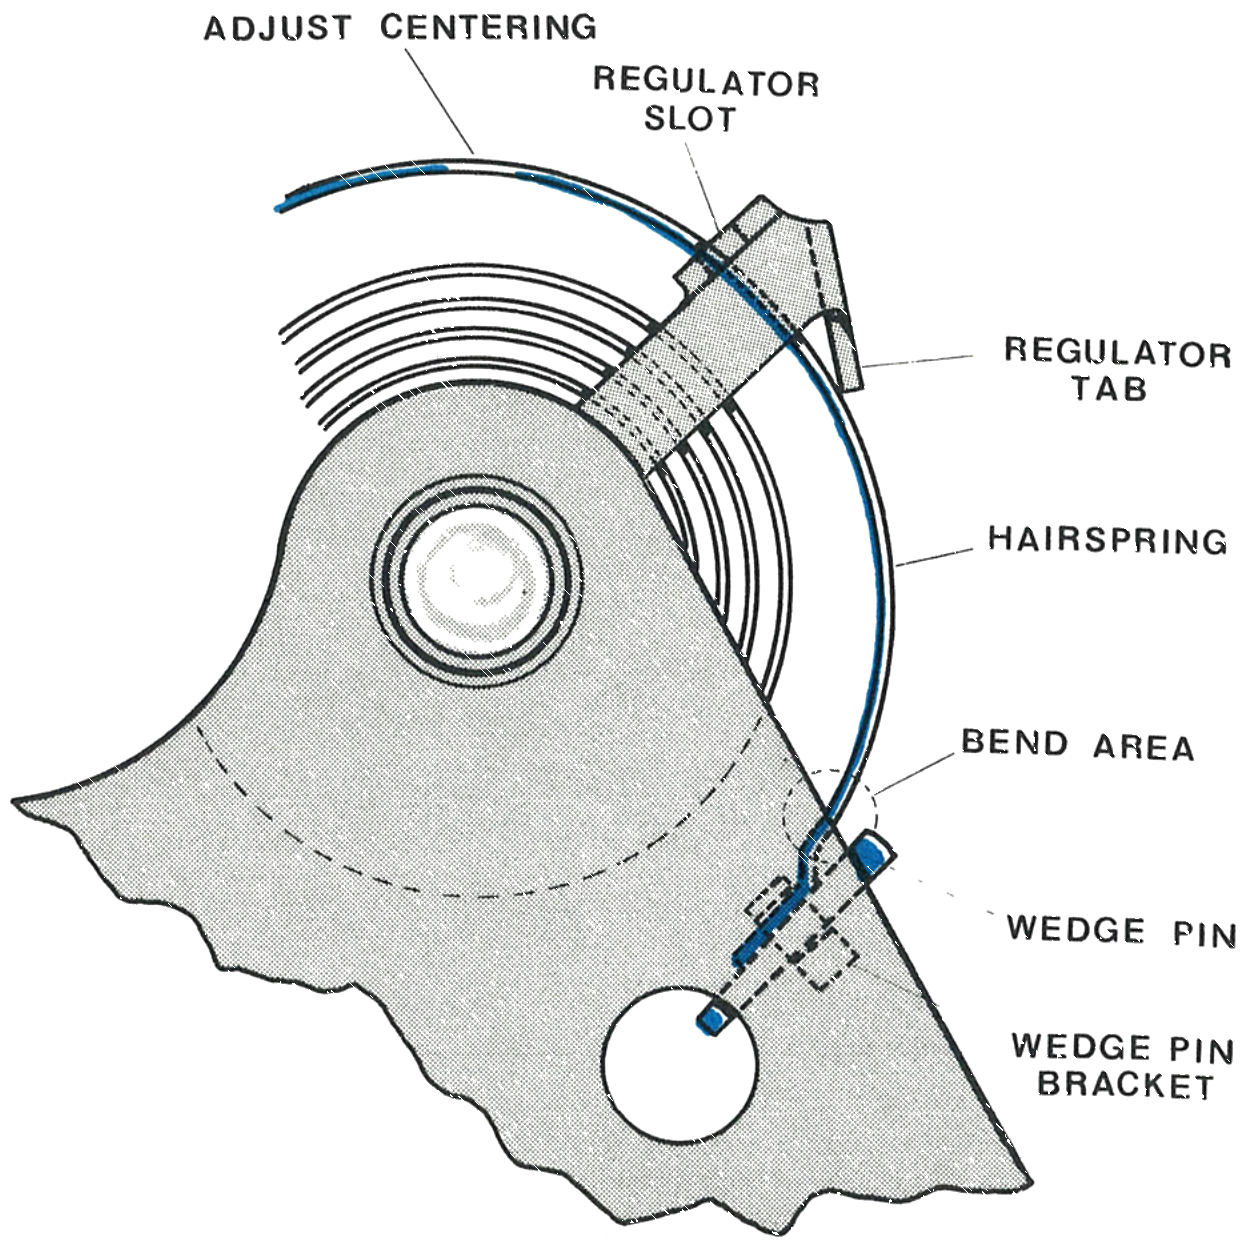
Insert the end of the hairspring into the slot in the regulator and then into the hole in the hairspring bracket by rotating the balance wheel and guiding the end of the spring. Check that the impulse pin is in the slot of the index lever, then secure the hairspring in the bracket with the wedge pin.
The hairspring should be levelled, centred and in light permanent contact with the inside edge of the regulator slot and the regulator tab. It must not leave those contact points at any time with the regulator within normal regulating range.
Adjust the level by grasping the spring as close as possible to the pinning point. To adjust centring, grasp 180° from the pinning point. To keep the spring in permanent contact with slot and tab, carefully bend the tab towards the centre of the spring.
After the basic movement has been cleaned, lubricated and assembled, reassemble in order: center wheel assembly, hour wheel assembly, hour wheel washer. Carefully orient the dial on the movement so the dial tabs engage the notches in the dial plate assembly, then, holding the dial firmly in place, turn the movement over and bend the tabs to secure the assembly. Assemble the hands at the 12 o’clock position.
The Sweep Second Hand
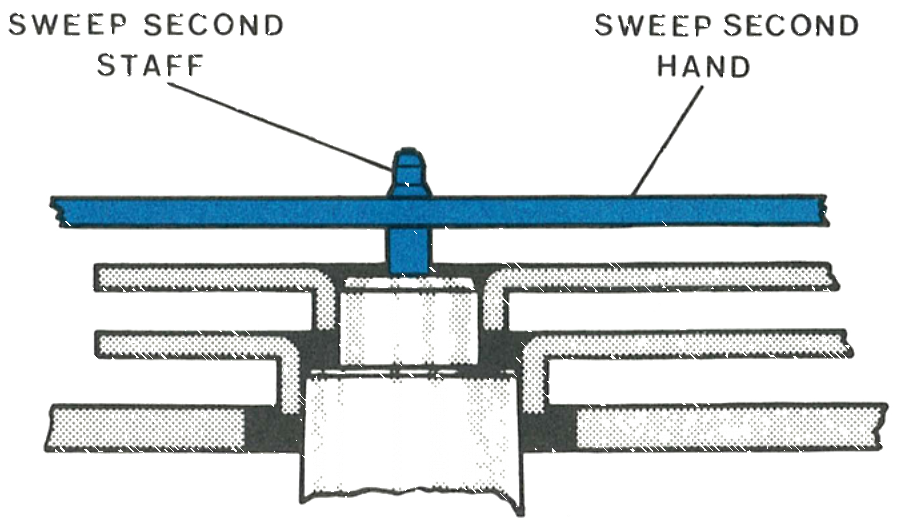
Drive the sweep second hand onto the end of the sweep second staff, being sure the hand is below the chamfer on the staff.
Place the movement and dial assembly in the case, being careful to position it on the locating tab. Position the reflector ring on the dial and replace the crystal to secure the assembly. Insert the crown and stem assembly with a turning motion to assure engagement in the stem bracket. Put a fresh Timex energy cell Type A in place, positive side up, position the caseback and snap it closed. Push the crown in and the watch will start; if it does not, slight rotation may be necessary to restart the mechanism.