
A Calendar on the DYNABEAT
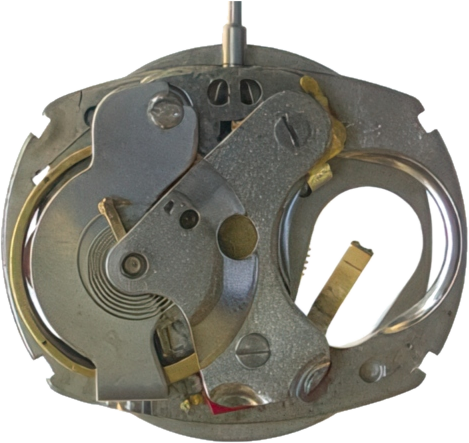
The Timex Model 254 is a 9¾ x 12¾ ligne high frequency electric calendar movement. The Model 254 movement is the same as the Model 253 movement except that the calendar mechanism has been added. The date can be changed manually, either forward or backward, by rotating the hands through 24 hours.
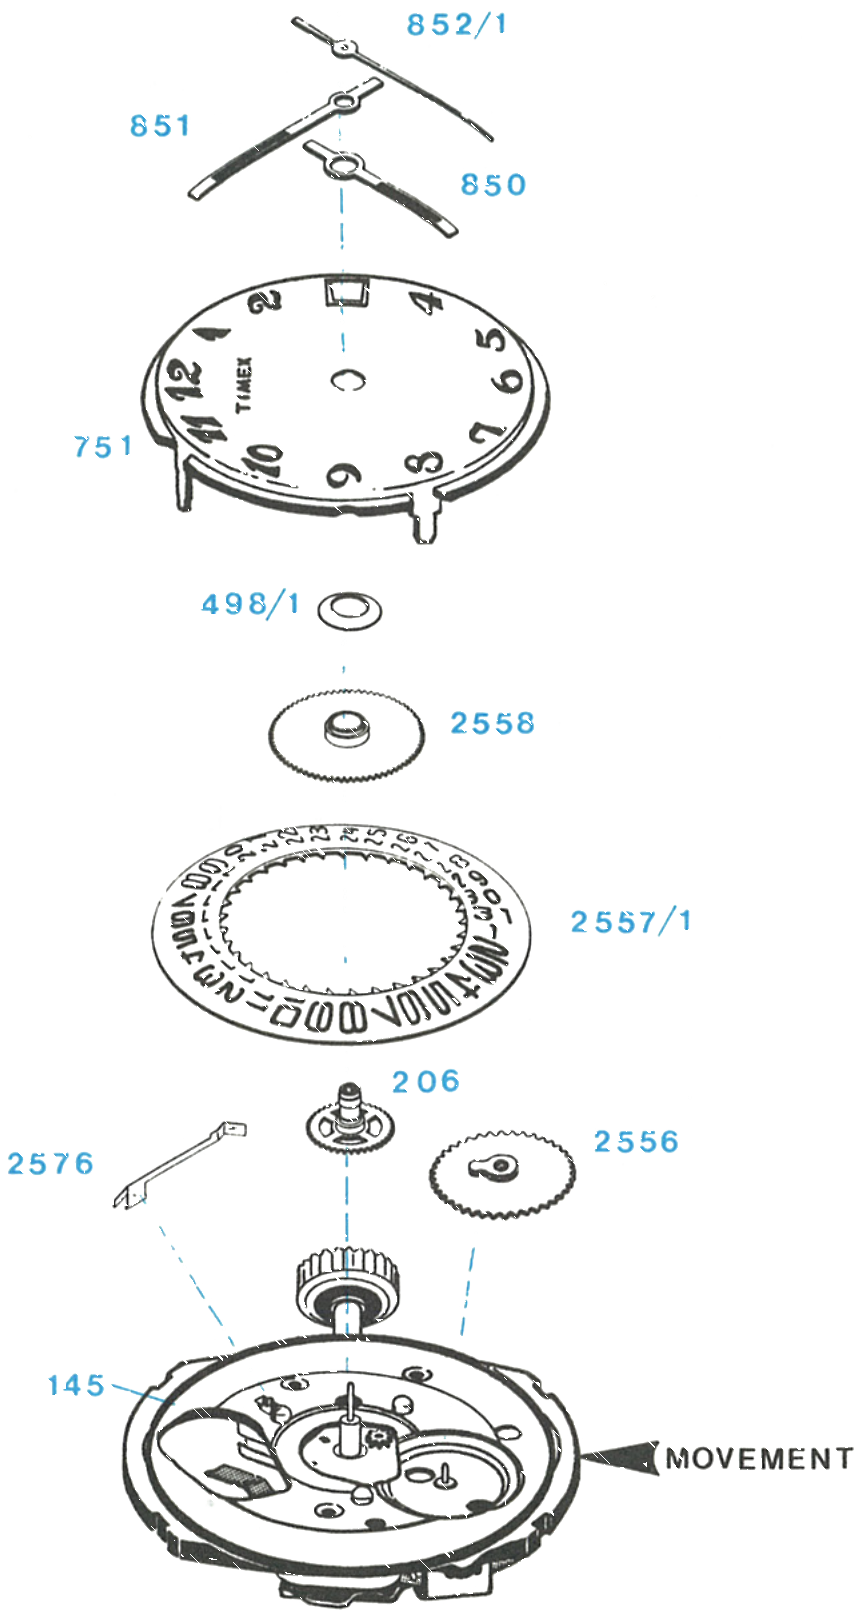
Exploded View
Everything below the numbered parts is the Model 253 movement.
Disassembly
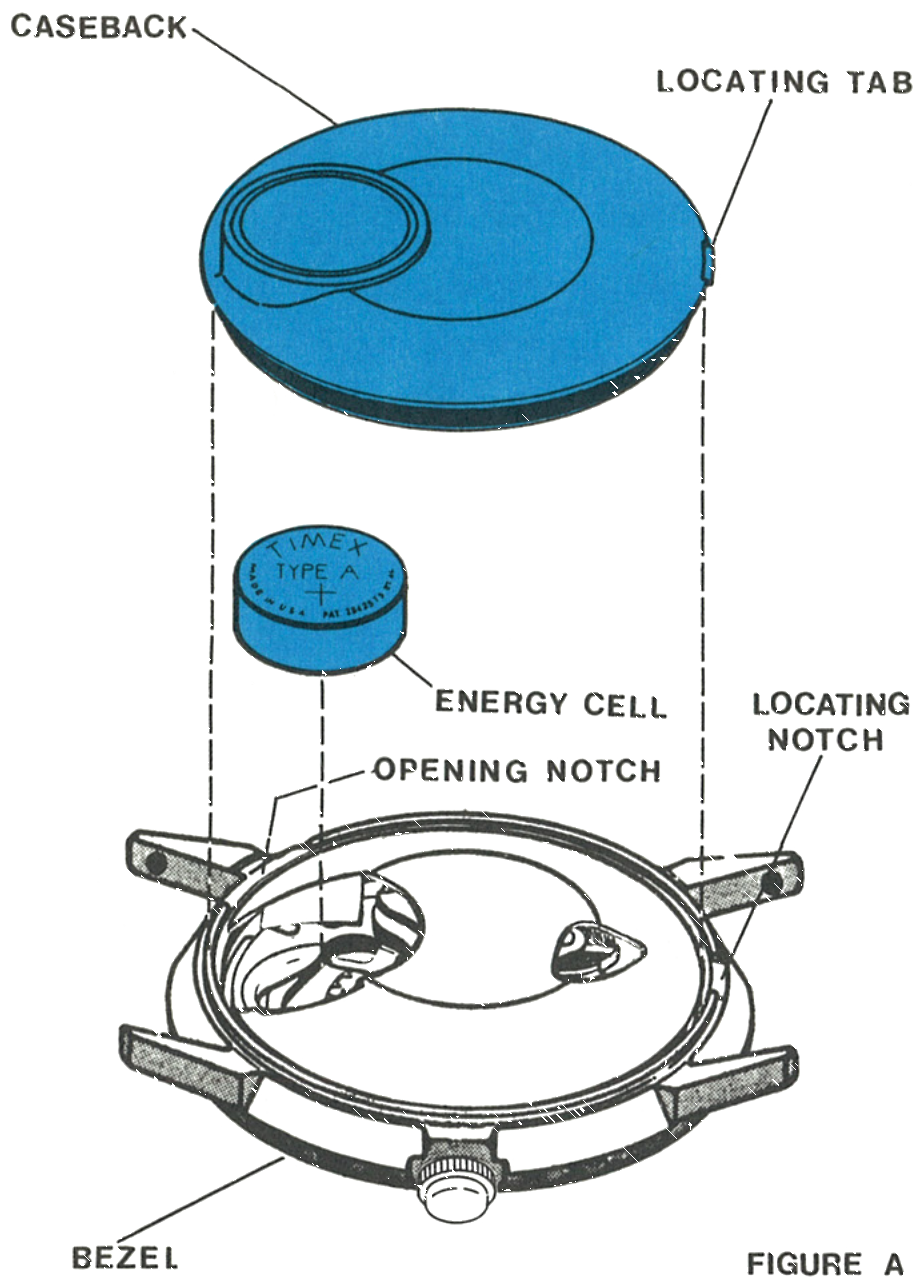
The Caseback and Cell
Insert a blade into the opening notch on the bezel and pry the caseback off. The locating tab on the caseback is used for orientation of the back during reassembly.
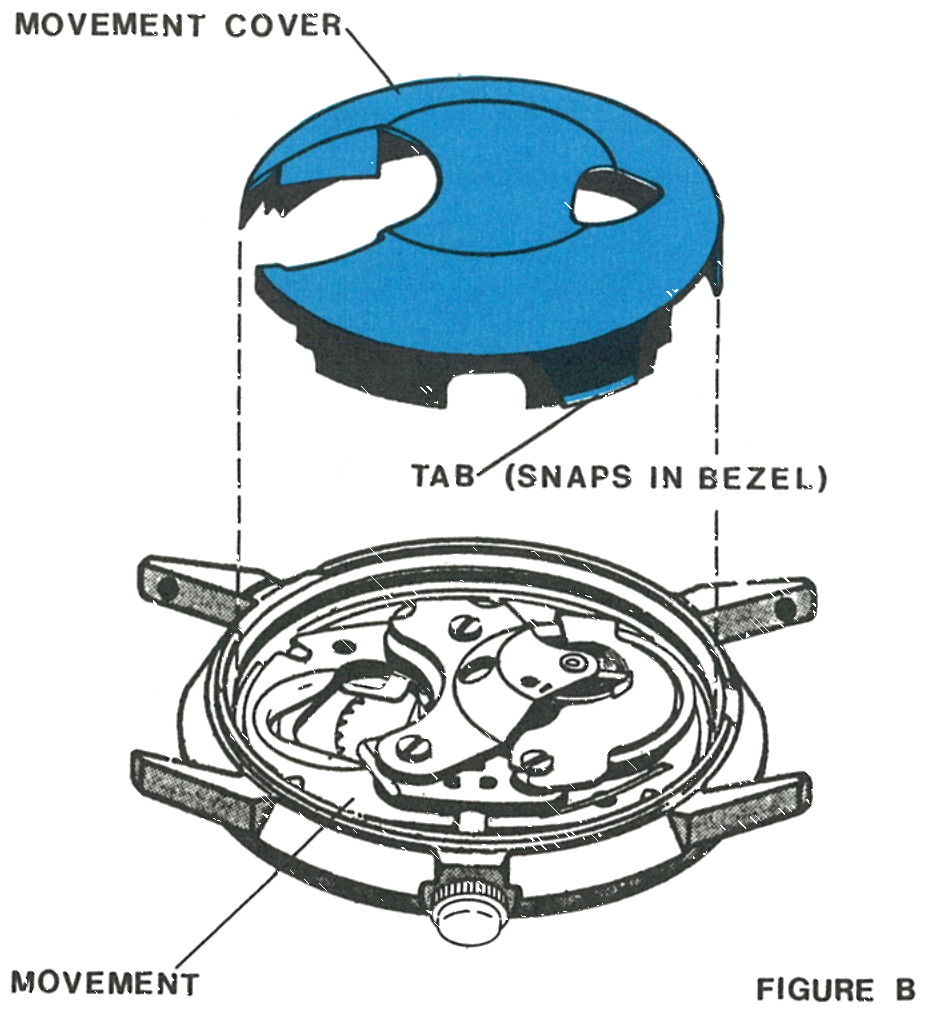
Remove the energy cell, then lift off the movement cover. The cover is held in place by two tabs which snap into recesses in the bezel.
The Movement Cover
The cover and the tab which snaps into the bezel, with the movement beneath.
Releasing the Stem
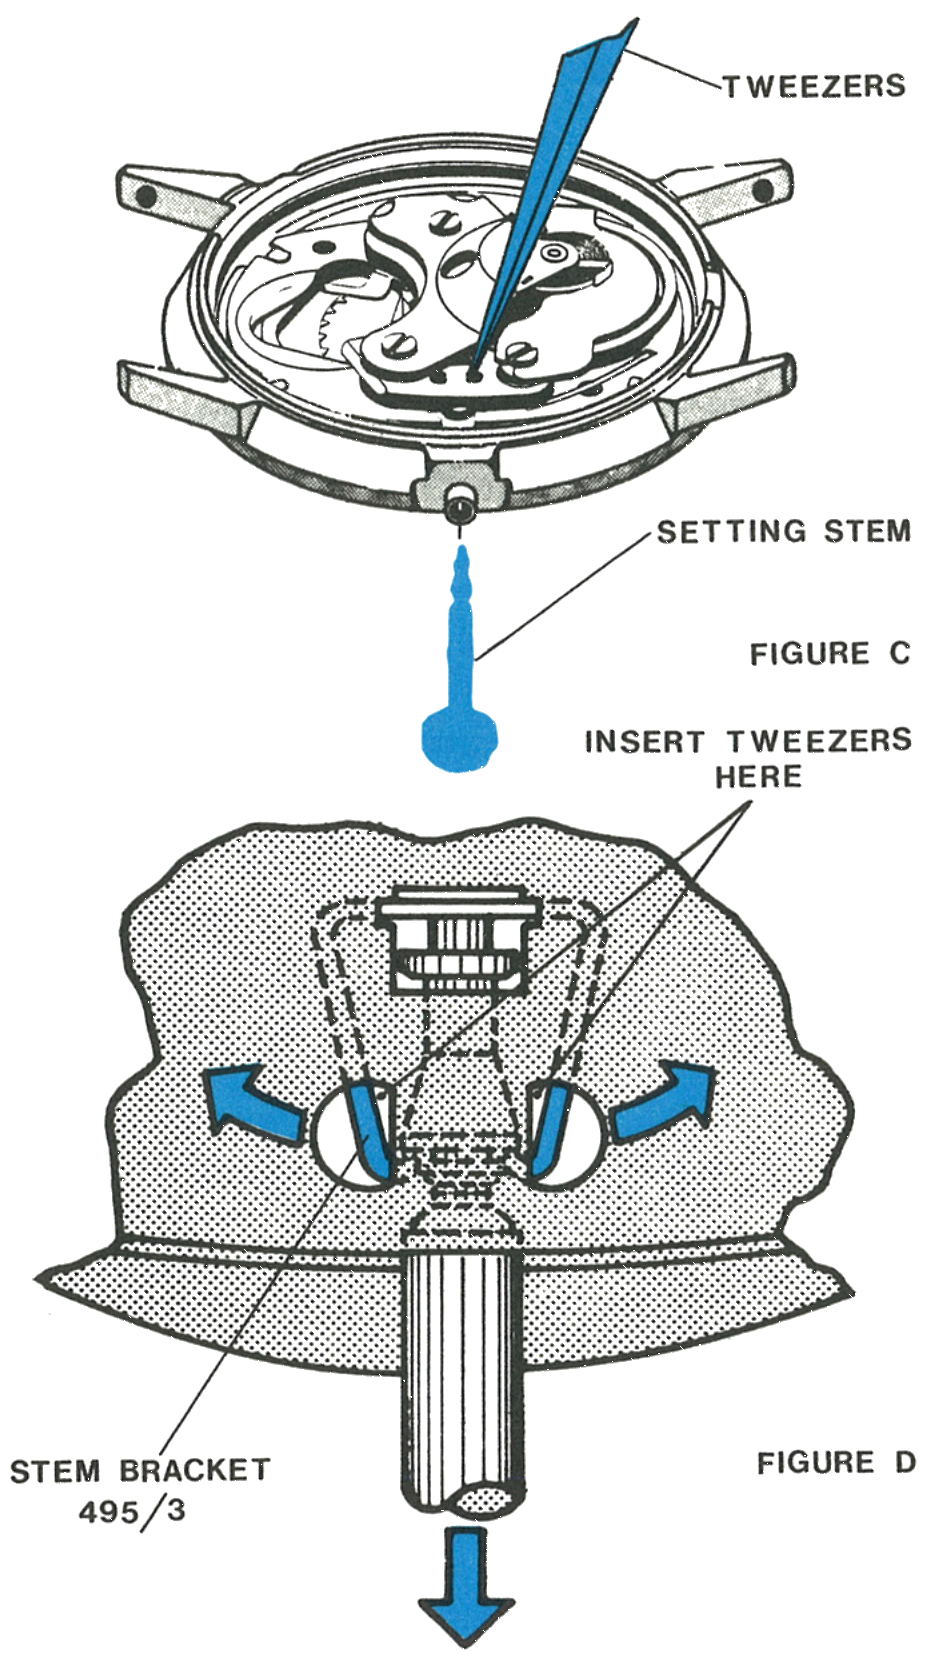
The stem is held in position by the stem bracket. Pull the stem out into the set position and continue to maintain a slight outward pull.
Place the points of a heavy tweezer into one side of the stem bracket and push the bracket aside to release one side of the stem. Continue to pull the stem outward and use the tweezer points to release the other side. The stem will now pull free of the movement and case.
Out Through the Crystal
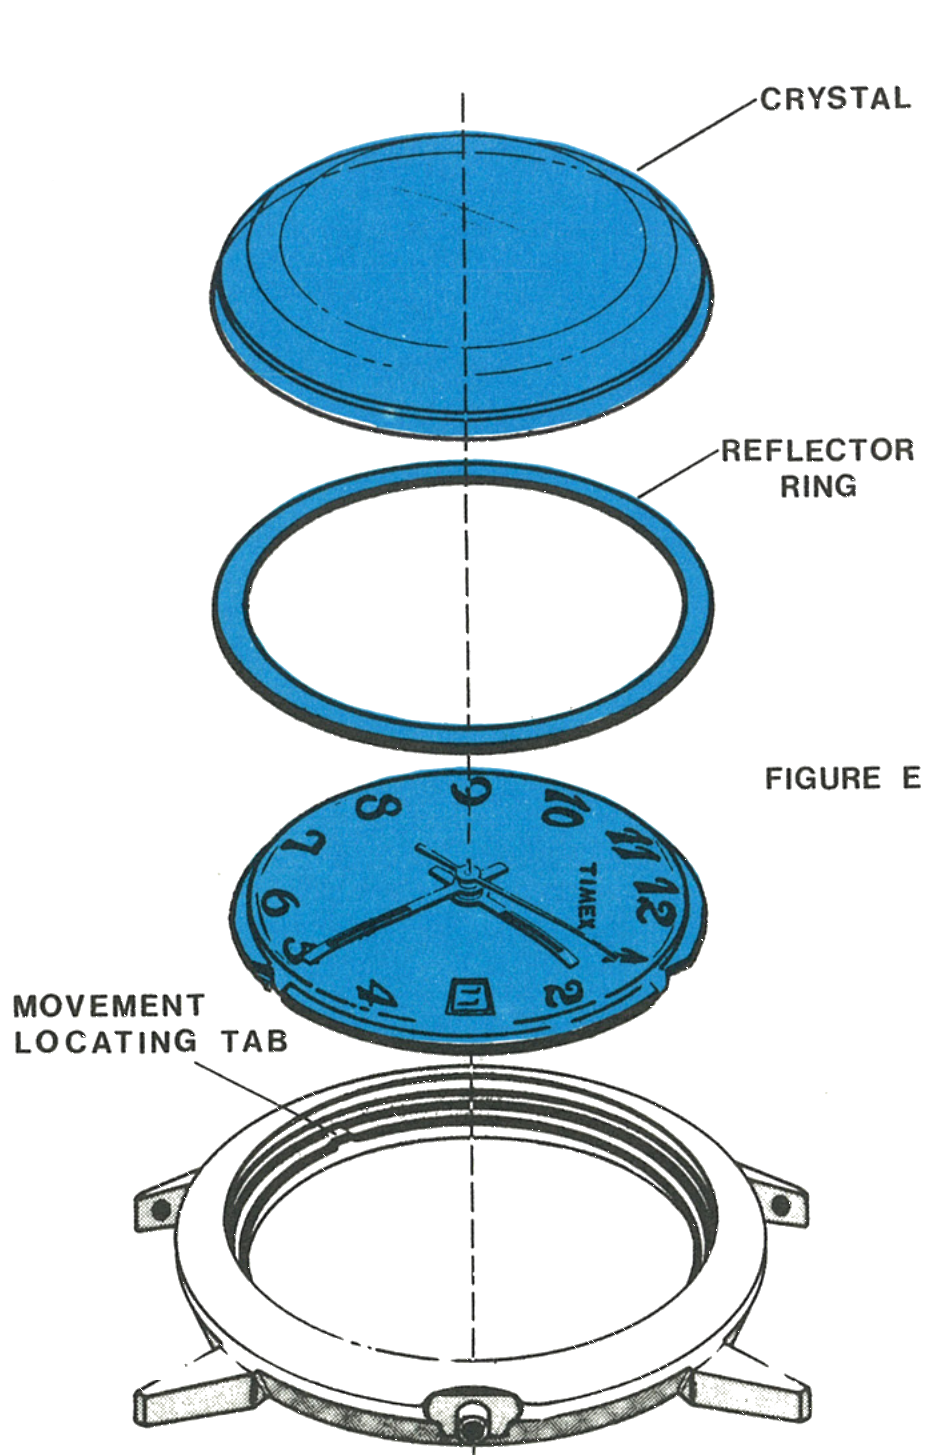
After the stem is removed, the movement can be removed through the crystal side of the case. Remove the crystal with a crystal seating tool and then lift the reflector ring and movement free of the case.
The Calendar Stack
Remove the sweep second hand and the minute hand. Bend the four dial tabs enough to free the dial from the movement.
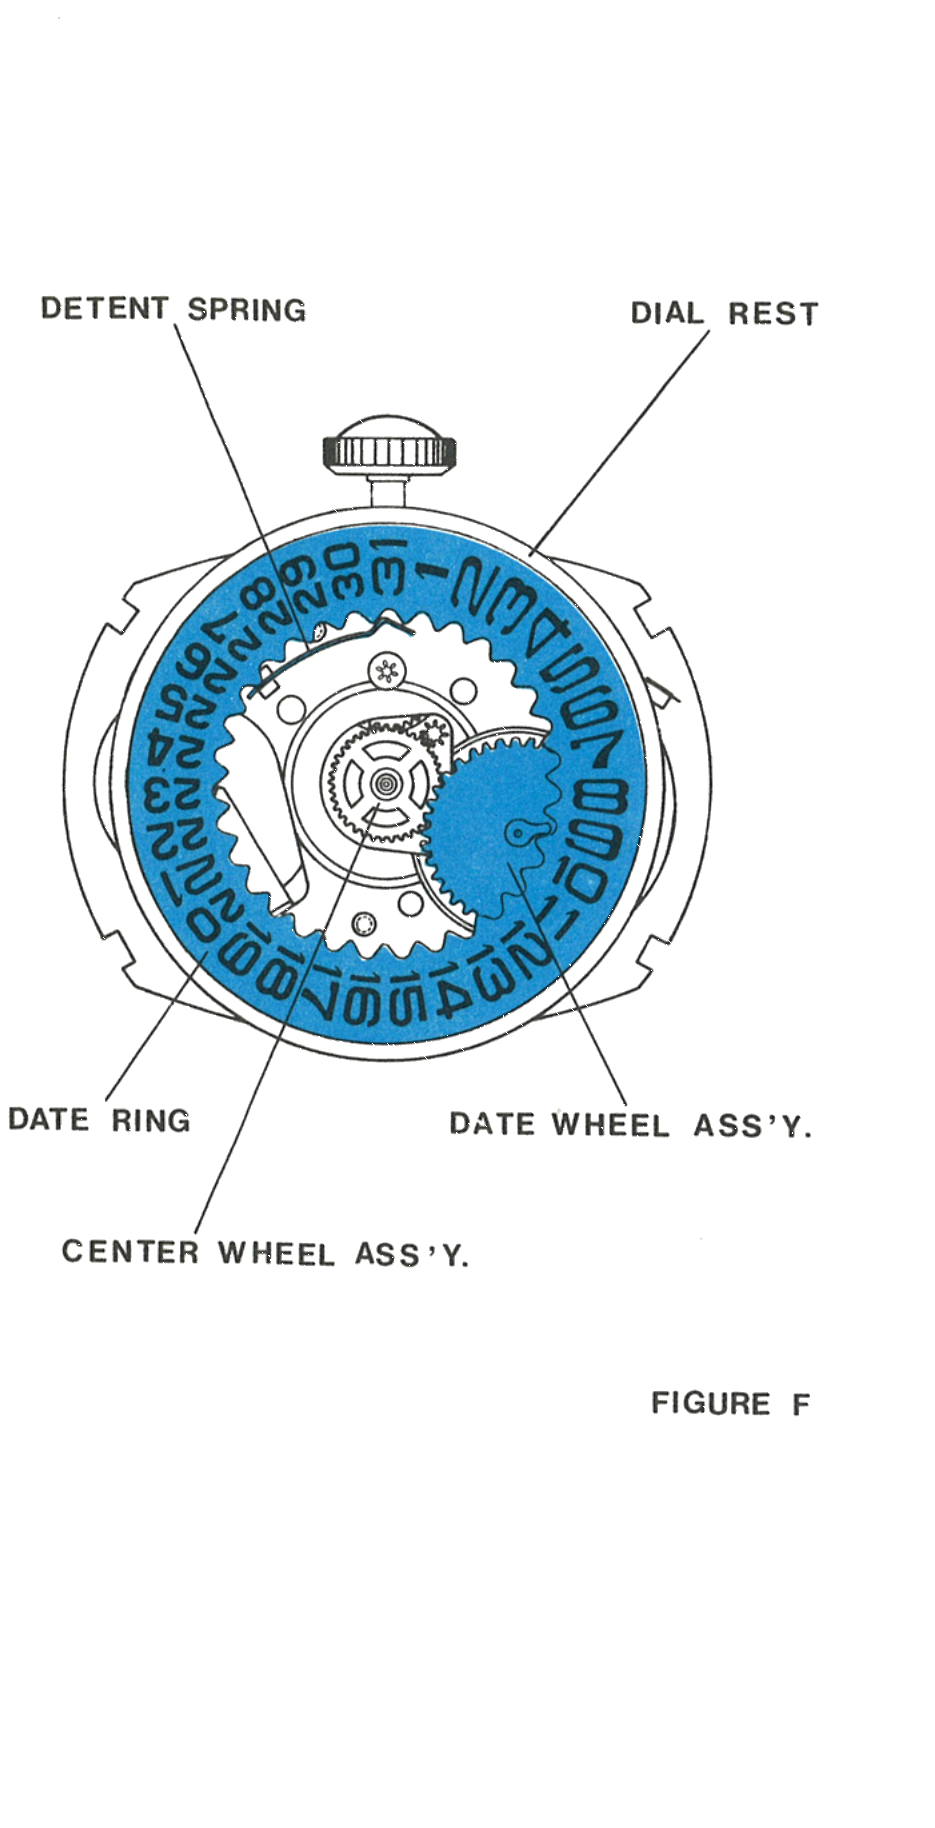
Turn the assembly over and carefully lift the dial off the movement. Note the position of the parts under the dial: the detent spring which positions the date ring, and the finger on the date wheel which indexes the date ring, shown in its position following the date change.
Lift off in order: date ring, date wheel assembly, center wheel assembly, detent spring, noting its engagement in the dial rest.
Reassembly
Lubricate the date wheel post and the end of the detent spring where it engages the date ring, using non-spreading type oil; Moebius Synt-a-lube is used in the factory.
Replace the detent spring in the dial rest.
Assemble the date wheel assembly.
Assemble the date ring, deflecting the end of the detent spring until it engages a tooth of the date ring.
Position the finger of the date wheel next to the date ring tooth as shown in the figure above.
Dial Rest Lubrication
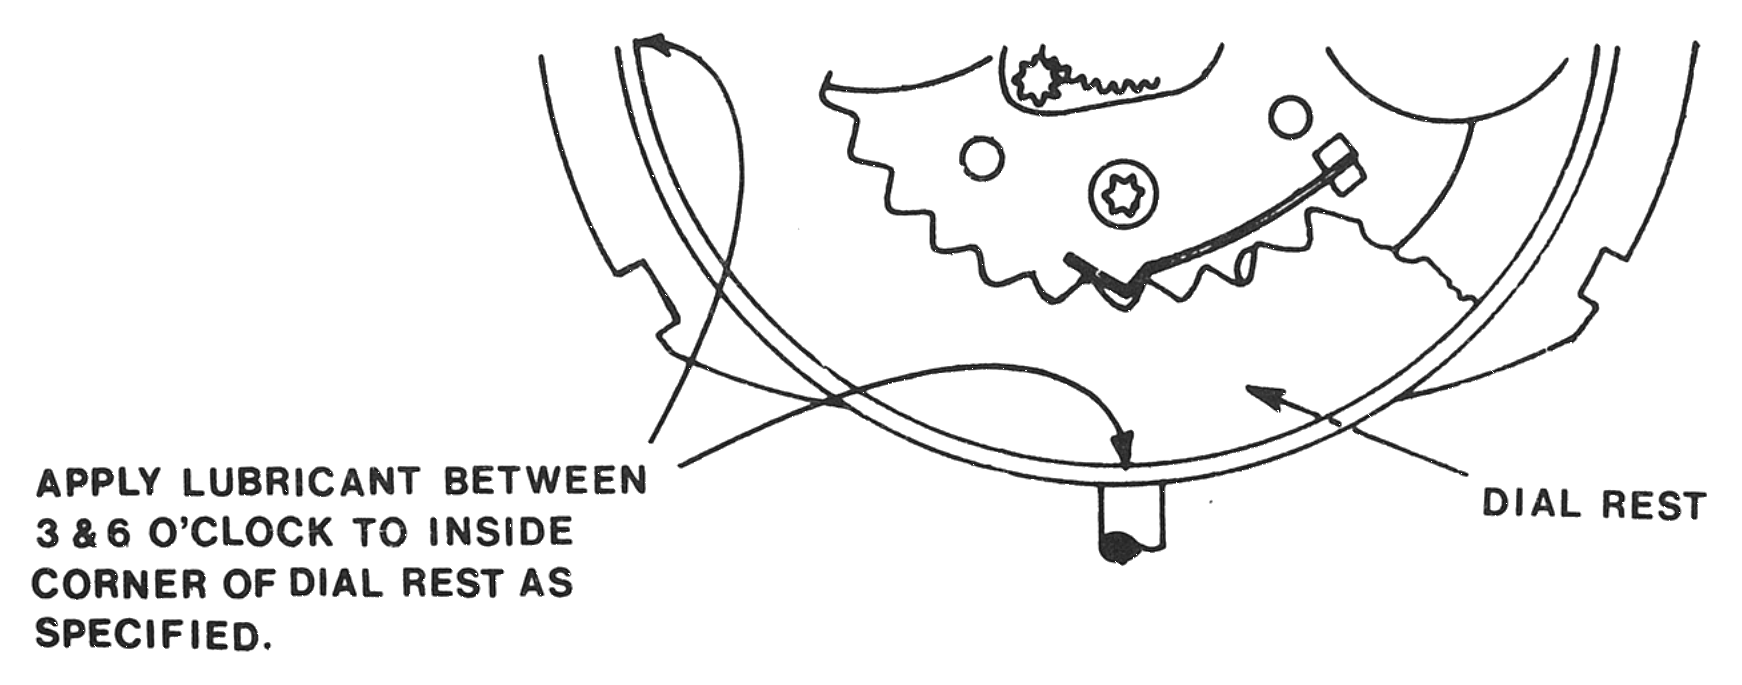
The solid film lubricant has been eliminated from the dial rest on the Model 254 watches. These watches should be lubricated by applying a spreading type lubricant (Woods AAAA oil is used in the factory) between 3 and 6 o’clock to inside corner of dial rest.
This same lubricant may be applied to dial rests which have solid film lubricant (i.e. Models 41, 51, 62 and 254).
Positioning the Hands
First: check that the finger on the date wheel is positioned against a date ring tooth as shown in the figure above.
Next: replace the dial assembly holding the hour hand at the 2 o’clock position, making certain the hour wheel teeth engage the minute pinion teeth, and bend the four dial tabs to hold the assembly firmly in position.
Finally: replace the minute hand and sweep second hand.
Remove the crown and stem assembly. Place the assembly into the bezel, being sure the notches in the plate engage the tabs inside the bezel. Position the reflector ring on top of the dial and insert the crystal using a crystal insertion tool. Insert the crown and stem assembly through the bezel with a twisting motion to assure engagement in the bracket.
Insert the movement cover and snap it into the bezel. Insert a fresh Timex Type A energy cell and snap the caseback into position. Push the crown in and the watch will start immediately; if not, slight finger agitation may be necessary.