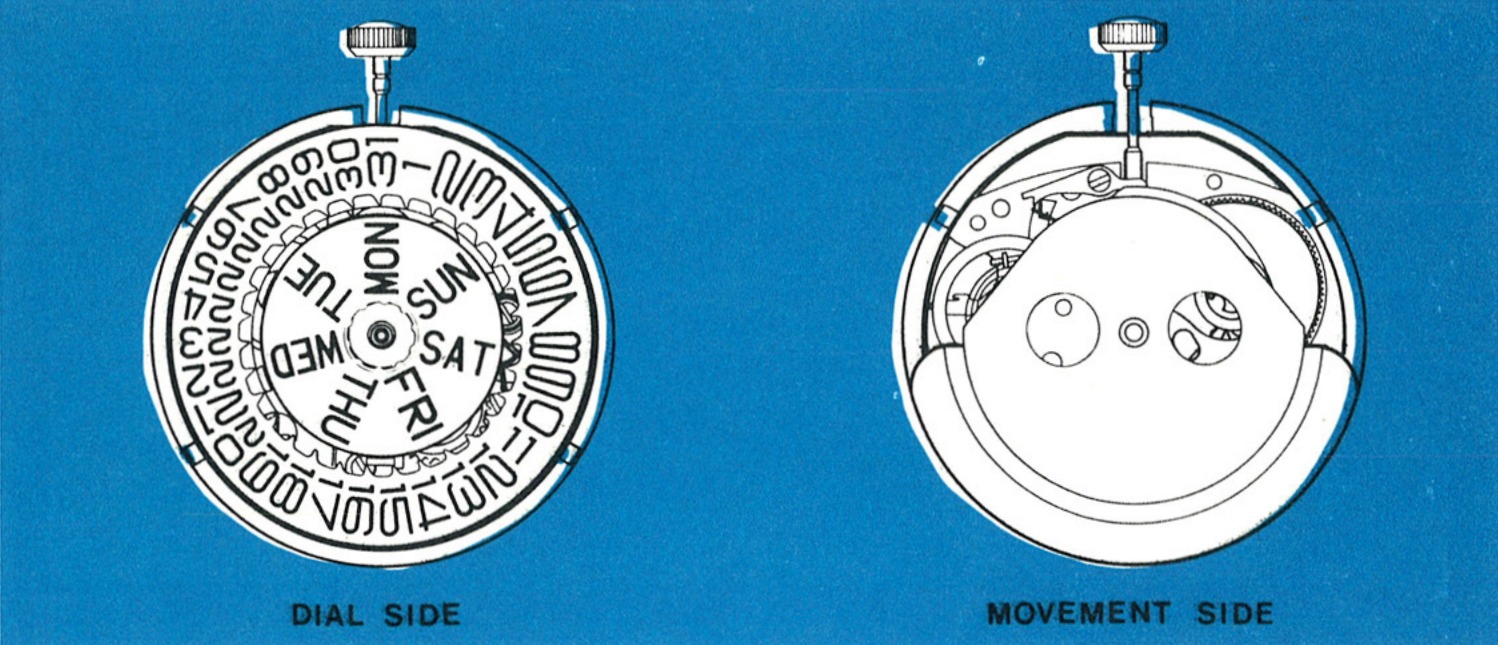
Day, Date and Self-Wind
The Model 109 movement is a 13 ligne self-wind day and date movement which contains a fast change feature for setting both the day and the date. The Model 109 contains a planetary gear winding system to keep the mainspring wound. The routine motion of a normally active person is sufficient to keep the watch running without manual winding.
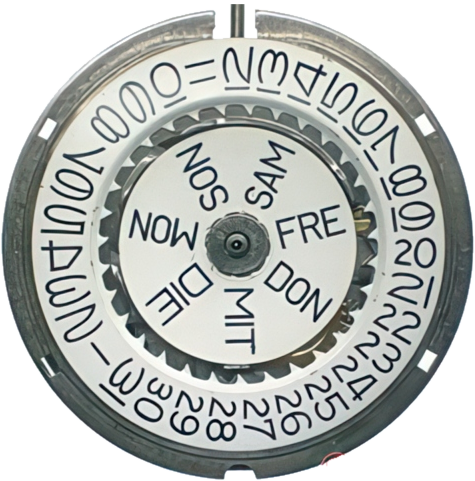
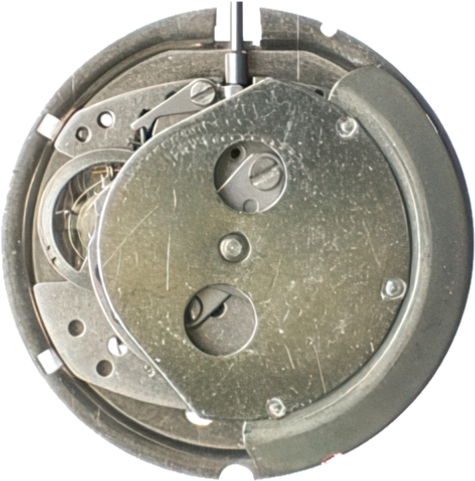
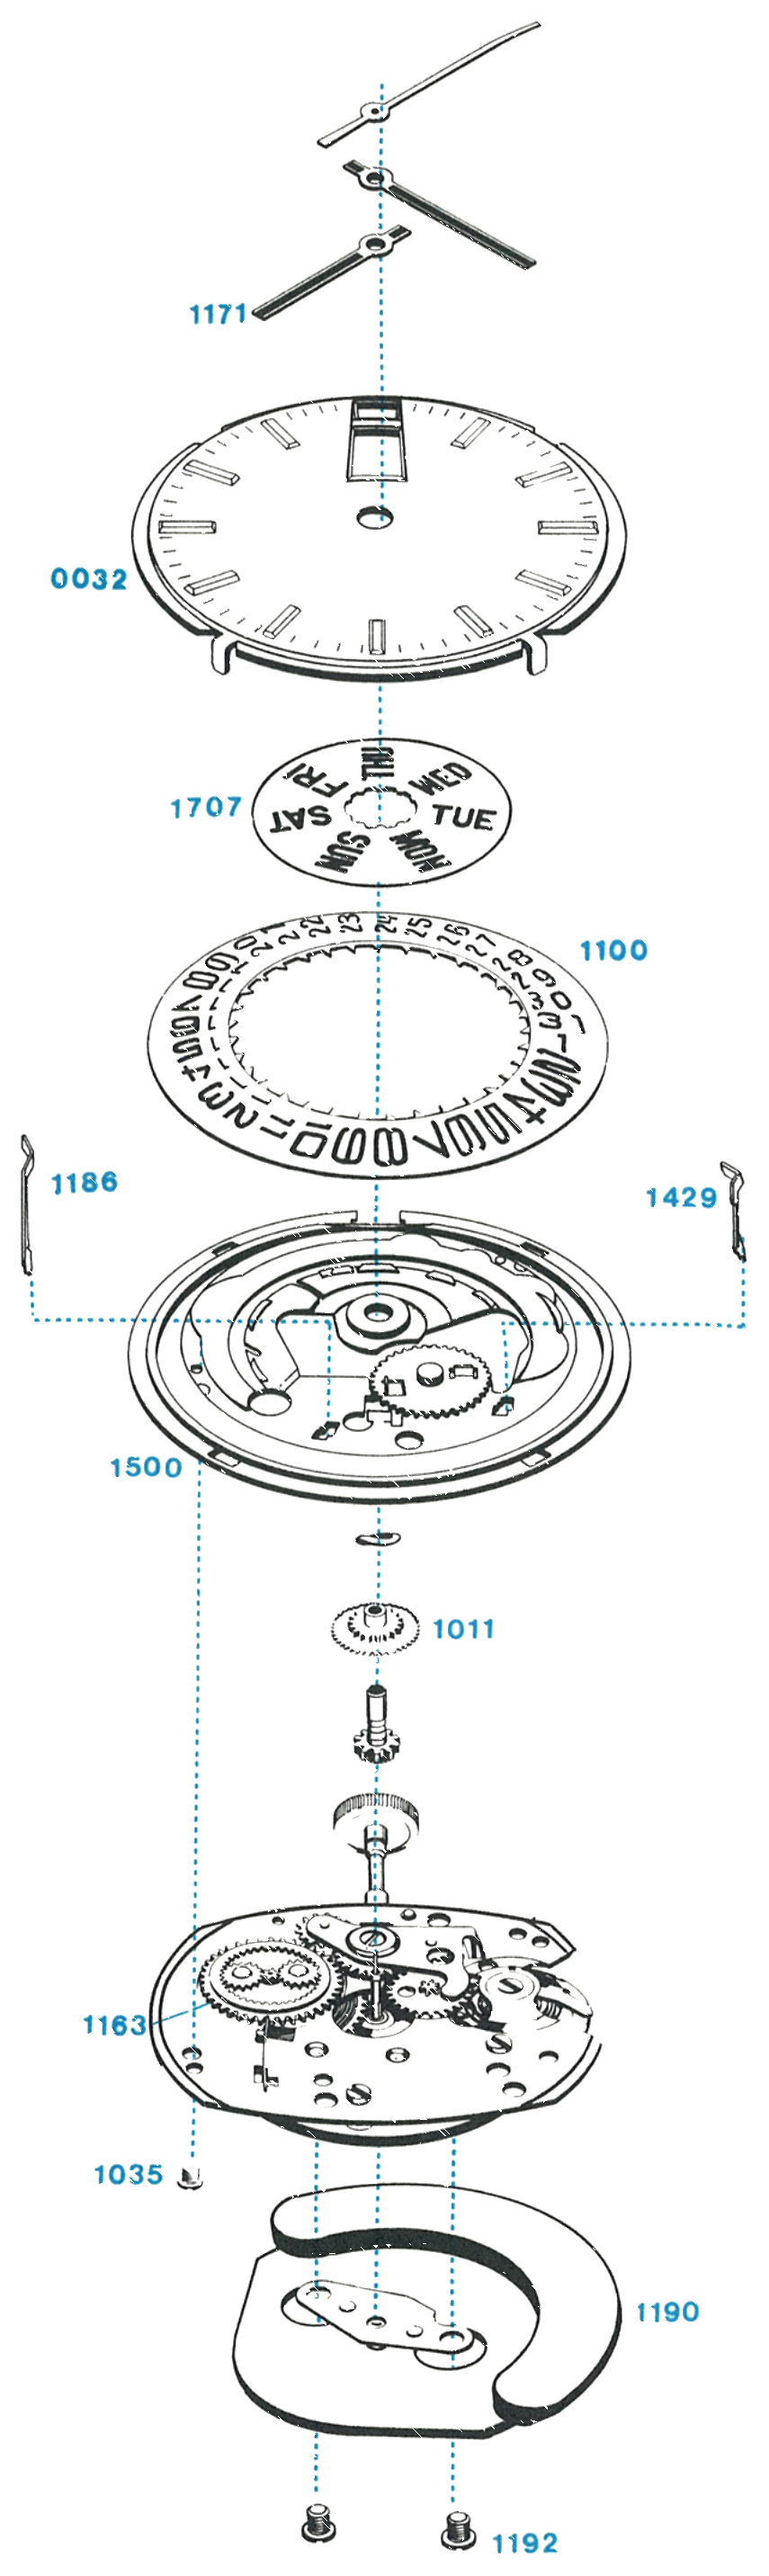
Exploded View
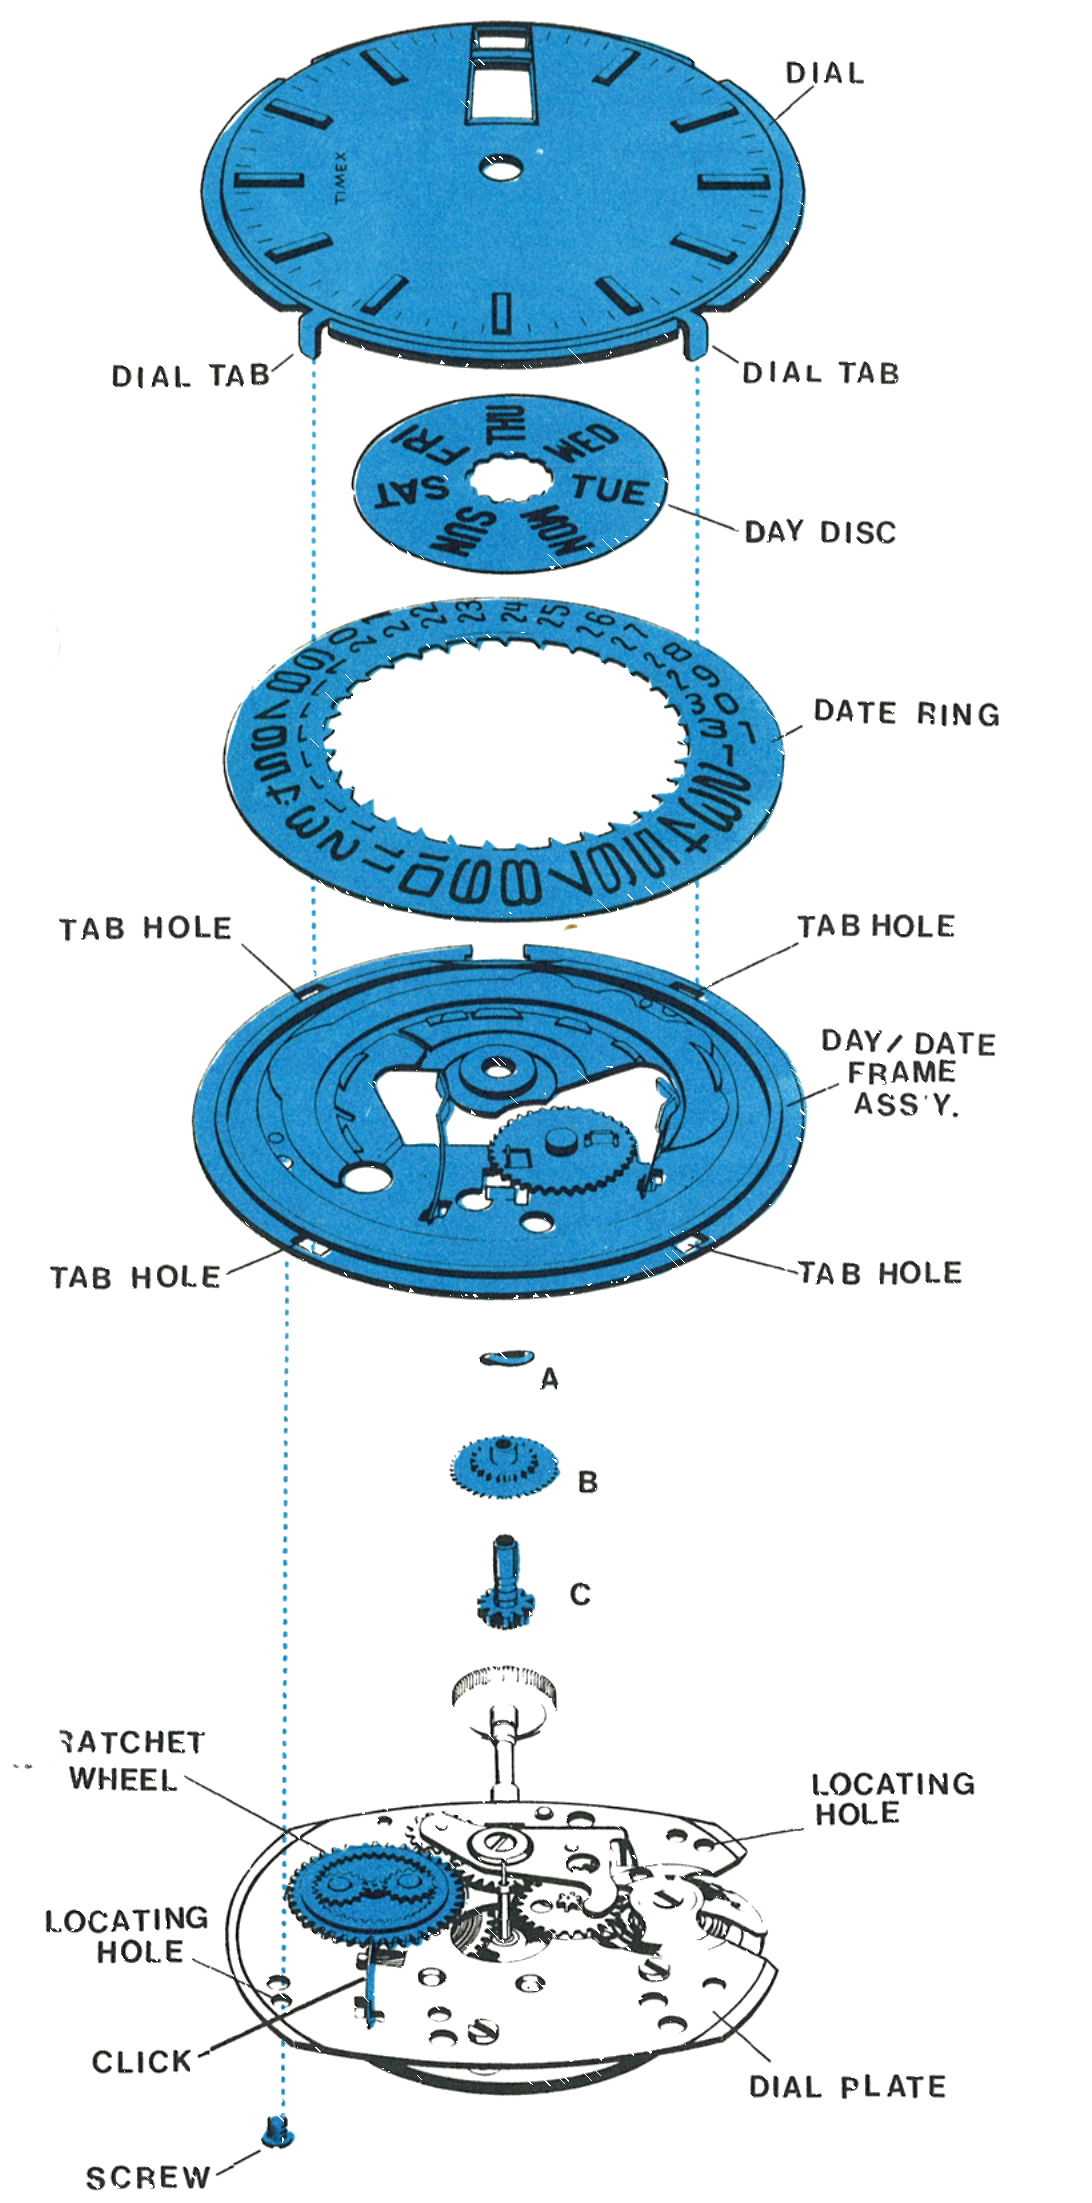
Everything below the numbered parts is the basic Model 104 movement.
Disassembly for Cleaning
Freeing the Rotor Assembly
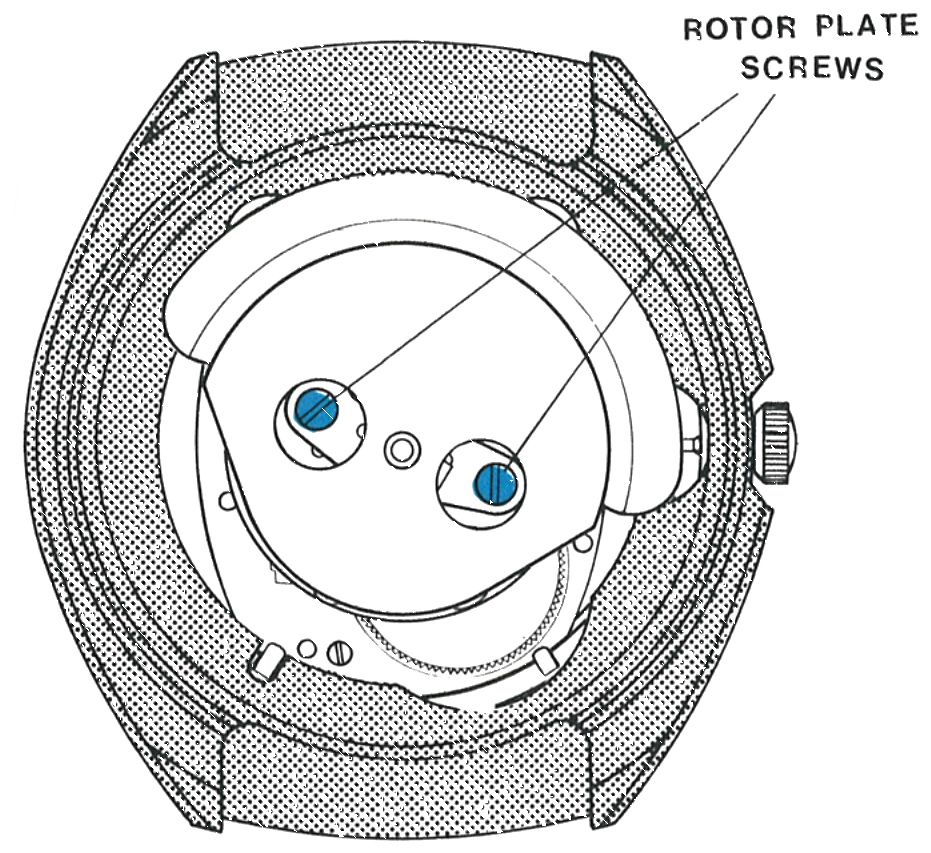
Remove the case back. Loosen and remove the two rotor plate screws.
Lift the rotor assembly slightly to free the dowels.
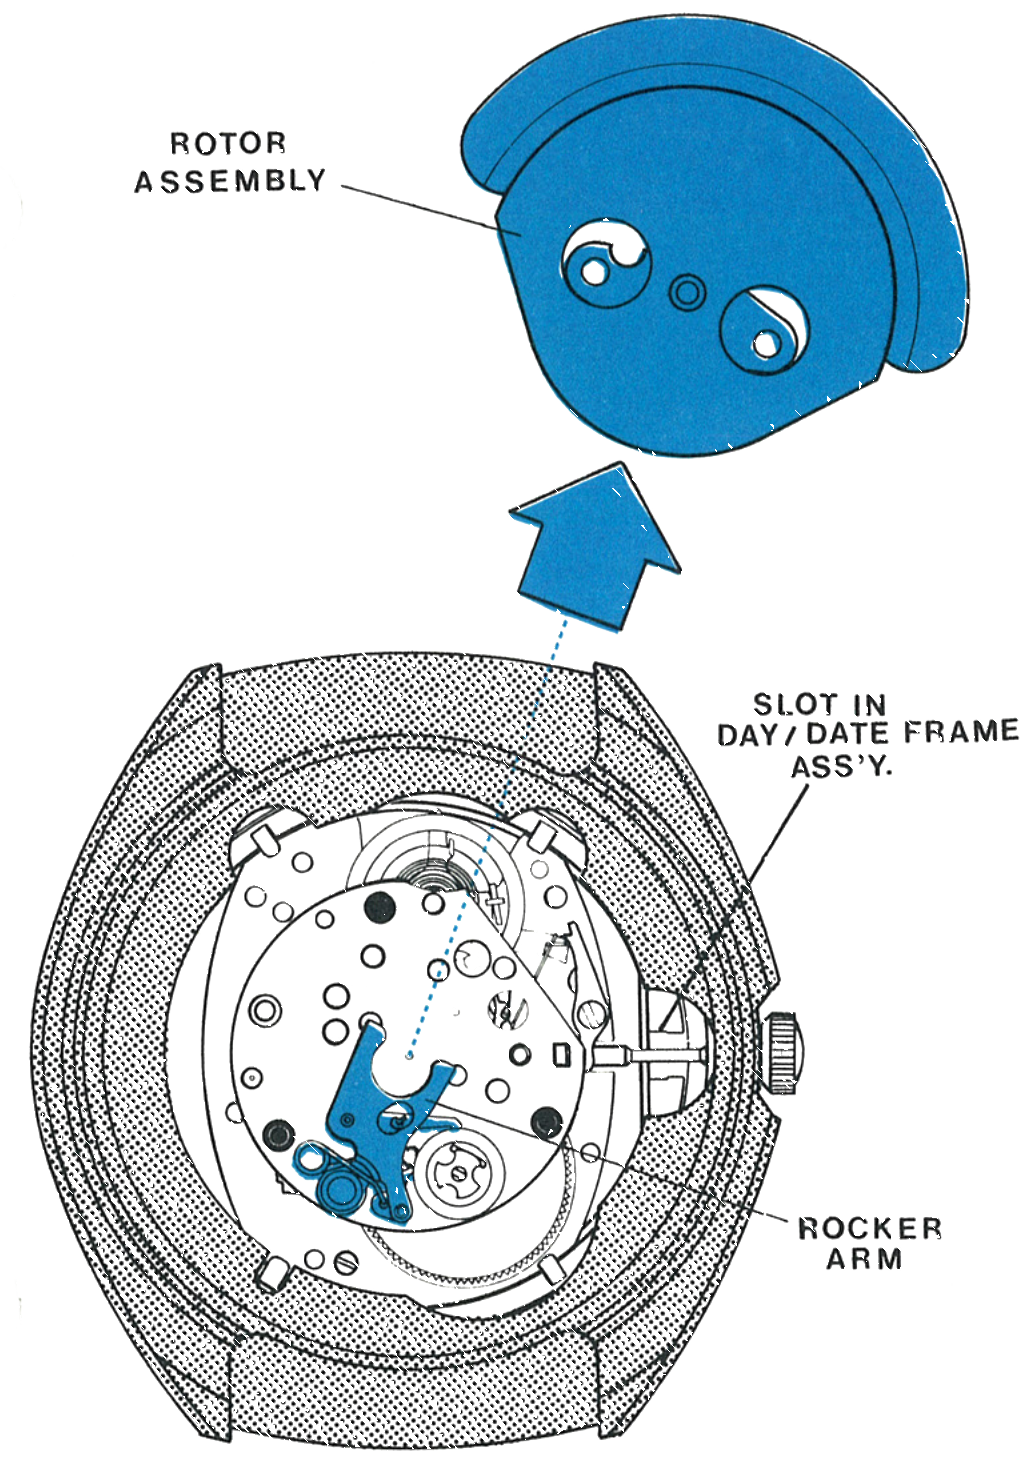
Sliding It Out
The rocker arm fits between the rotor frame and the rotor assembly. Position the rotor weight as shown and slide the assembly along the movement plate, toward the balance wheel, until it is free of the rocker arm, then lift the assembly out of the case.
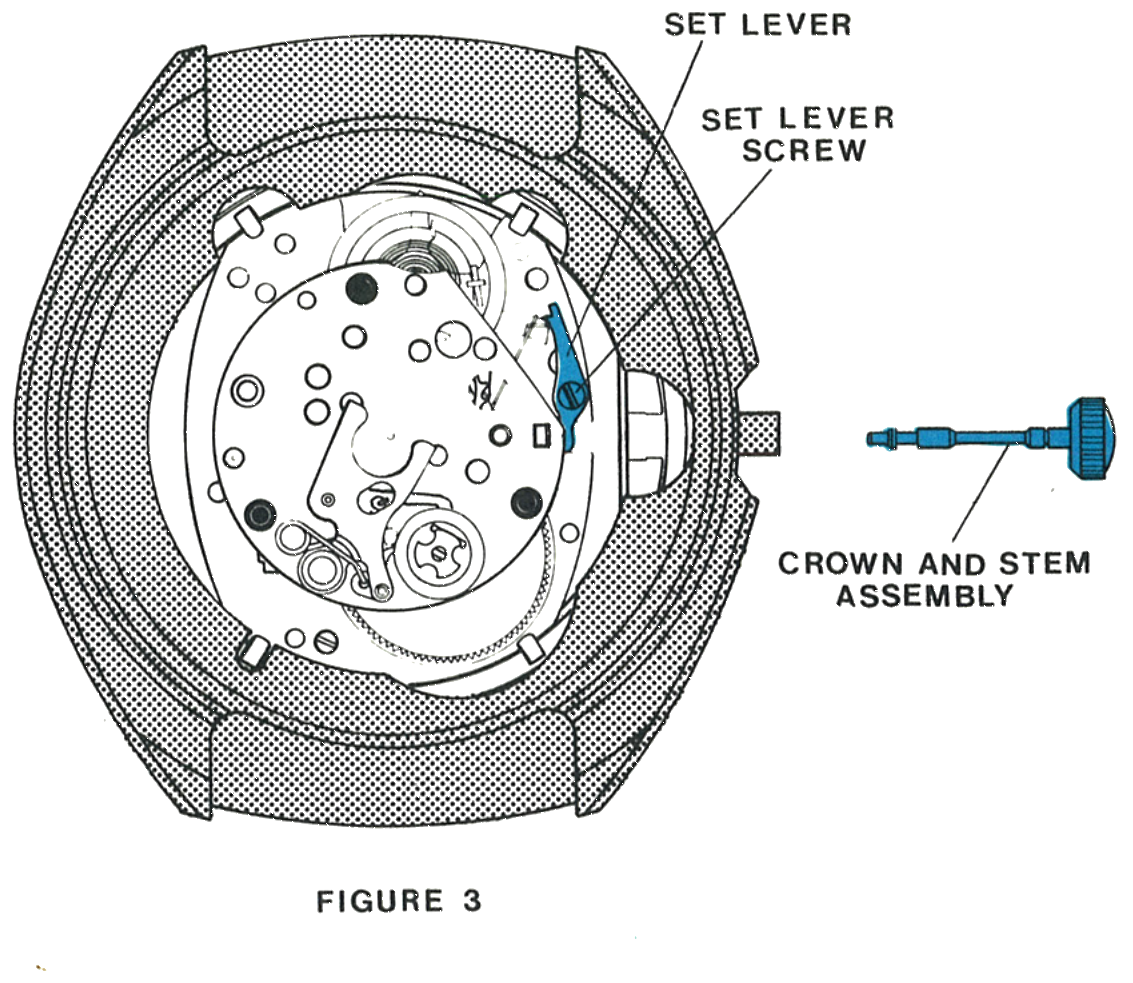
Releasing the Crown and Stem
Loosen the set lever screw and raise the lever sufficiently to release the stem, then pull the crown and stem assembly free of the movement and the case.
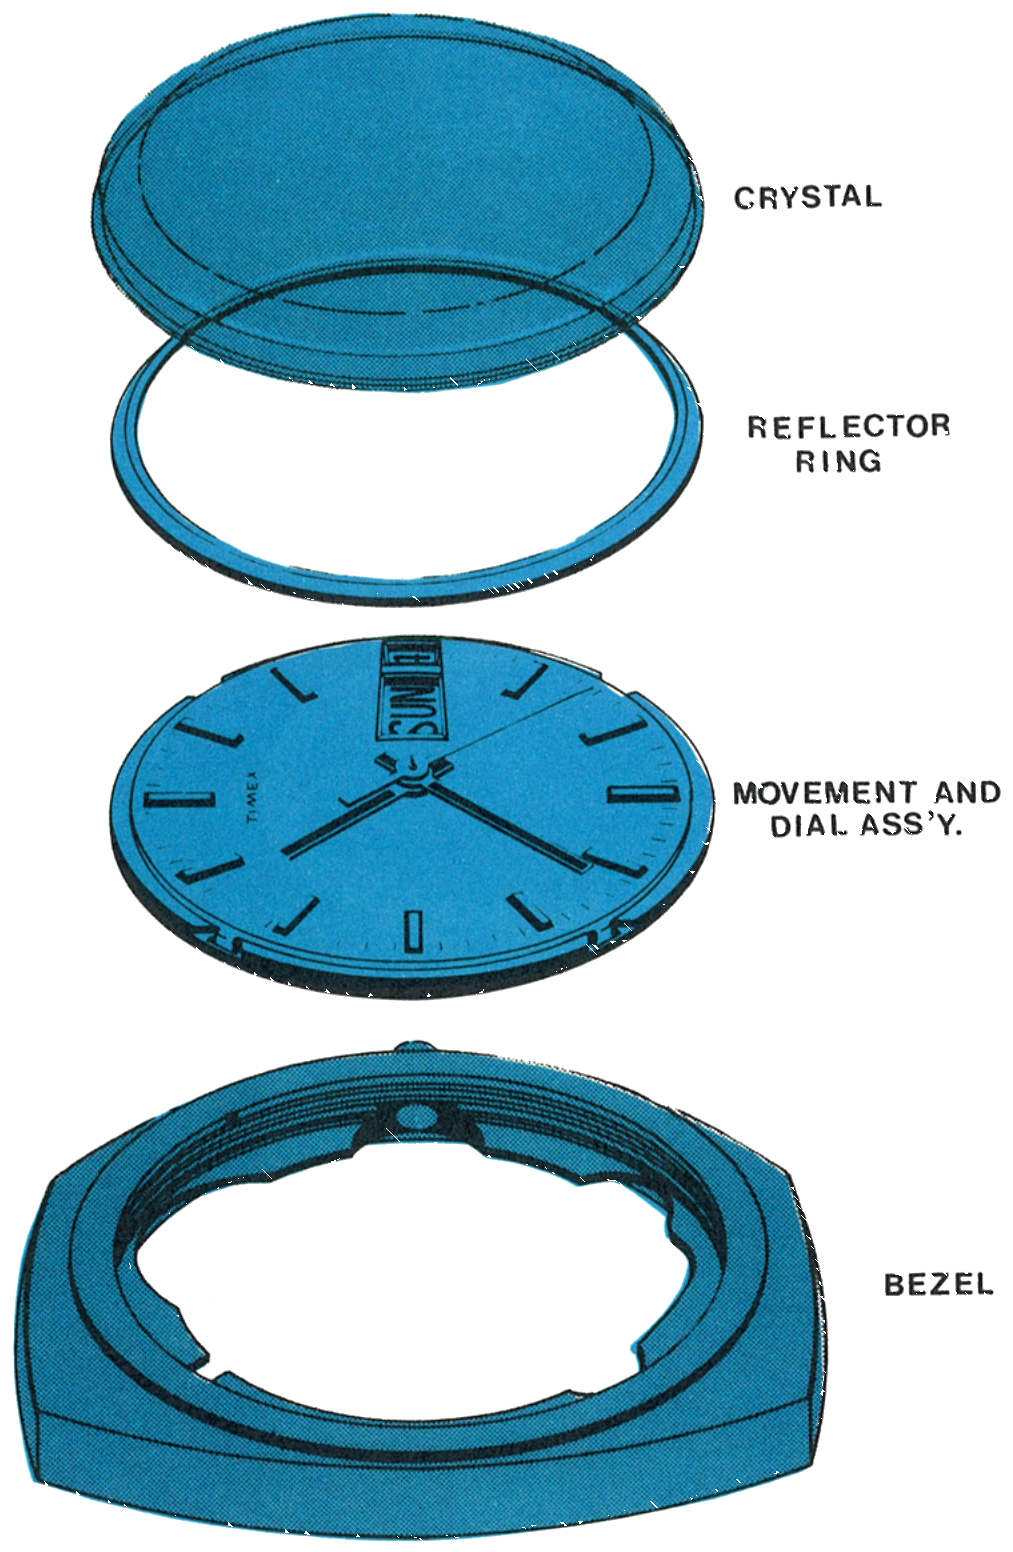
Out of the Case
Turn the assembly over and remove the crystal using a crystal remover. The reflector ring and the movement and dial assembly can then be removed through the front of the bezel.
The Dial Tabs
Remove all hands. Turn the assembly over and bend the four dial tabs sufficiently to free the dial from the day/date frame and the movement.
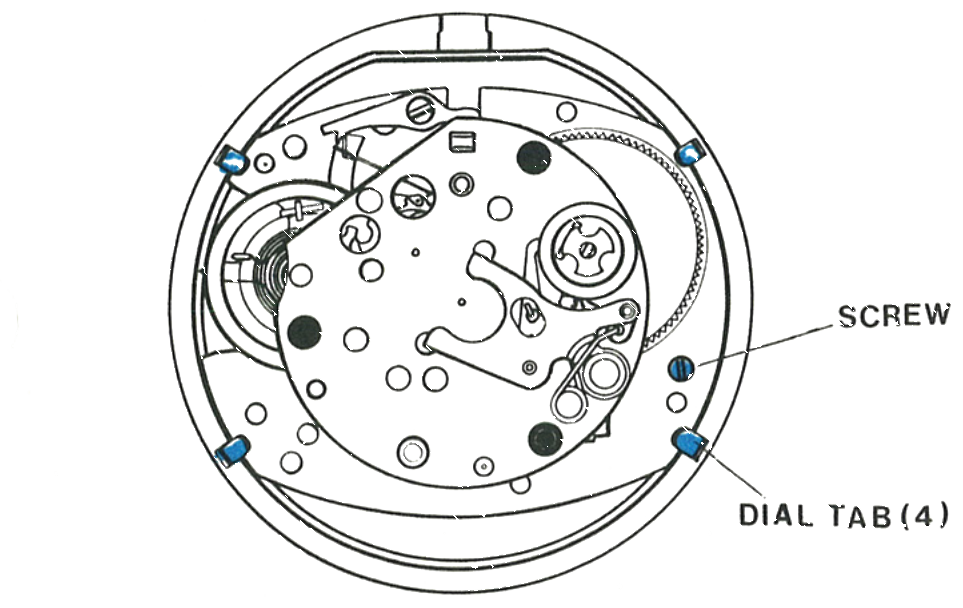
Off the Day/Date Frame
Hold the dial in place and turn the assembly over so the dial is up. Carefully lift the dial off the assembly, noting the positions of the parts underneath, then lift off the day disc, the date ring, the date detent spring and the day detent spring.
Replace the crown and stem assembly in the movement and tighten the set lever screw to assure engagement. Release the mainspring power slowly by holding the crown in the fingers of one hand while the click is held out of engagement with the ratchet wheel, through the hole in the day/date frame.
Turn the assembly over, day/date frame down, and remove the screw securing the frame. Turn the assembly over again and lift off the day/date frame assembly and the ratchet wheel.
Remove the hour wheel washer (A), hour wheel assembly (B) and cannon pinion assembly (C) from the movement.
Cleaning
With the above parts removed, the movement of the Model 109 may be cleaned and relubricated as outlined for the Model 104 movement. Other metal parts may be cleaned in the same manner as the movement.
Reassembly
The Detent Springs
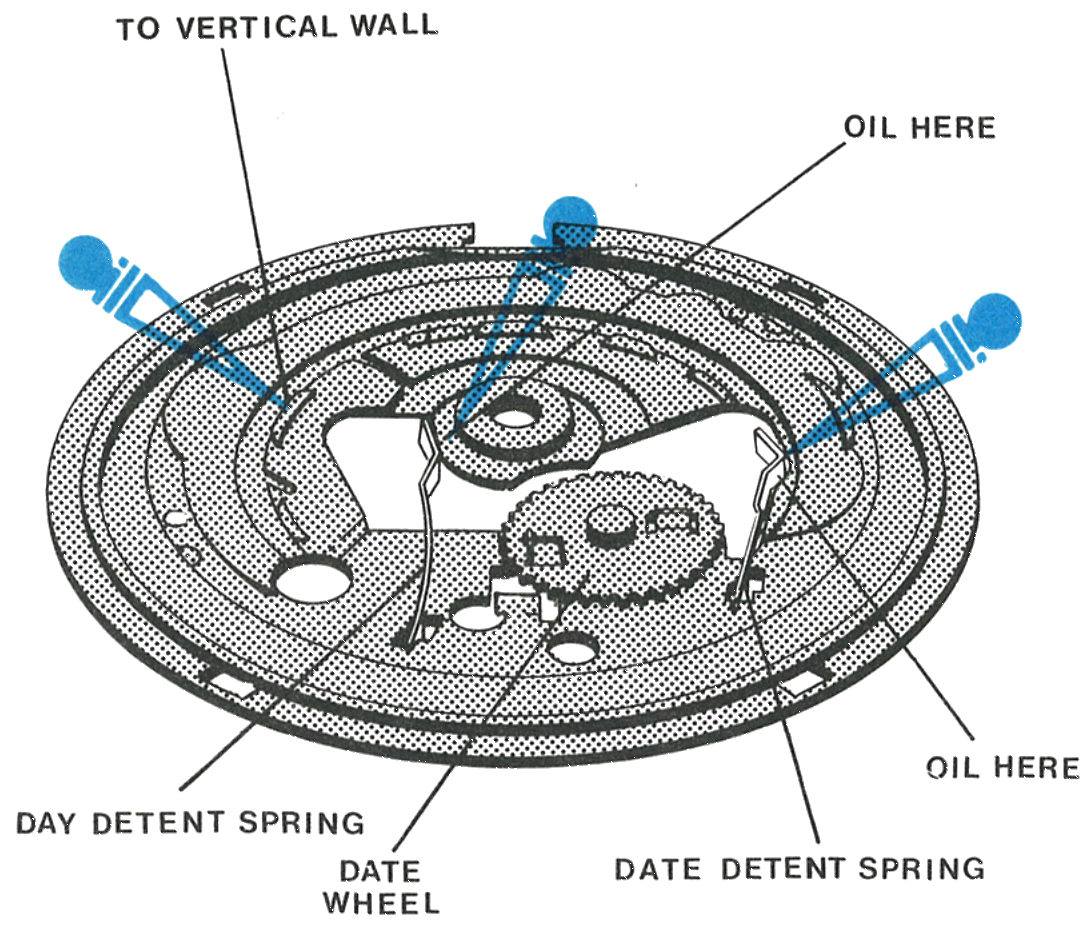
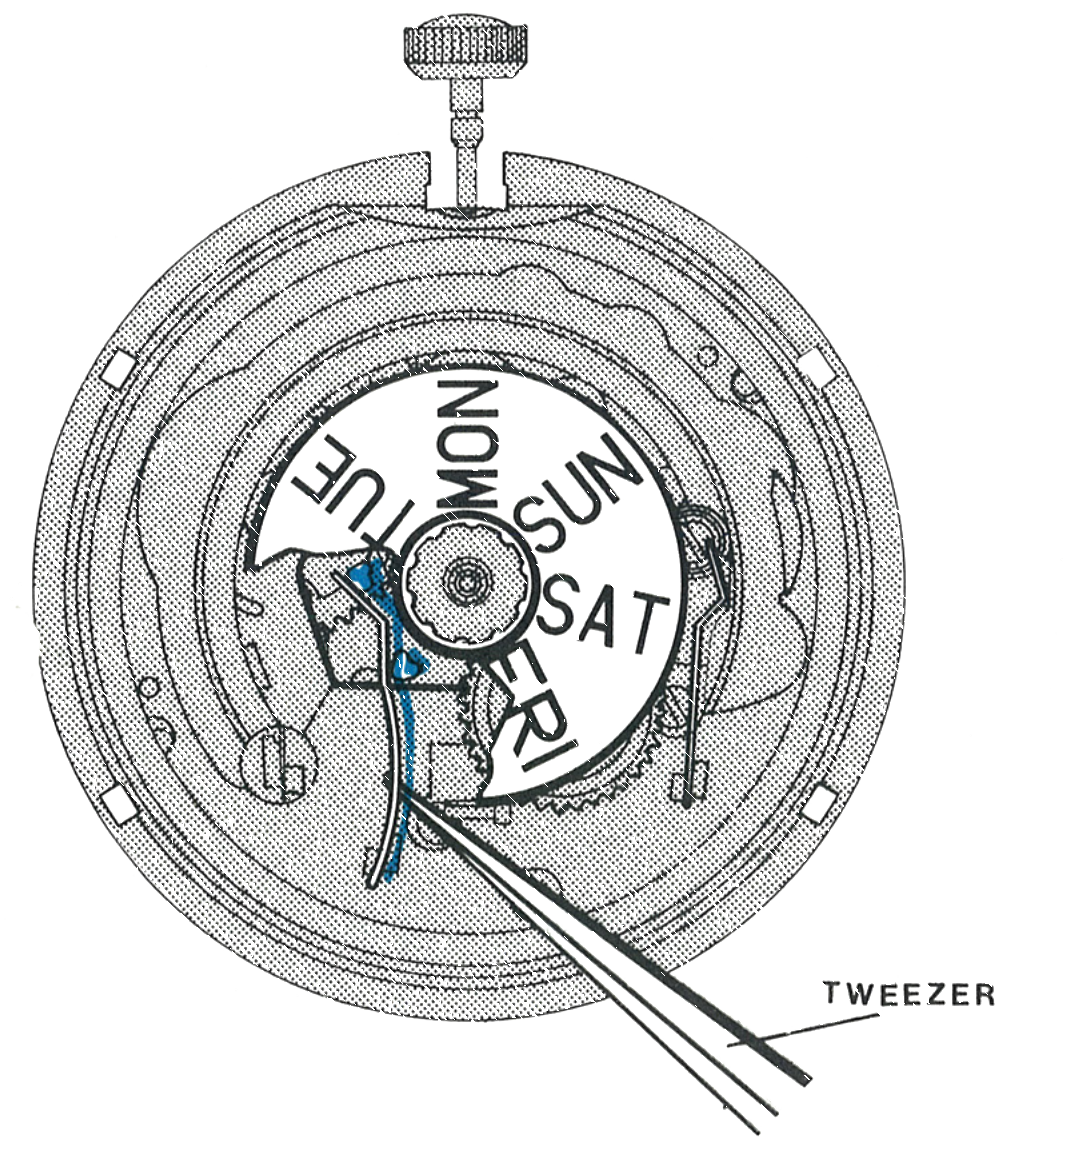
Insert the day detent spring and the date detent spring into the day-date frame as shown.
Lubricate the bearing face of the day detent spring and the date detent spring with a thin film of non-spreading watch oil, Moebius Synt-A-Lube in the factory. Lubricate the vertical wall of the day-date frame with a thin film of non-spreading oil as well.
The Cannon Pinion
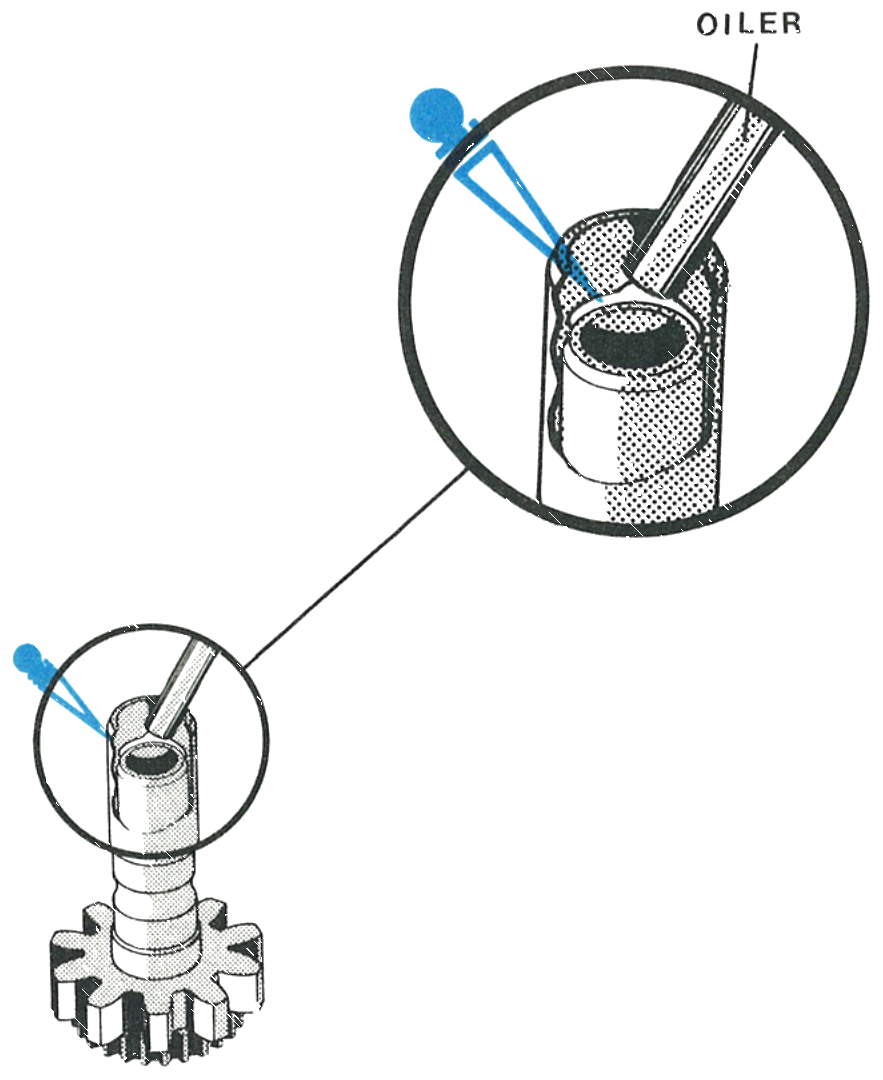
Apply non-spreading watch oil to the end of the cannon pinion.
Replace the parts on the movement in this order: cannon pinion assembly, hour wheel assembly, hour wheel washer, then the ratchet wheel, making sure it is seated and properly engaged with the click and the rocking bar assembly. Orient the day-date frame assembly with the slot at the stem and seat the bosses in the holes, hold the assembly together and turn it over so the frame is down, then insert and tighten the screw.
The Day Disc
Note the protrusions on the back of the day disc. With a tweezer, deflect the day detent spring outward and place the day disc on the day-date frame assembly with any day, Monday for instance, in line with the crown and stem, then drop it into place and release the day detent spring.

The Date Ring
Position the date ring centrally on the day-date frame assembly. With a fine tweezer, deflect the date detent spring inward until the date ring drops into place.
Orient the dial with the windows toward the crown and stem assembly and insert the dial tabs through the holes in the day-date frame assembly. Hold the dial and day-date frame assembly in position on the movement, turn the assembly over and bend the tabs firmly over the edge of the dial plate. Pull the crown and stem out and rotate to turn the hands clockwise until the date changes with a snap, stop turning, and assemble the hands at the 12 o’clock position.
Checking the Change
Turn the crown so the hands rotate clockwise until first the date and then the day advance and snap into position.
Rotate the hands counterclockwise until the day moves partially out of the window then snaps back into the window. Rotate the hands clockwise until the day advances again.
Rotate the hands counterclockwise until they indicate 9 PM, then rotate clockwise until the date changes with a snap. This change should occur around midnight.
Continue to rotate the hands clockwise through 29 hours and both the day and the date should advance one position.
Factory Corrections
The third paragraph from the bottom of page 109.5, printed in blue and starting “With the above parts removed, the basic movement may be replaced with a Timex reconditioned movement”, is misplaced. It should follow immediately after the paragraph at the top of the same page which ends “and the Day Detent Spring, (see figure 6).”
The #109 reconditioned movement comes complete with the day/date frame assembly attached to the movement, with the ratchet wheel, hour wheel washer, hour wheel assembly and cannon pinion assembly included. Those parts should be removed from the customer’s movement only if you wish to clean the movement and replace it in the watch, in which case follow the reassembly instructions in paragraphs C and D on page 109.7.