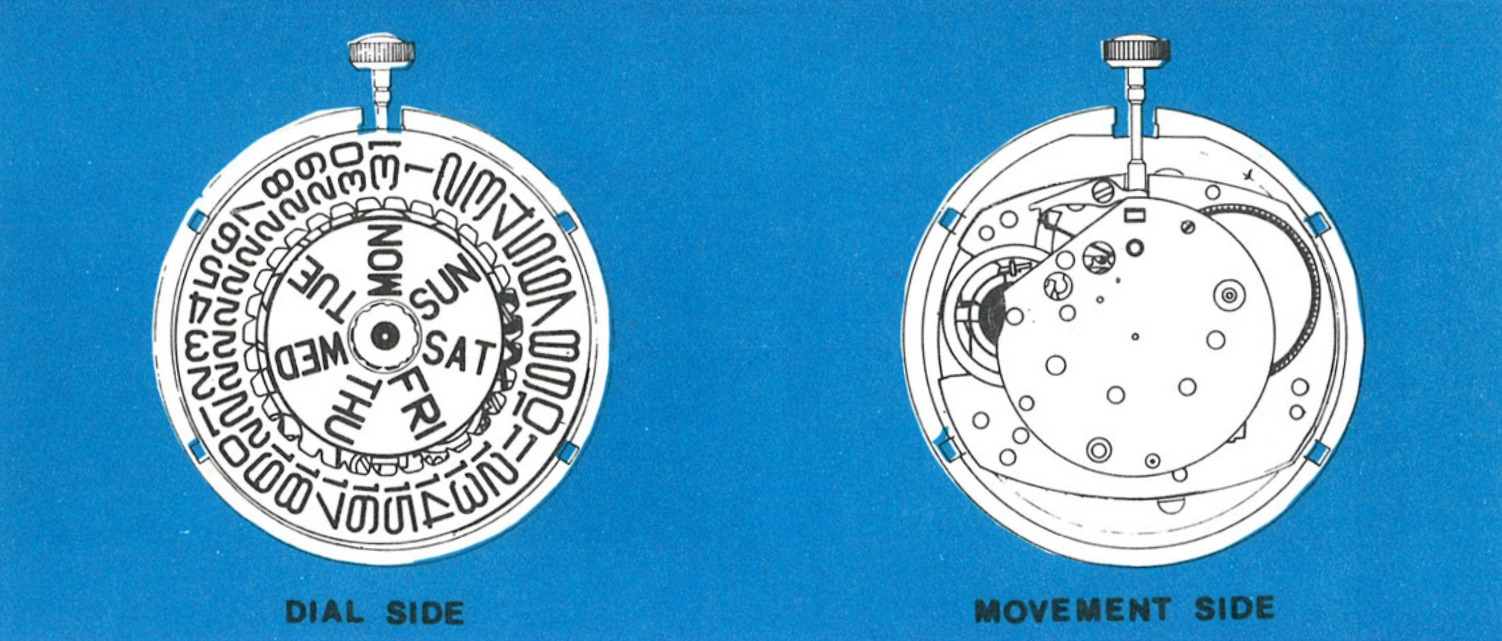
Not the Model 27
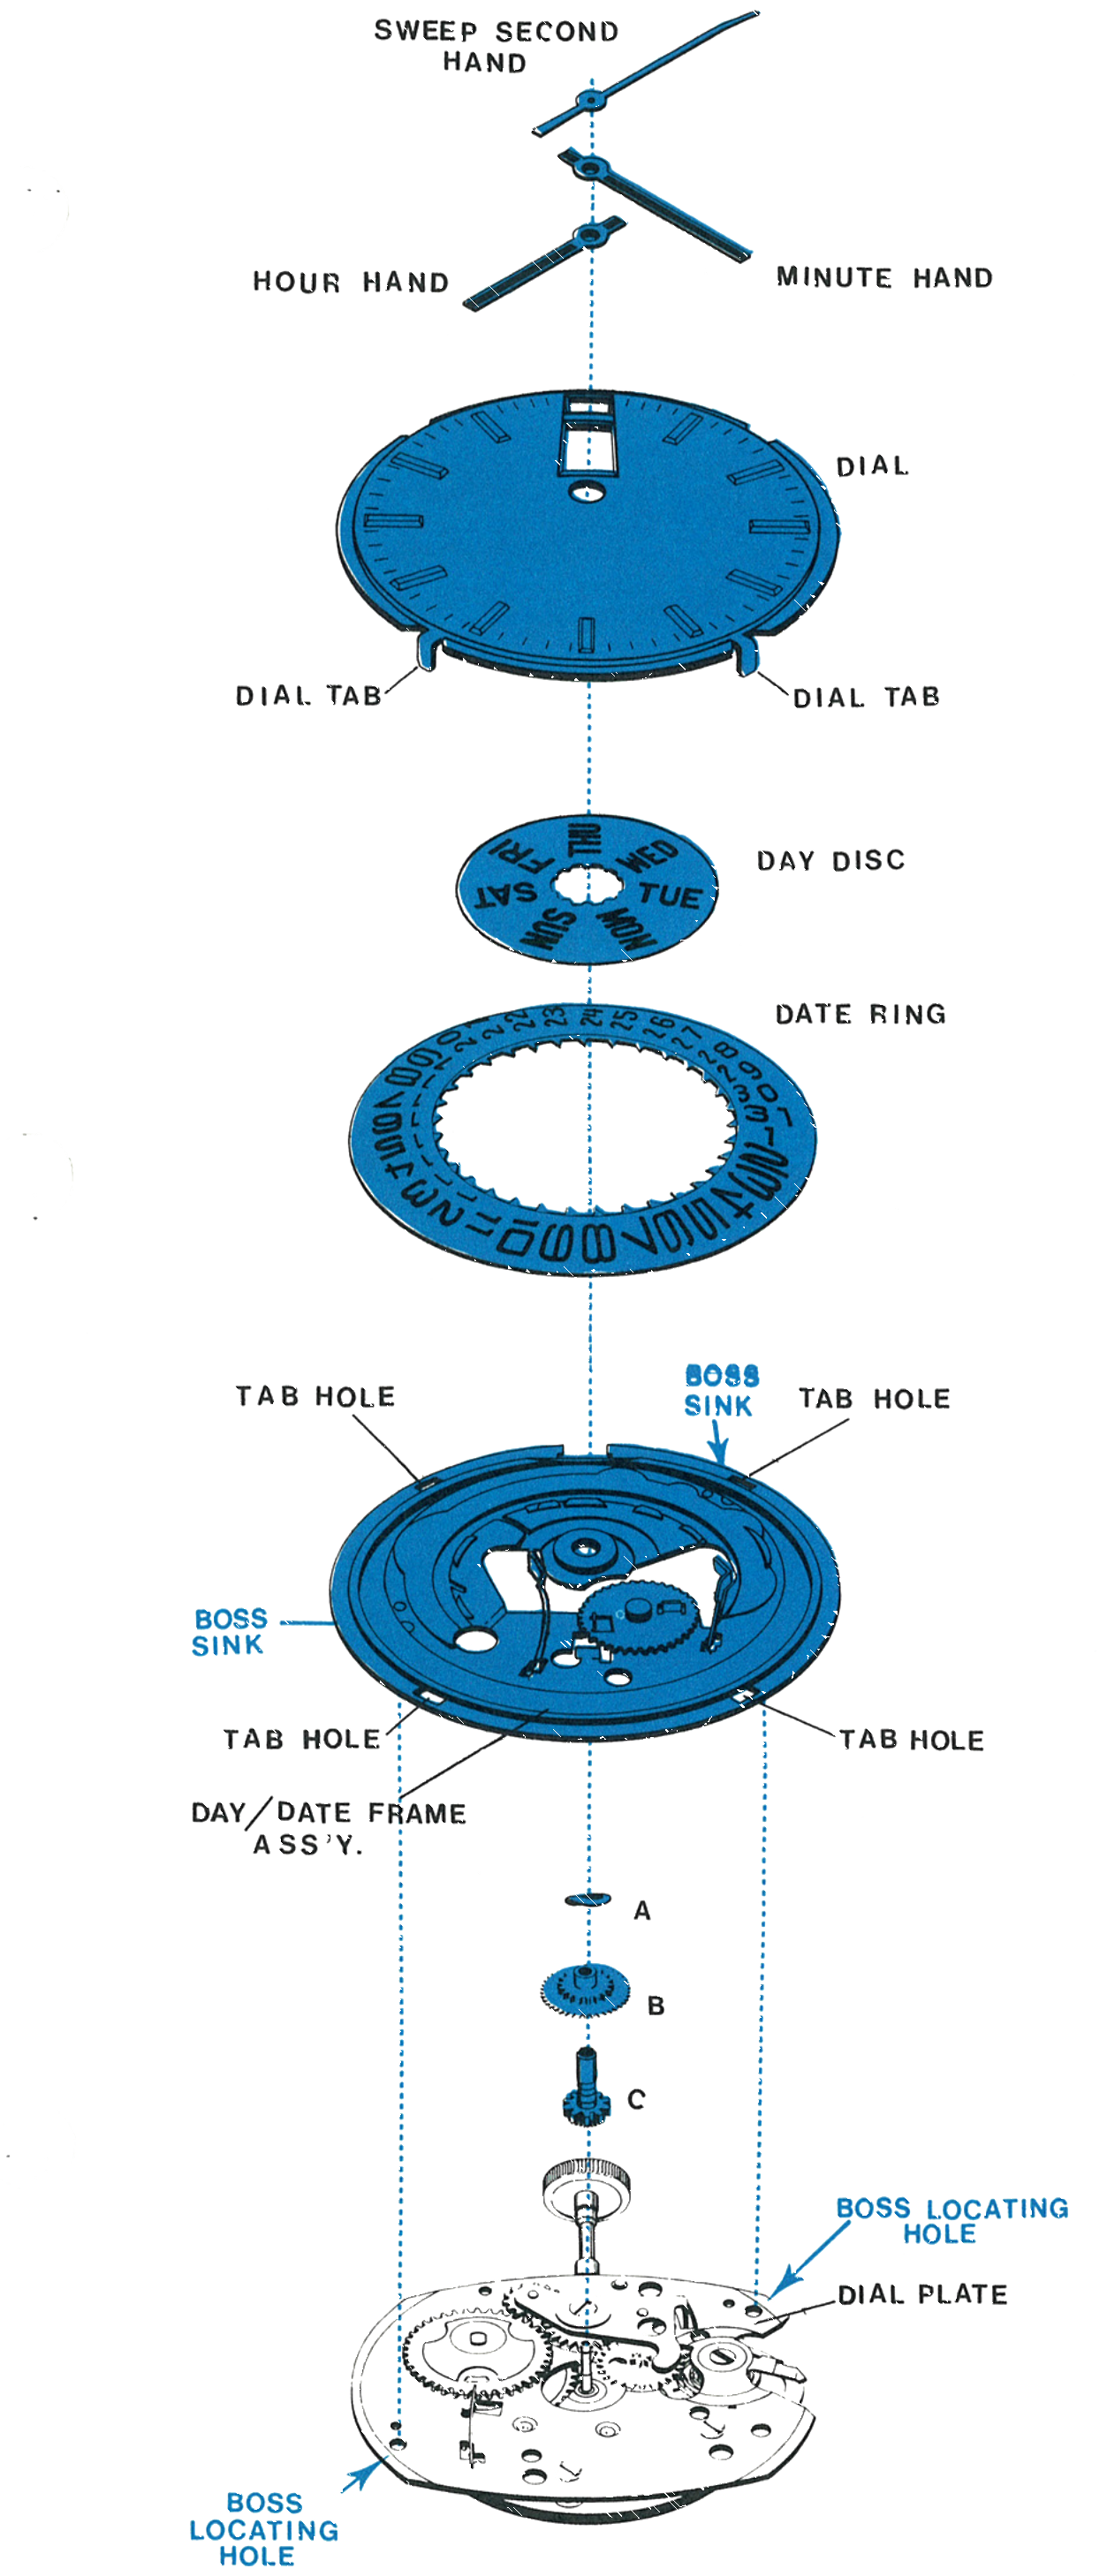
The TIMEX Model 106 is a 13 ligne manual wind day and date movement which contains a fast change feature for setting both the day and the date. It contains “V-conic” balance bearings. The Model 106 is similar to the Model 104 movement with the addition of the day and date mechanism.
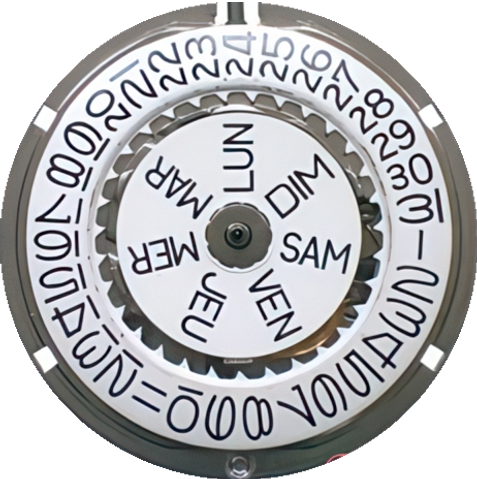
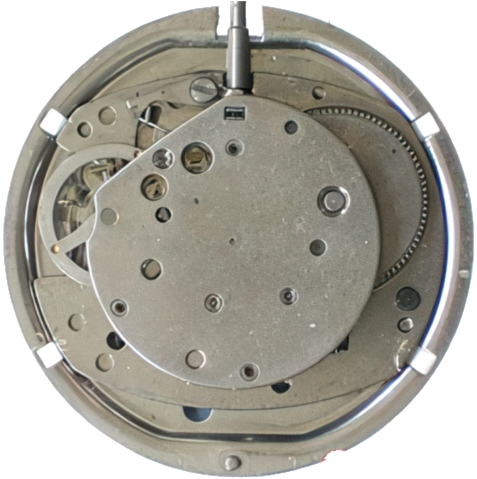
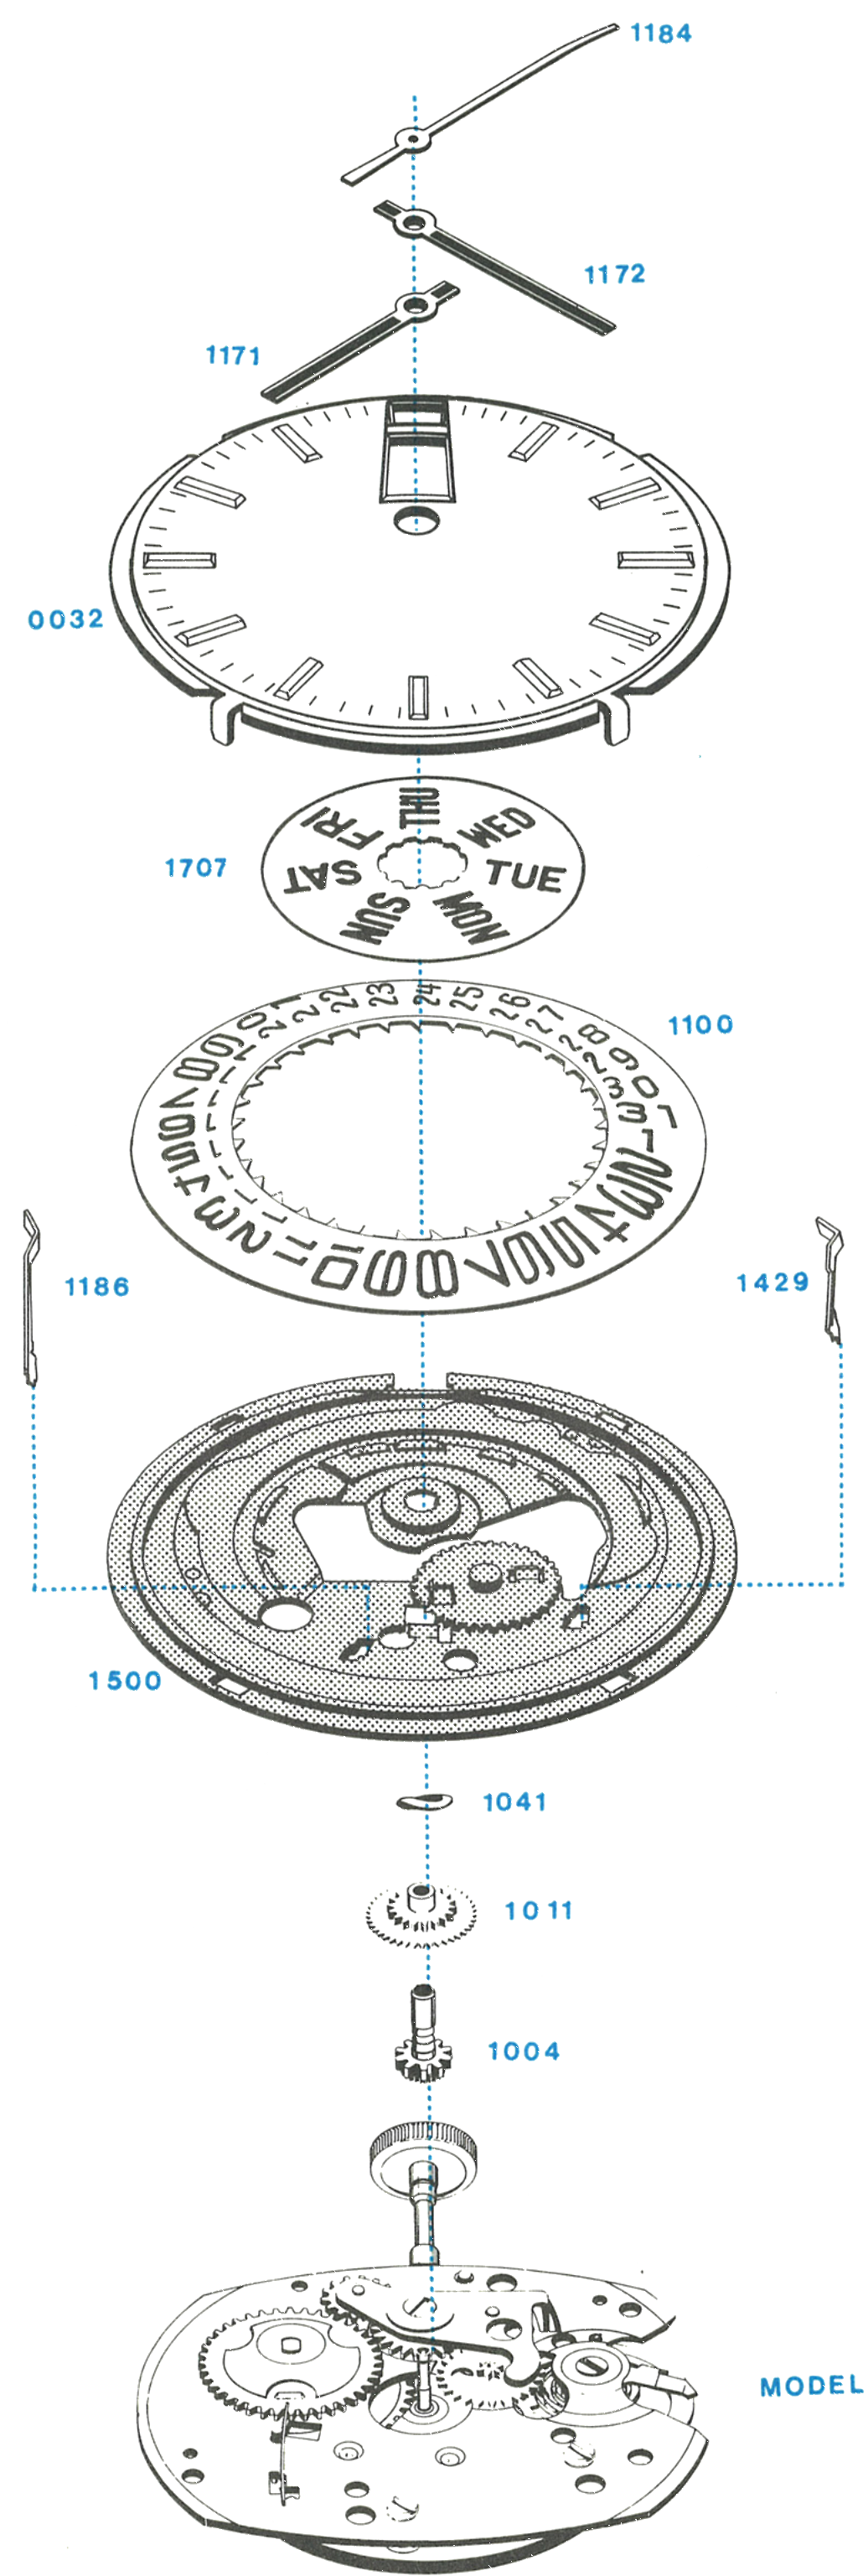
Exploded View
Everything below the numbered parts is the Model 104 movement.
Disassembly for Cleaning
Out of the Case and Off the Dial
Remove the case back and support ring. This is not always used.
Remove the screw on the set lever, beside the stem, and the set lever, to release the crown and stem assembly.
Pull the crown and stem assembly out of engagement in the movement and the movement assembly can then be lifted out of the case. Some case designs require that the crystal be removed and the movement is then removed through the front of the case.
Remove all hands.
Straighten the dial tabs so they will pass through the holes. Turn the assembly over and lift off the dial, the day disc, the date ring and the date frame.
Reassembly
The Detent Springs
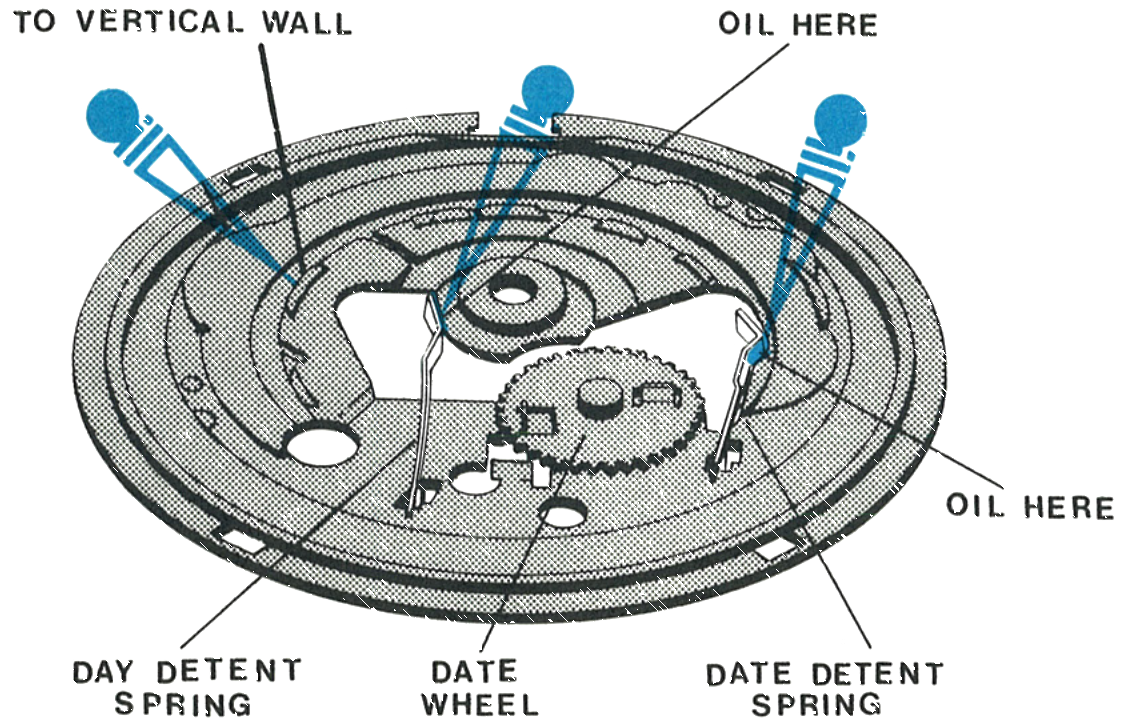
Insert the day detent spring and the date detent spring into the day-date frame as shown.
Lubricate the bearing face of the day detent spring and the date detent spring with a thin film of non-spreading watch oil, Moebius Synt-A-Lube in the factory, where shown.
The Cannon Pinion
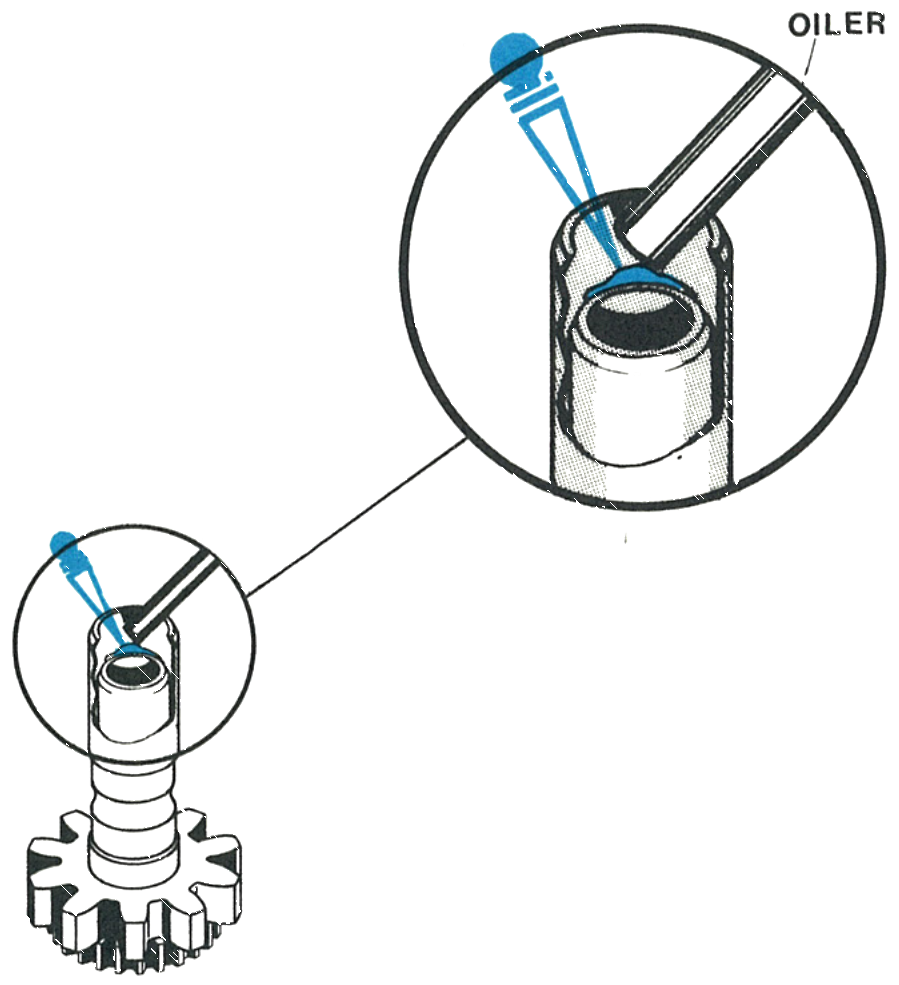
Apply non-spreading watch oil to the end of the cannon pinion. The vertical wall of the day-date frame is also lubricated with a thin film of non-spreading oil.
The Day Disc
Note the protrusions on the back of the day disc. With fine tweezers, deflect the day detent spring outward and place the day disc on the day-date frame assembly with any day, Sunday for instance, in line with the crown and stem, then drop it into place and release the day detent spring.
Fitting the Day Disc
The day disc being deflected into place on the day-date frame assembly with fine tweezers.
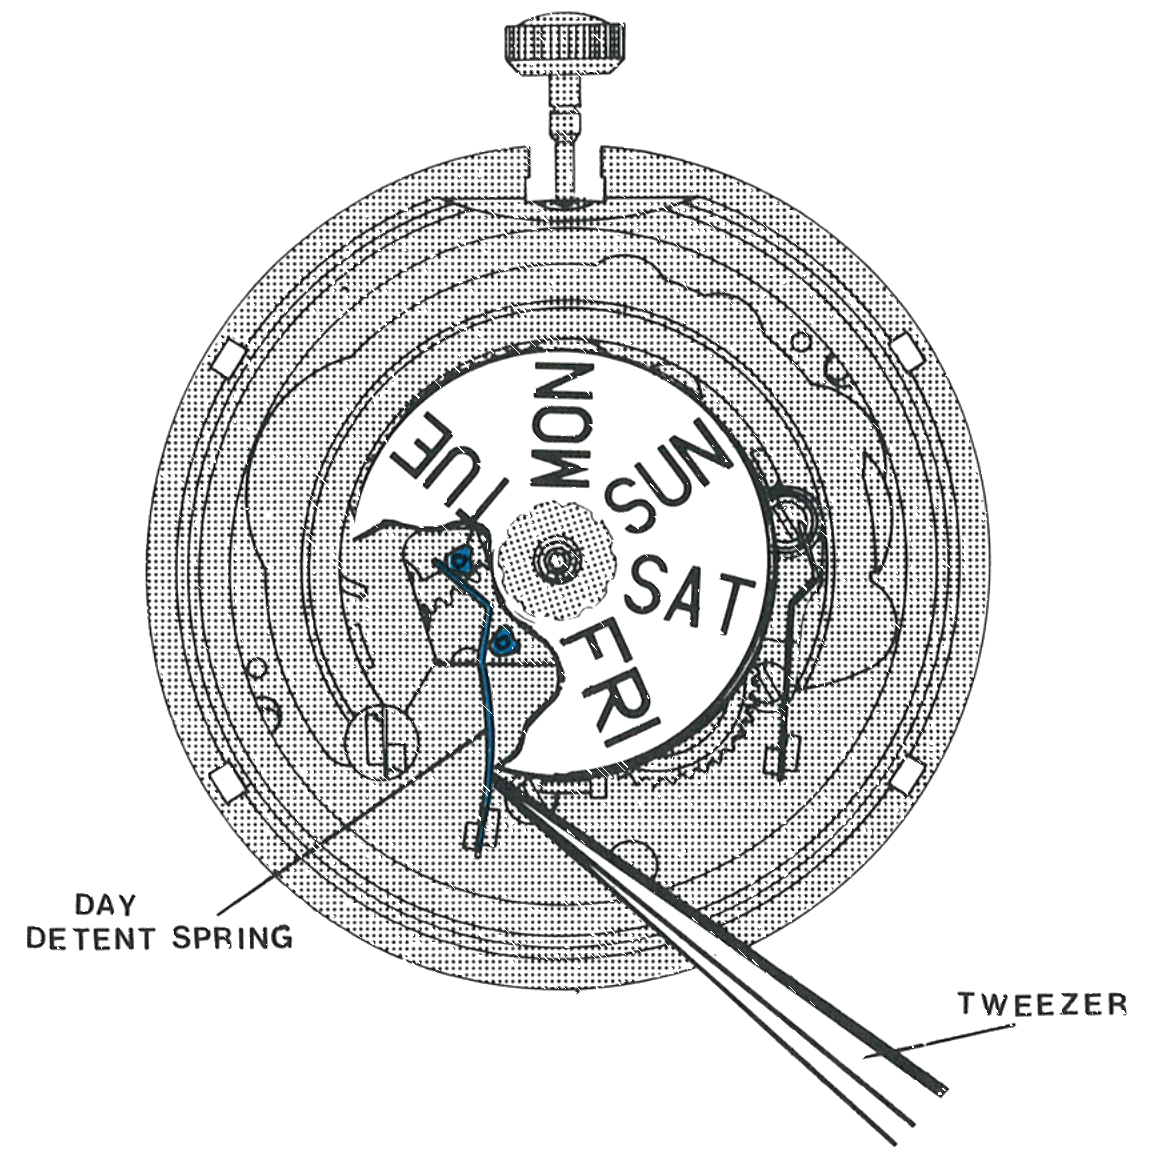
Position the date ring centrally and deflect the date detent spring until the date ring drops into place. Orient the dial with the windows toward the crown and stem assembly and insert the tabs through the holes of the day-date frame assembly. Hold the dial and day-date frame firmly on the movement, turn the assembly over and bend the tabs securely around the edge of the dial plate.
Checking the Change
Turn the crown so the hands rotate clockwise until first the date and then the day advance and snap into position.
Rotate the hands counterclockwise until the day moves partially out of the window, then snaps back into the window. Rotate the hands clockwise until the day advances again.
Rotate the hands counterclockwise until they indicate 9 PM, then rotate clockwise until the date changes with a snap. This change should occur around midnight.
Continue to rotate the hands clockwise through 29 hours and both the day and the date should advance one position.