Service Manual · Heritage 1854
The Model 102
9½ Ligne Day & Date · Model 100 Base
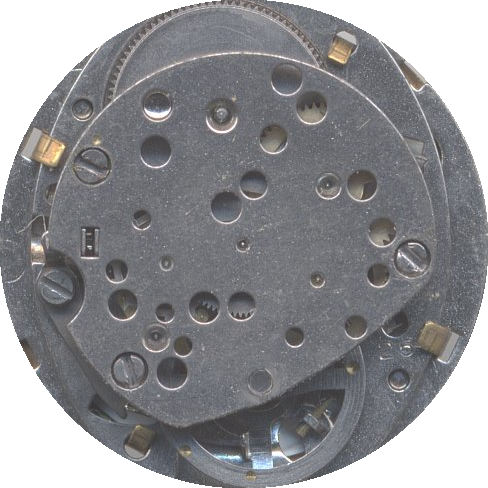
A 9½ ligne day and date movement, the Model 100 with the day and date mechanism added. The date may be advanced quickly, and the day disc drops onto the frame over a detent spring.
Hand-wound
Day & Date
V-Conic
Quick Date Advance

Model 102 · Dial Side & Movement Side
Ligne9½
Diameter21.44 mm
BearingsV-Conic
Basic movementModel 100
FeatureQuick date advance
ManualService Manual · Model 102
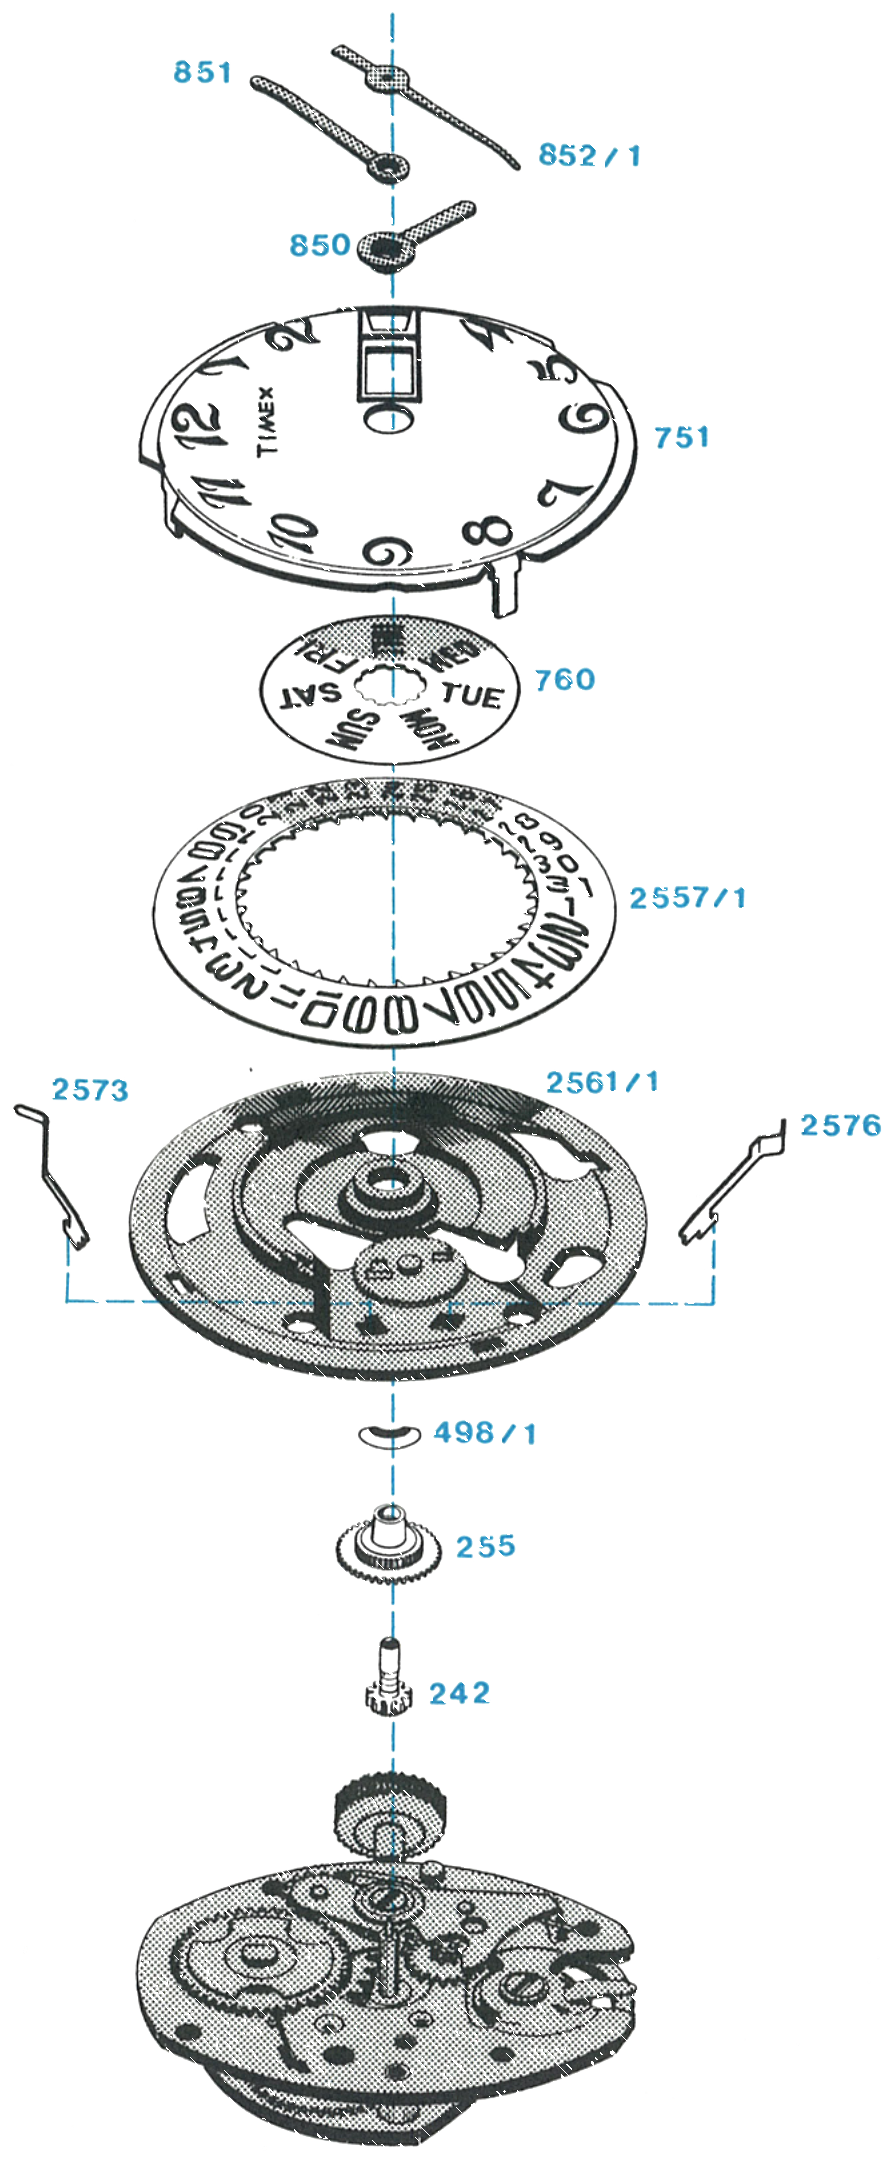
Exploded View
Everything below the numbered parts is the basic Model 100 movement.
Model 102 · Exploded View
242Cannon Pinion Assembly
255Hour Wheel Assembly
498/1Hour Wheel Washer
751Dial
760Day Disc
850Hour Hand
851Minute Hand
852/1Sweep Second Hand
2557/1Date Ring
2561/1Day / Date Frame Assembly
2573Day Detent Spring
2576Date Detent Spring
Disassembly for Cleaning
Getting the movement out of its case first? Case types and dust seals →
1 · Lifting Off the Day and Date
Straighten the dial tabs so they will pass through the holes. Turn the assembly over and lift off the dial, the day disc, the date ring and the day-date frame assembly.
Remove the hour wheel washer (A), hour wheel assembly (B) and cannon pinion assembly (C) from the movement.
After the above parts have been removed, the basic movement can be disassembled, cleaned, lubricated and reassembled as outlined for the Model 100 movement.
The hour wheel washer, hour wheel assembly, cannon pinion assembly and day-date frame assembly may be cleaned using standard watch cleaning solutions.
Caution: Extreme care must be exercised in cleaning dials, hands, day discs and date rings. Solvent type cleaners will often damage the finish on these parts.
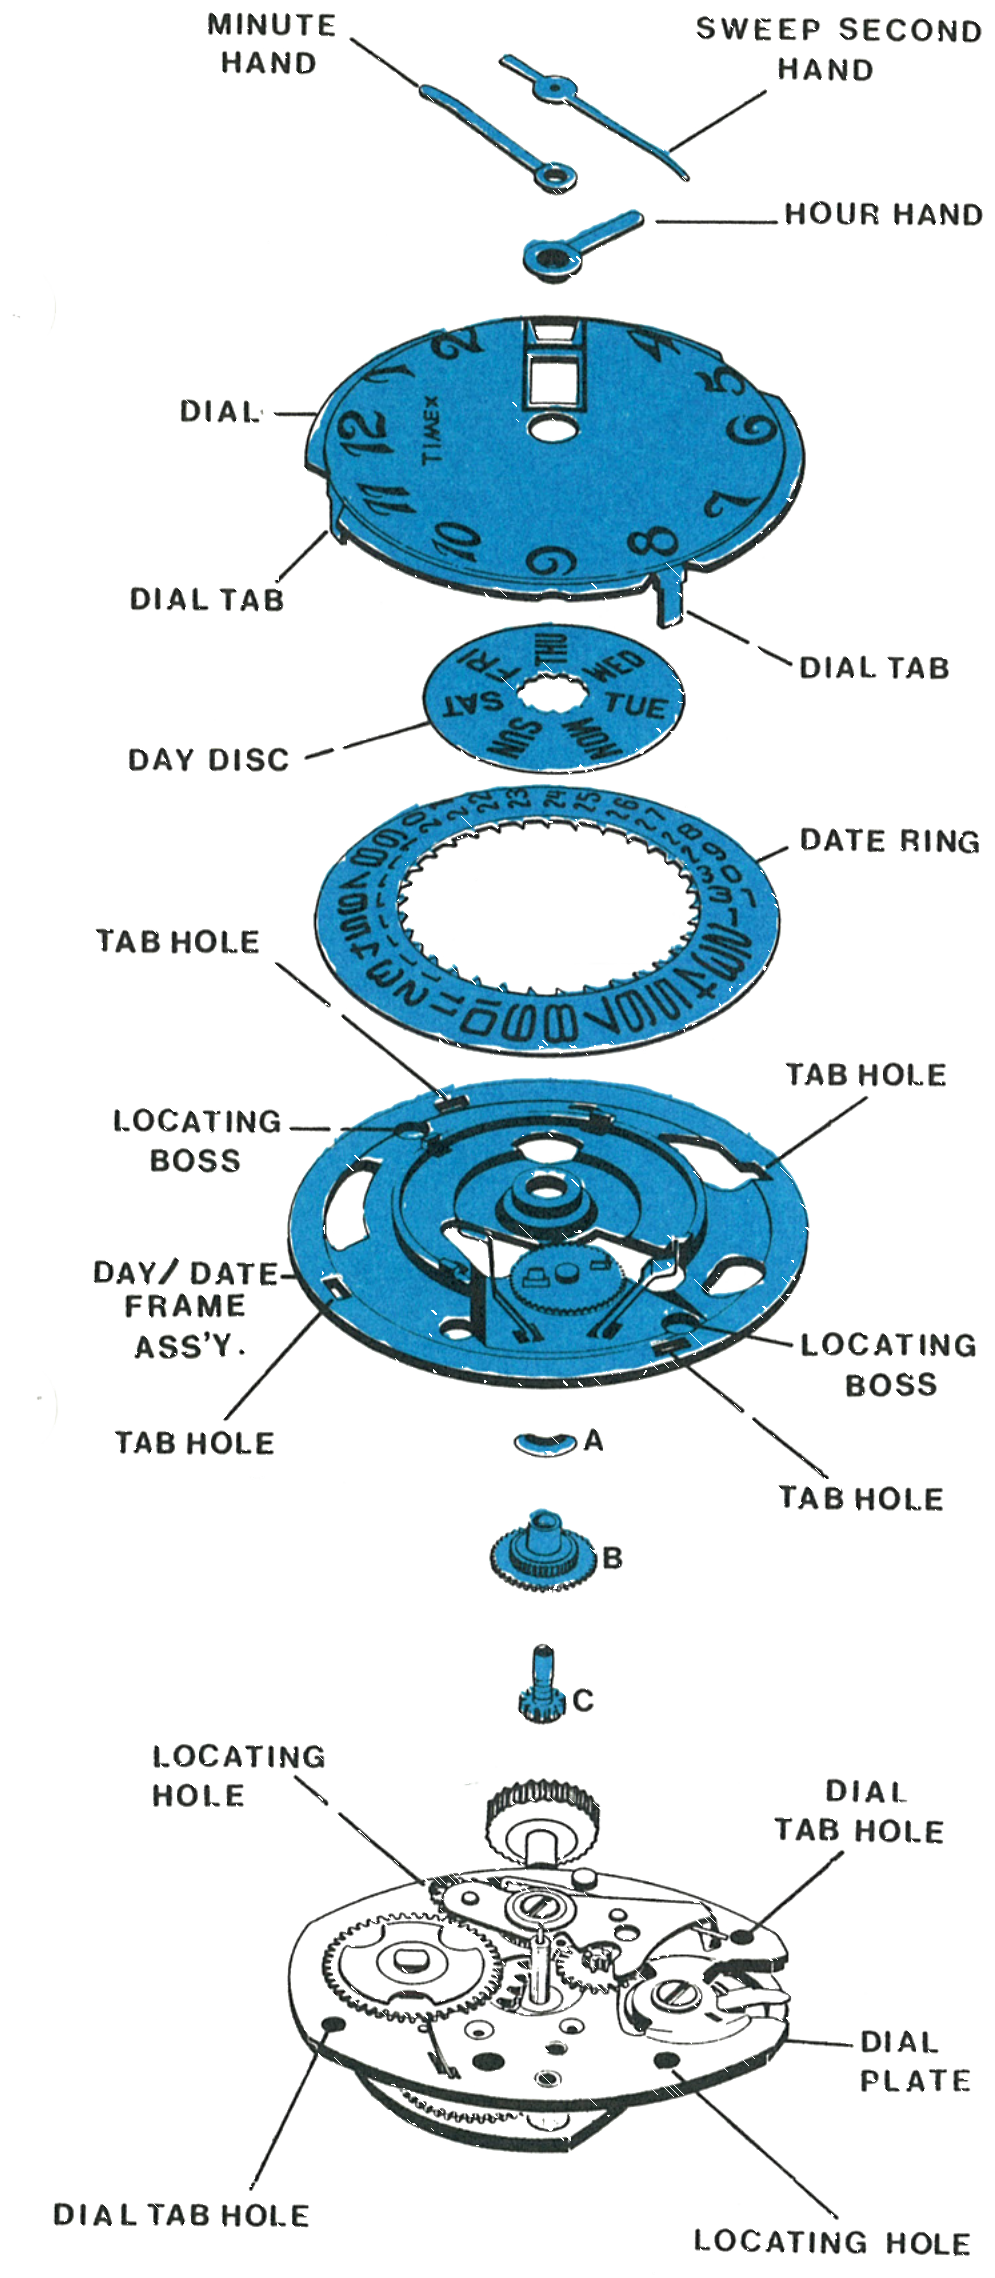
Fig. 102.3 · Day & Date Stack
Reassembly
1 · The Detent Springs
Make certain the day detent spring and the date detent spring are correctly located in the day-date frame assembly.
Lubricate the bearing face of the day detent spring and the date detent spring with a thin film of non-spreading watch oil, Moebius Synt-A-Lube in the factory. Lubricate the vertical wall of the day-date frame with a thin film of spreading type watch oil, Woods AAAA in the factory.
Caution: Avoid excess lubrication, and do NOT lubricate the date wheel area.
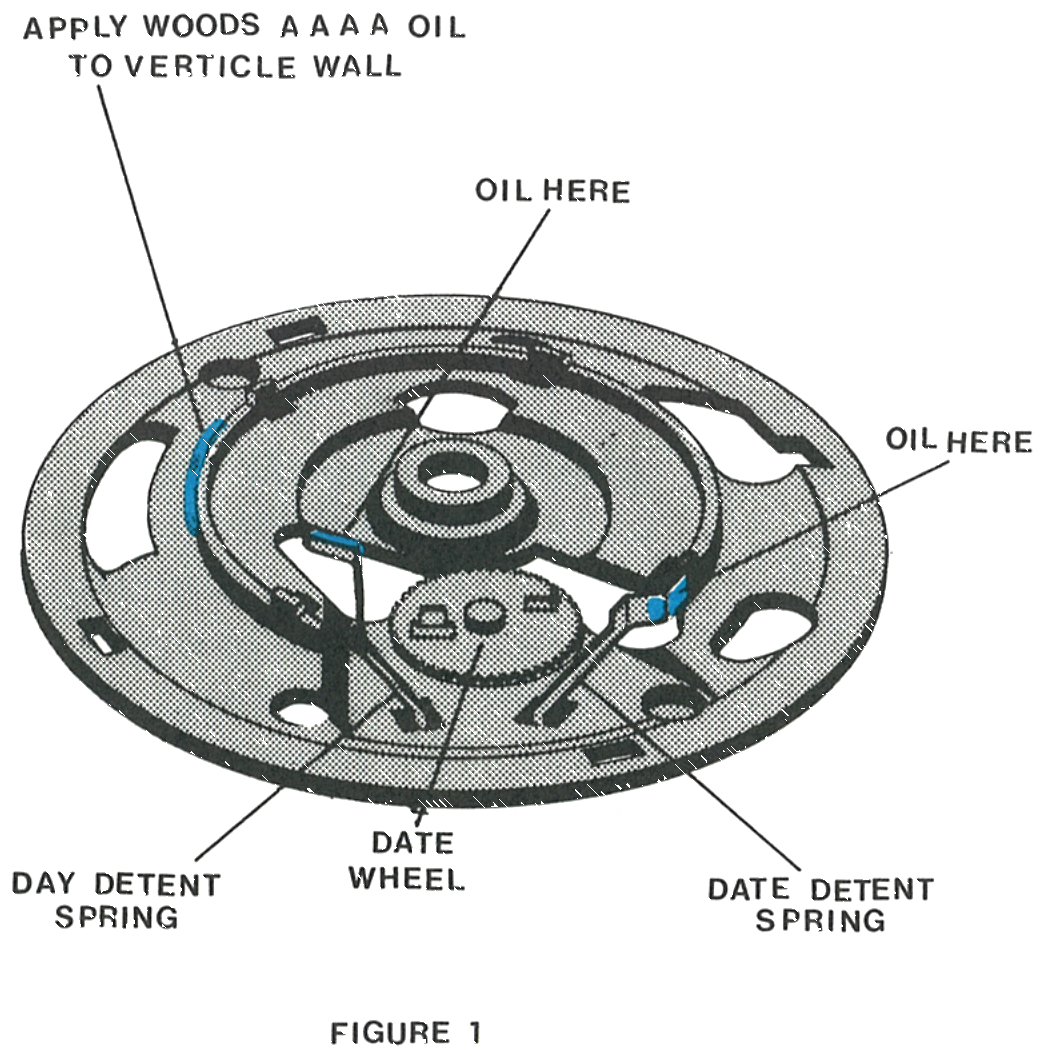
Fig. 102.4 · Figure 1
2 · The Cannon Pinion
Apply non-spreading watch oil to the end of the cannon pinion assembly.
Replace the parts on the movement in this order: cannon pinion assembly, hour wheel assembly, hour wheel washer, then the day-date frame assembly, oriented as shown on page 102.3 with the bosses seated in the holes.
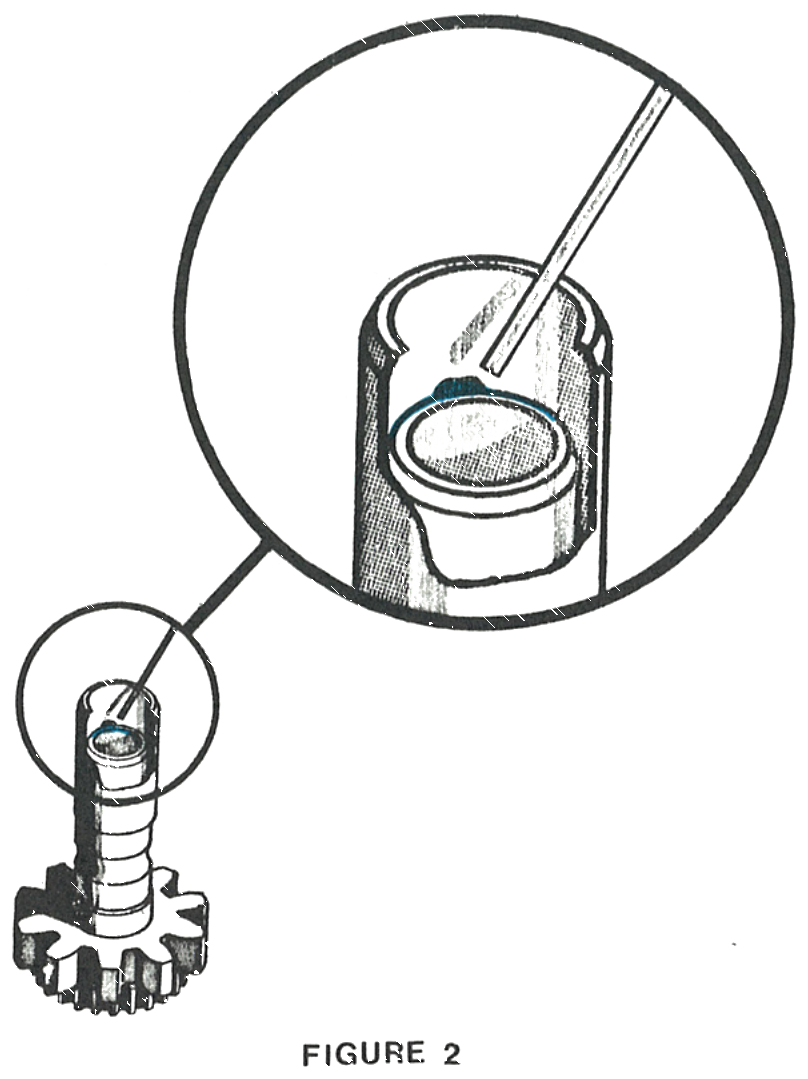
Fig. 102.4 · Figure 2
3 · The Day Disc
Note the protrusions on the back of the disc. Place the disc on the day-date frame assembly with any day, Sunday for instance, in line with the crown and stem.
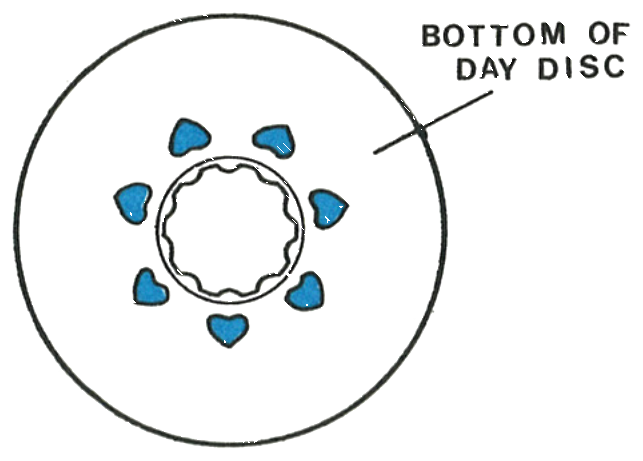
Fig. 102.5 · Figure 3
4 · Fitting the Day Disc
With a fine tweezer, deflect the day detent spring outward until the day disc drops into place.
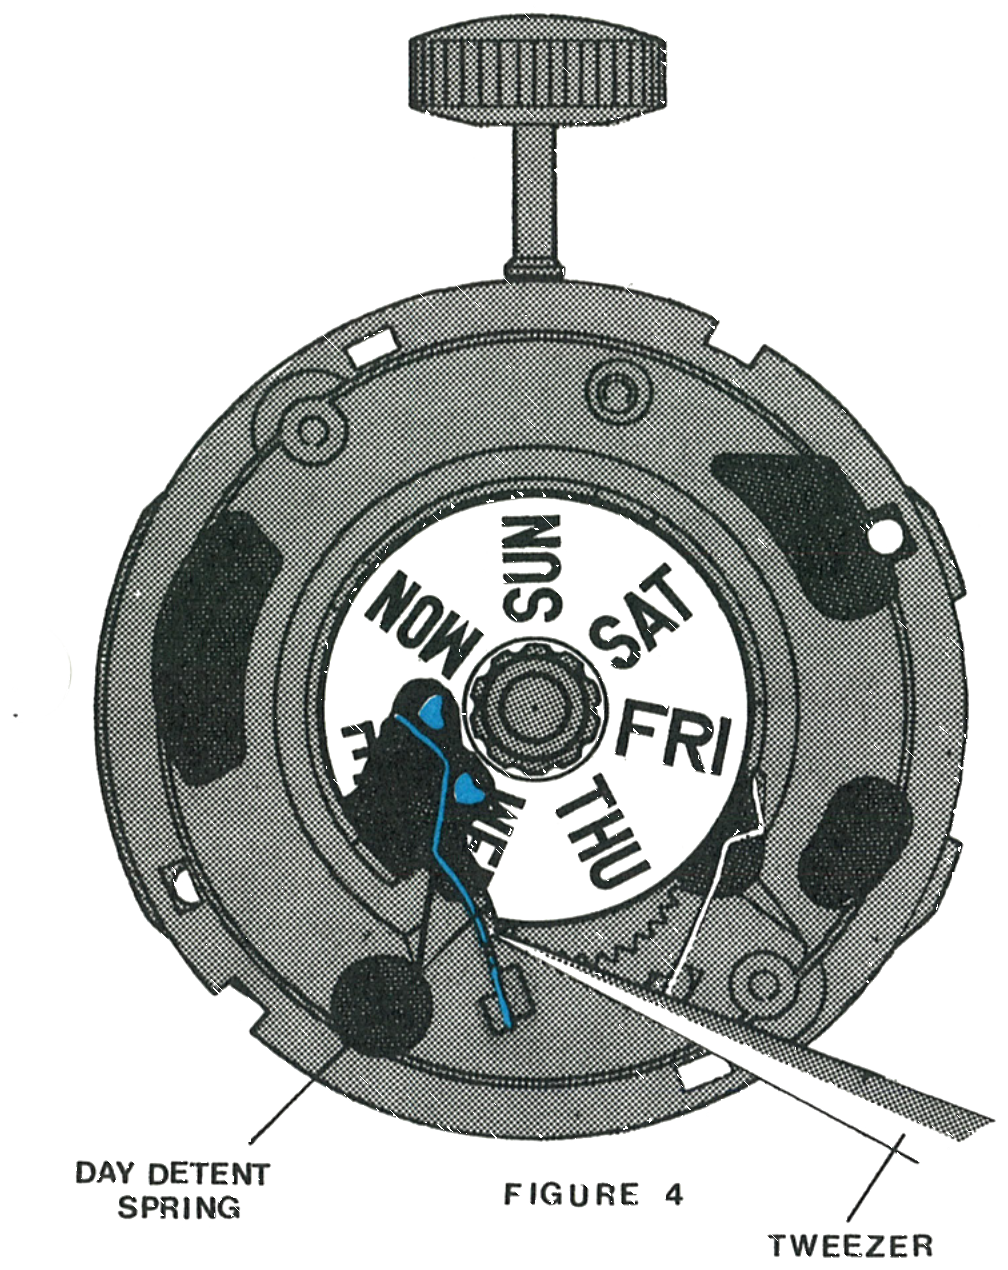
Fig. 102.5 · Figure 4
5 · The Date Ring
Position the date ring centrally on the day-date frame assembly. With a fine tweezer, deflect the date detent spring inward until the date ring drops into place.
Orient the dial as shown on page 102.3 with the windows toward the crown and stem and insert the tabs through the day-date frame assembly into the dial plate of the movement. Hold the dial in place on the movement, turn the assembly over and bend the tabs firmly against the back of the dial plate.
Pull the crown and stem out and rotate clockwise until the date changes with a snap. Stop turning the crown immediately and assemble the hands at the 12 o’clock position.
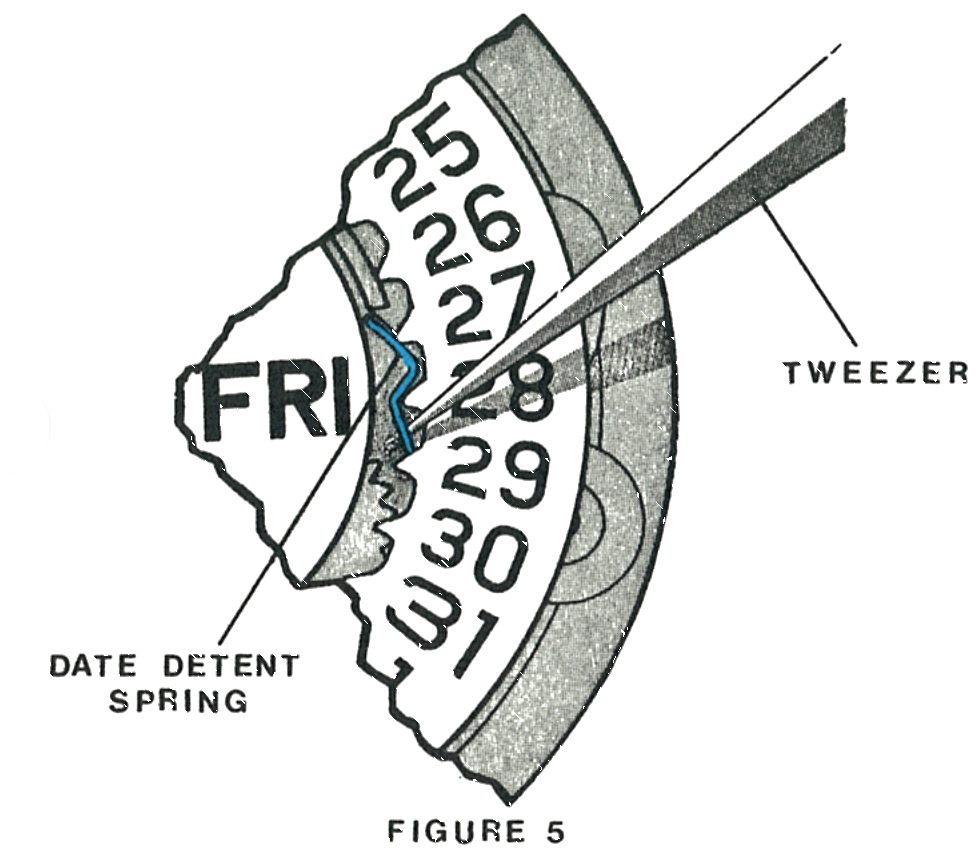
Fig. 102.5 · Figure 5
Orient the dial with the windows toward the crown and stem and insert the tabs through the day-date frame assembly into the dial plate. Hold the dial in place, turn the assembly over and bend the tabs firmly against the back of the dial plate.