
A Calendar on the Model 80
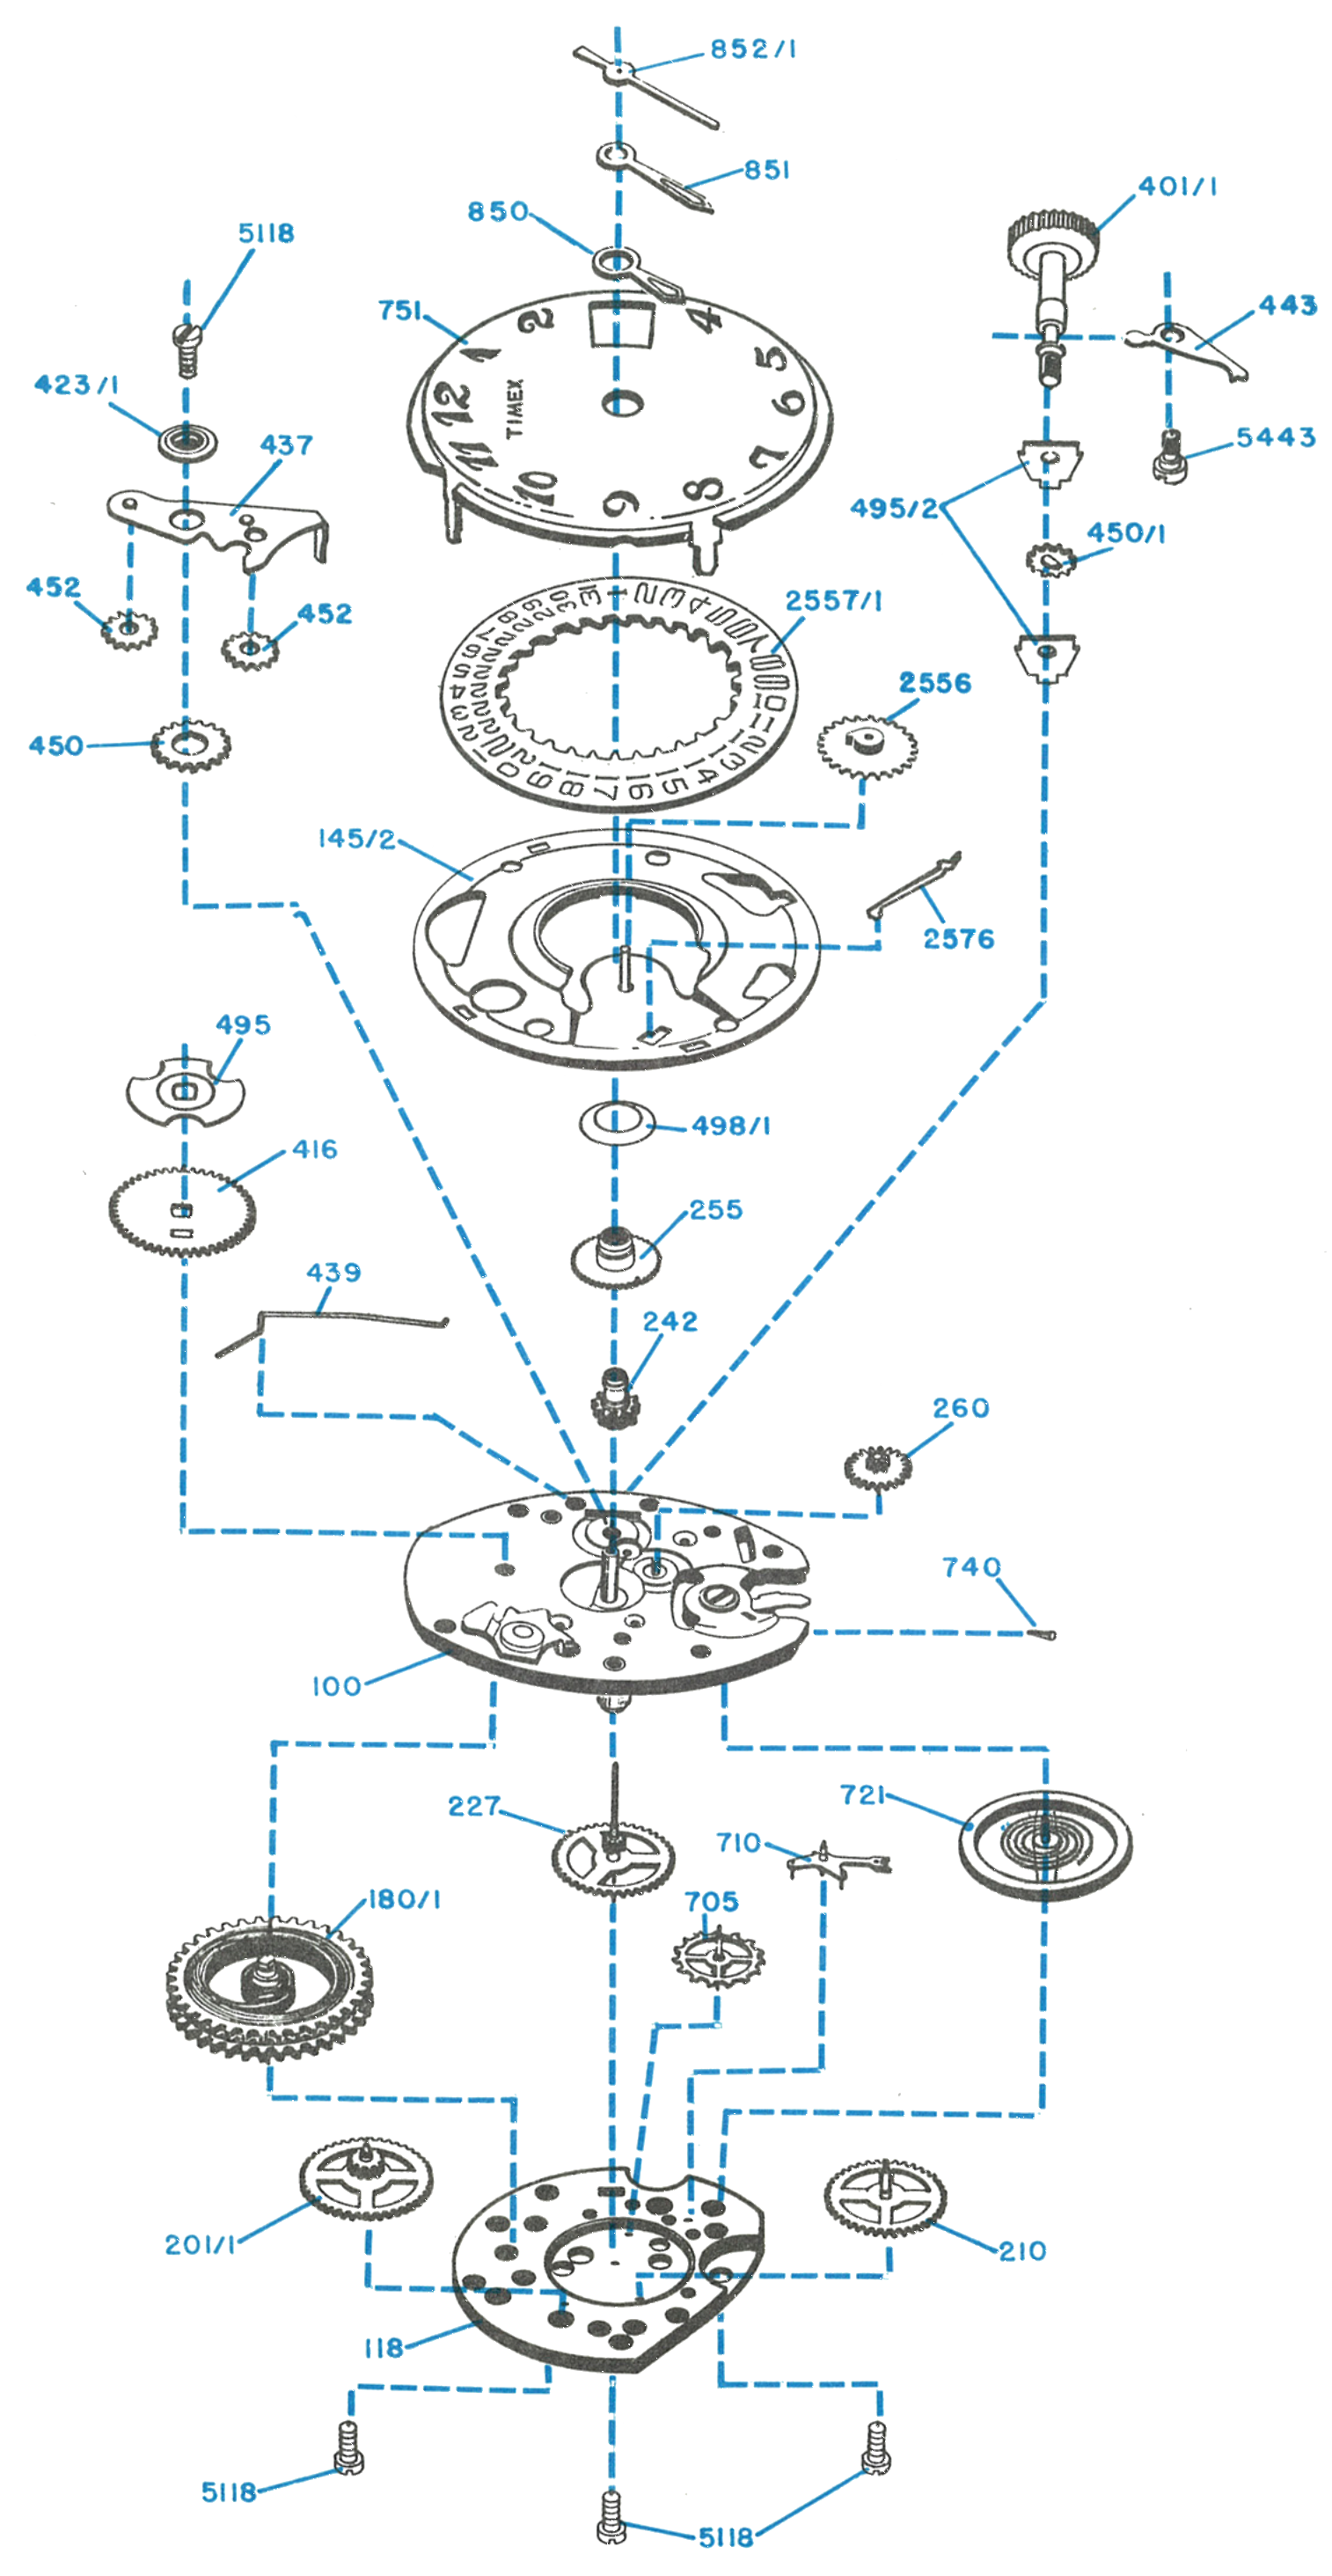
The TIMEX Model 81 is a 9¾ ligne calendar movement which utilizes the basic Model 80 movement with the “V-conic” bearing system and rugged two plate design. The entire calendar mechanism is housed between the date frame assembly and the dial.
Exploded View
Disassembly for Cleaning
Removing the Dial and Calendar
Remove the sweep second hand, the minute hand and the hour hand.
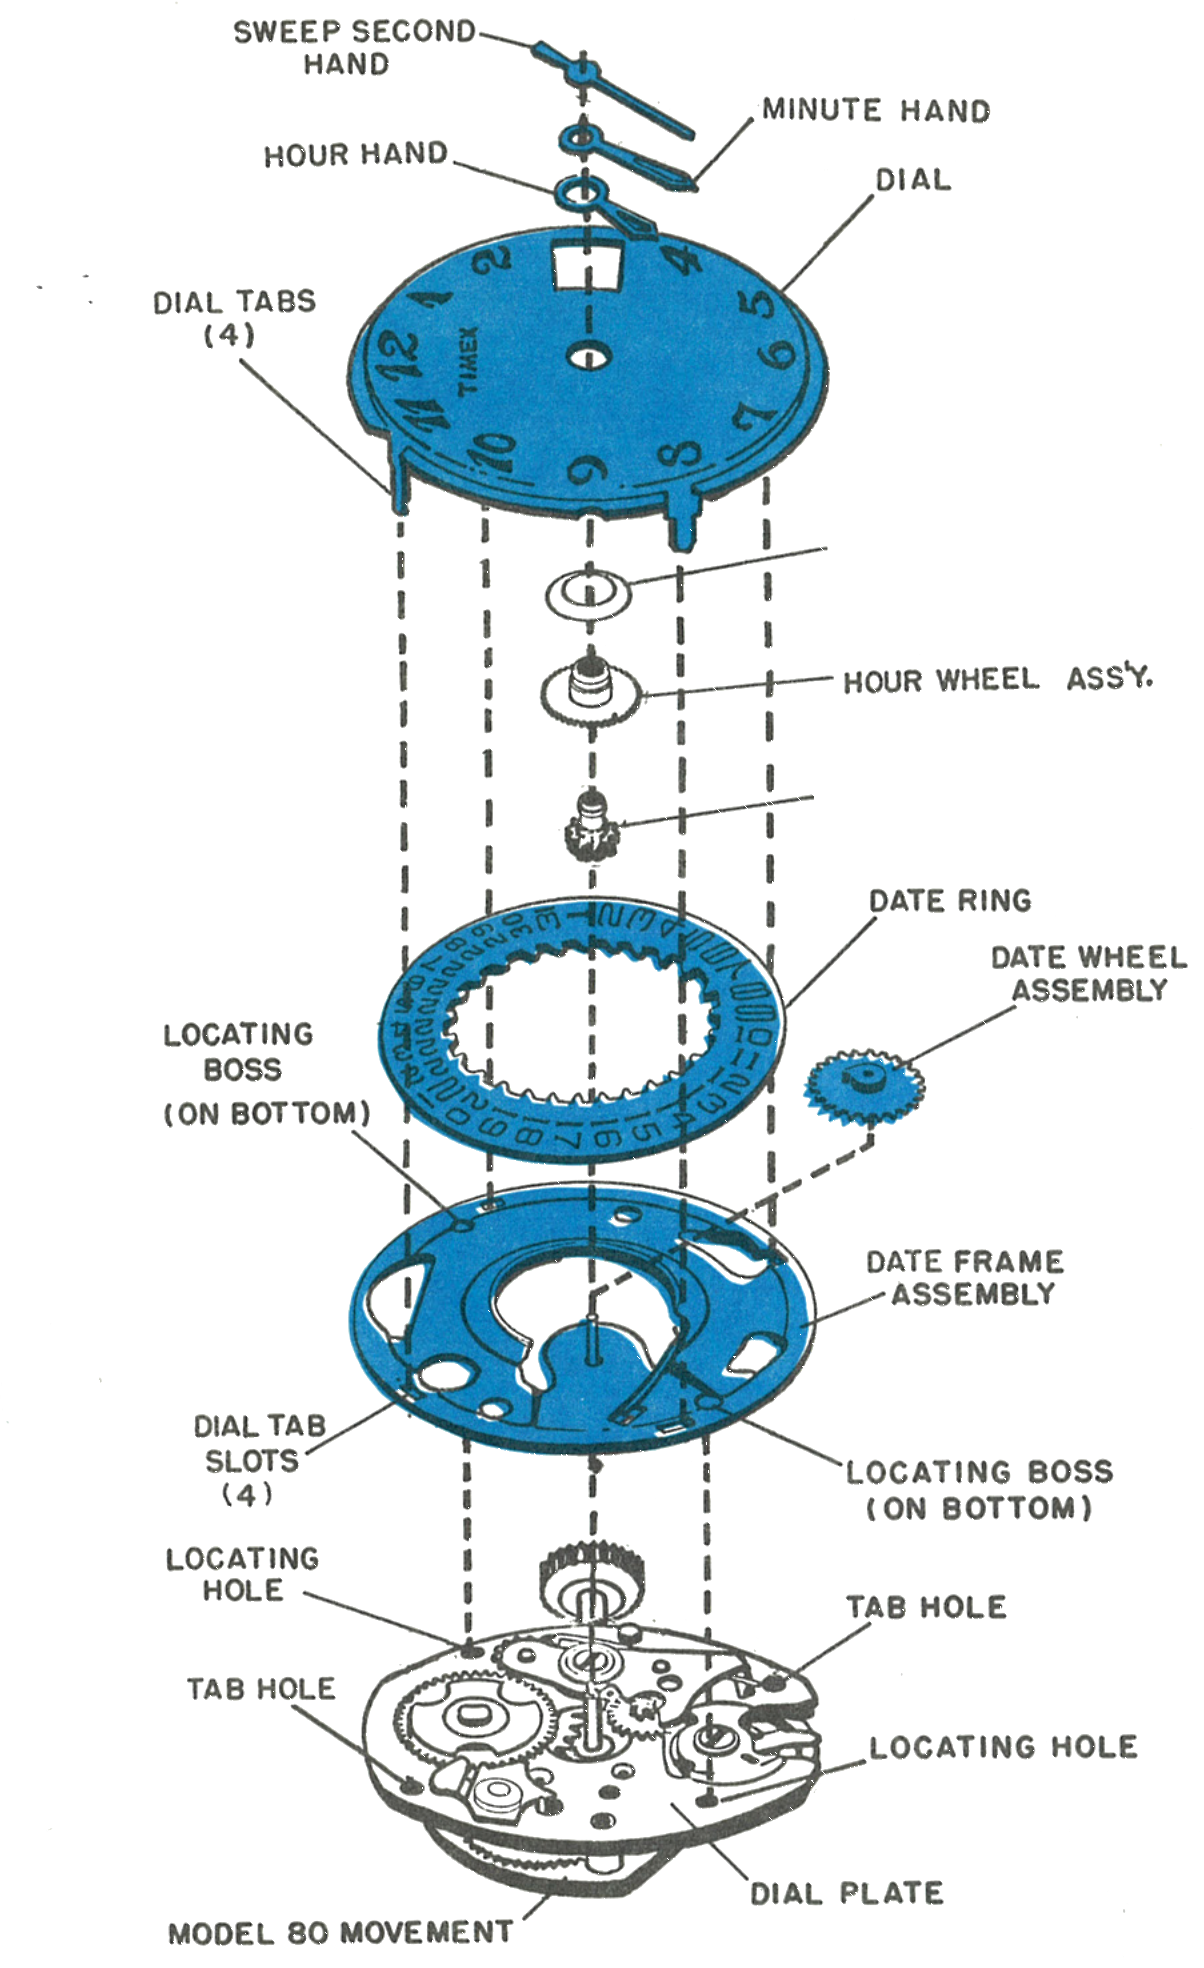
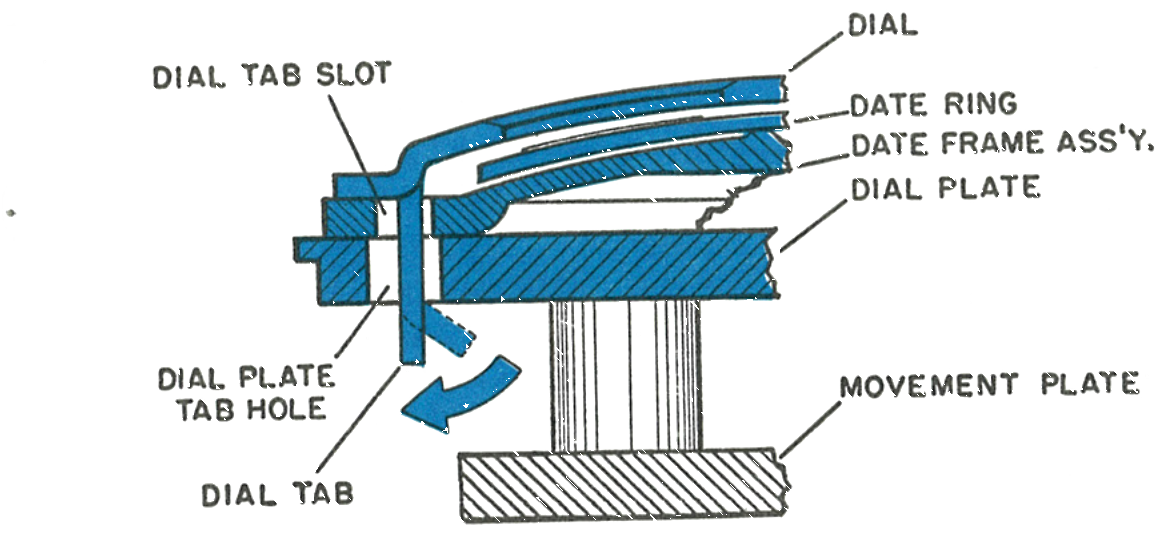
The dial assembly is clamped to the movement by means of four tabs which are inserted through slots in the date frame assembly into two holes in the dial plate, and then bent under the plate to secure the assembly. Bend the tabs slightly to free the dial from the movement.
Then lift off in order: dial, date ring, hour wheel washer, hour wheel assembly, date wheel assembly, date frame assembly, cannon pinion assembly.
The Dial Tabs
Cross section showing a dial tab passing through the date frame assembly slot and the dial plate tab hole, bent under the movement plate.
Reassembly
Assemble the detent spring, if loose, into the date frame assembly. Place the date frame assembly on the Model 80 movement, being sure the date frame bosses are located in the two holes in the dial plate. Then assemble in order: date wheel assembly, cannon pinion assembly, hour wheel assembly, hour wheel washer.
Lubricate the cannon pinion bearing area and the date wheel bearing area with fine watch oil, Elgin M56b in the factory. Position the date ring on the date frame assembly.
Lubricating the Date Ring
Lubricate the face of the date ring and the detent spring with fine watch oil, Elgin M56b in the factory, as shown.

Insert the dial tabs, which should be straight, through the slots in the date frame assembly. Hold the dial in position and bend the four tabs under the dial plate.
Hands & Date
To Position Hands for Proper Date Change
With the dial assembled to the movement, pull the crown and stem assembly into the set position and rotate the crown clockwise until the date starts to move. Continue to rotate slowly until the date jumps into place, then stop rotating. Replace all hands at the 12 o’clock position. Be certain the sweep second hand is set below the chamfer on the top of the staff.

Test the assembly for proper function of the hands and calendar mechanism.
To Set the Date
Pull the crown out to the set position and rotate the hands forward clockwise until the date shown in the window changes. The date may now be advanced rapidly by first rotating the hands backwards past 9 o’clock and then rotating them forward past 12 o’clock. The date will advance each time the backward and forward cycle is repeated.