Service Manual · Heritage 1854
The Model 107
13 Ligne Self-Wind · Model 104 Base
A 13 ligne self-winding movement built on the Model 104. A planetary gear system keeps the mainspring wound from wrist motion, and the rotor has to be freed from the rocker arm before it will lift out.
Self-winding
V-Conic
13 Ligne
Planetary Gear
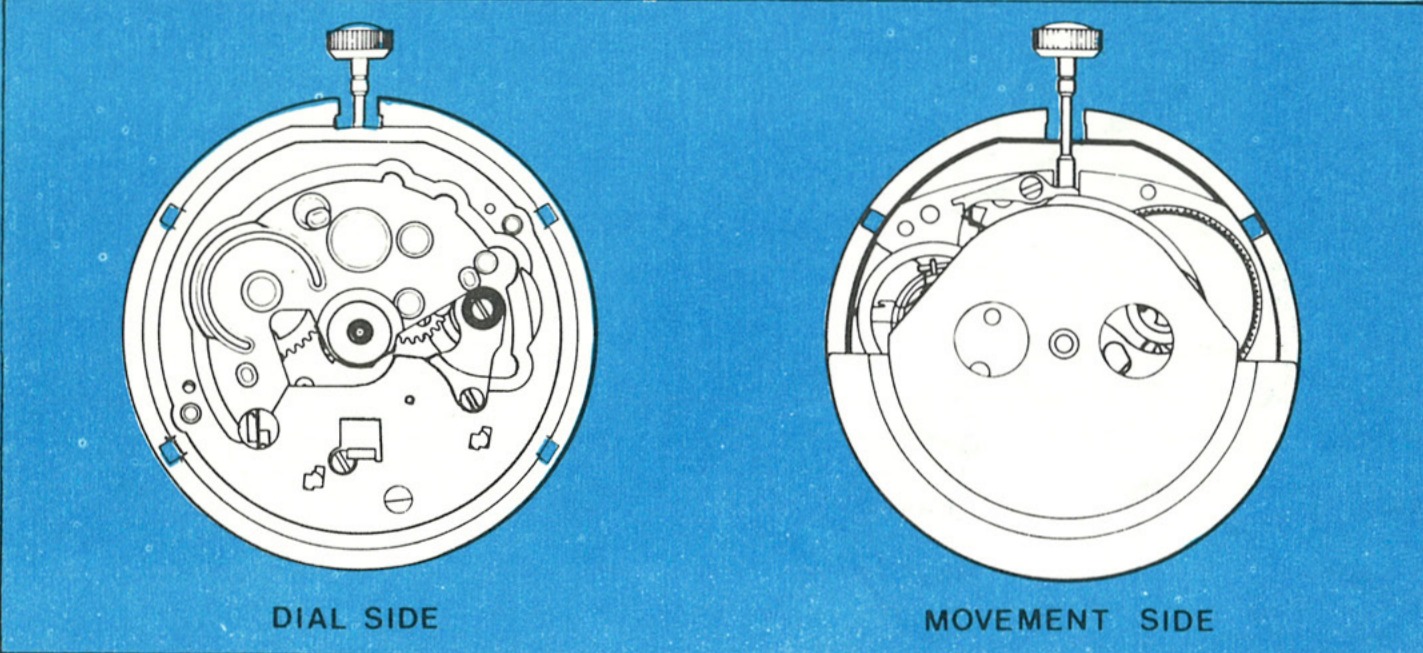
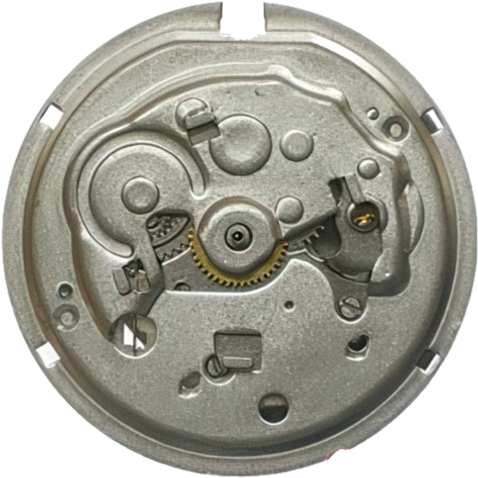
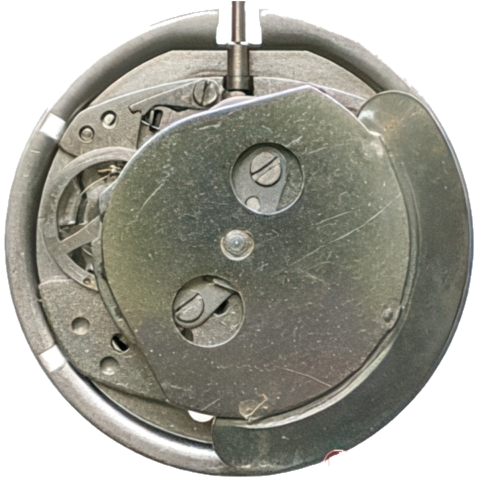
Model 107 · Dial Side & Movement Side
Ligne13
BearingsV-Conic
ConstructionTwo plate
WindingPlanetary gear, self-wind
Basic movementModel 104
ManualService Manual · Model 107
Size (mm)29.45 mm
Height6.40 mm
Jewels0
EscapementPin lever
Beat rate18,000 bph
Power reserve38 h
Size in mm, height, jewels, escapement, beat rate and power reserve:
ranfft.org
Disassembly for Cleaning
Getting the movement out of its case first? Case types and dust seals →
1 · Freeing the Rotor Assembly
Remove the case back. Loosen and remove the two rotor plate screws.
Lift the rotor assembly slightly to free the dowels.
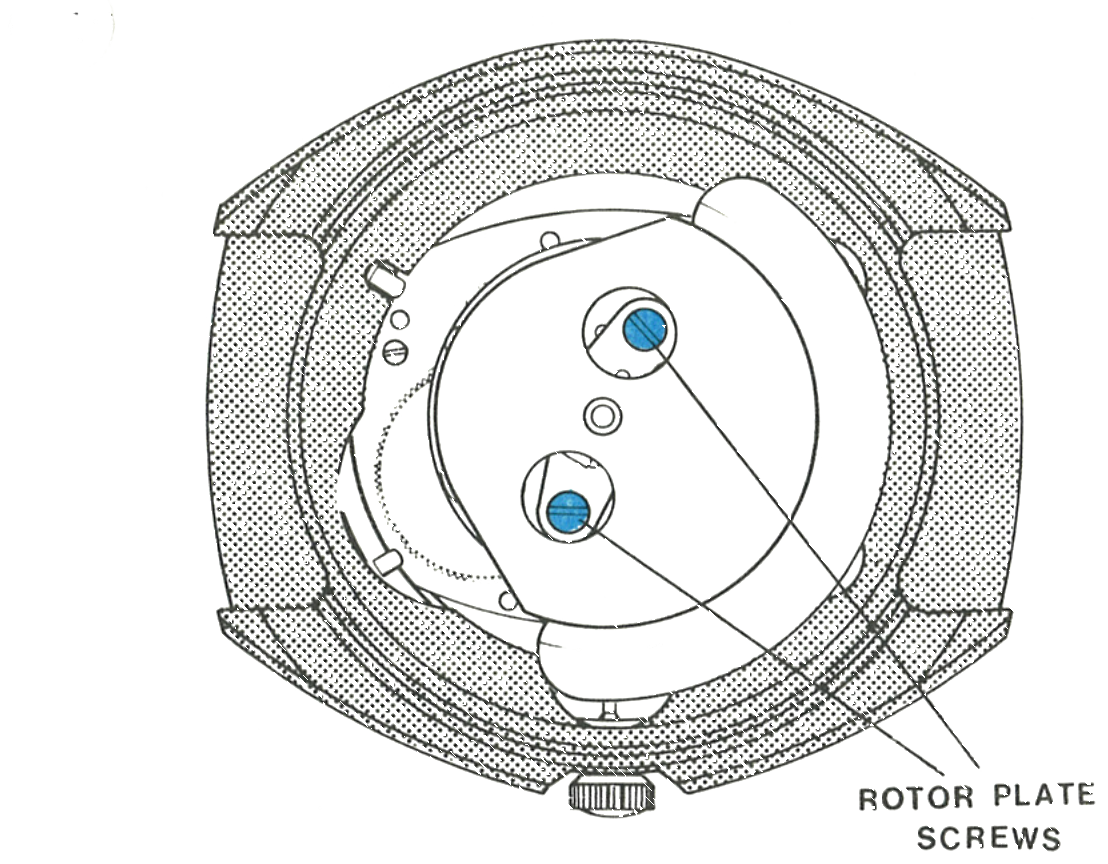
Fig. 107.3 · Figure 1
2 · Sliding It Out
The rocker arm fits between the rotor frame and the rotor assembly. Position the rotor weight as shown and slide the assembly along the movement plate, toward the balance wheel, until it is free of the rocker arm, then lift the assembly out of the case.
Caution: Any attempt to lift the weight before it is free of the rocker arm will result in damage to the movement.
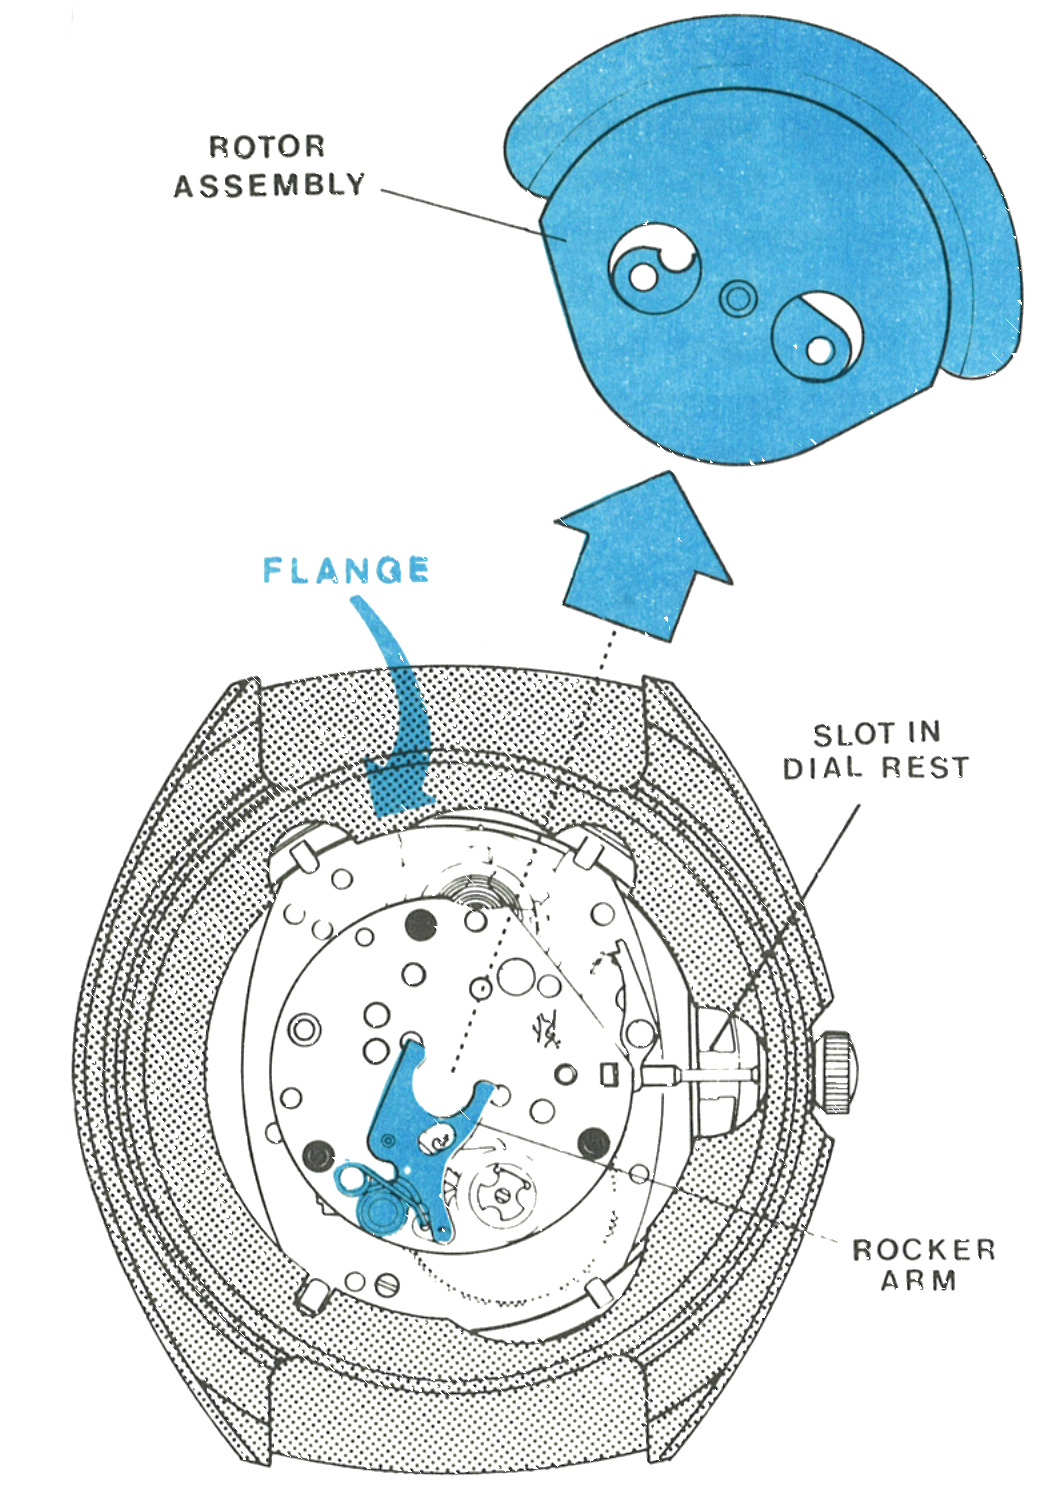
Fig. 107.3 · Figure 2
3 · Releasing the Crown and Stem
Loosen the set lever screw and raise the lever sufficiently to release the stem, then pull the crown and stem assembly free of the movement and the case.
Note: Some Timex self-wind watches take the movement out only through the back. Check for a retaining ring on the inside of the bezel instead of a flange. Where one is fitted, do not remove the crystal: free the ring from the case groove and take the movement out through the back.
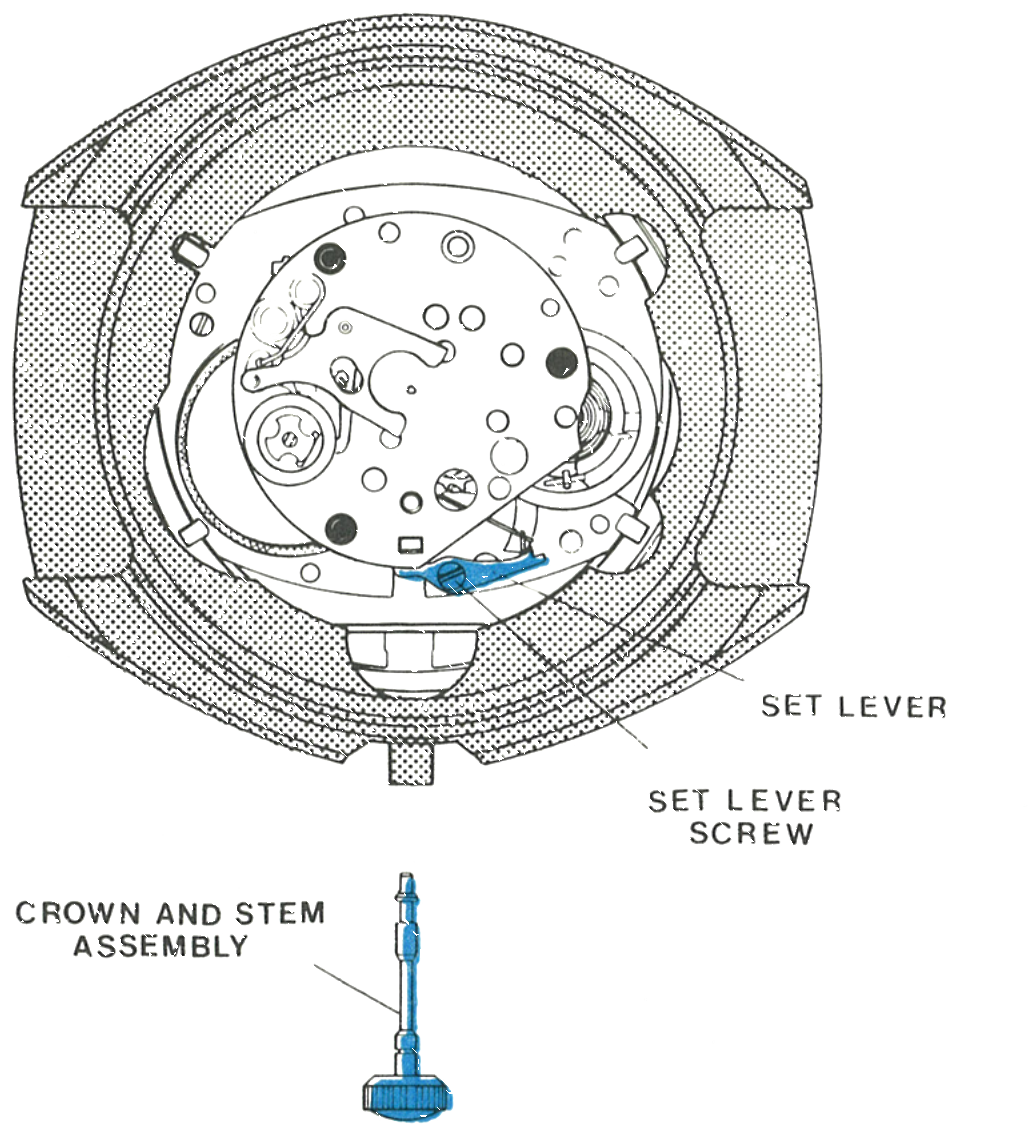
Fig. 107.4 · Figure 3
4 · Out of the Case
Where there is no retaining ring, turn the assembly over and remove the crystal using a crystal remover. The reflector ring and the movement and dial assembly can then be removed through the front of the bezel.
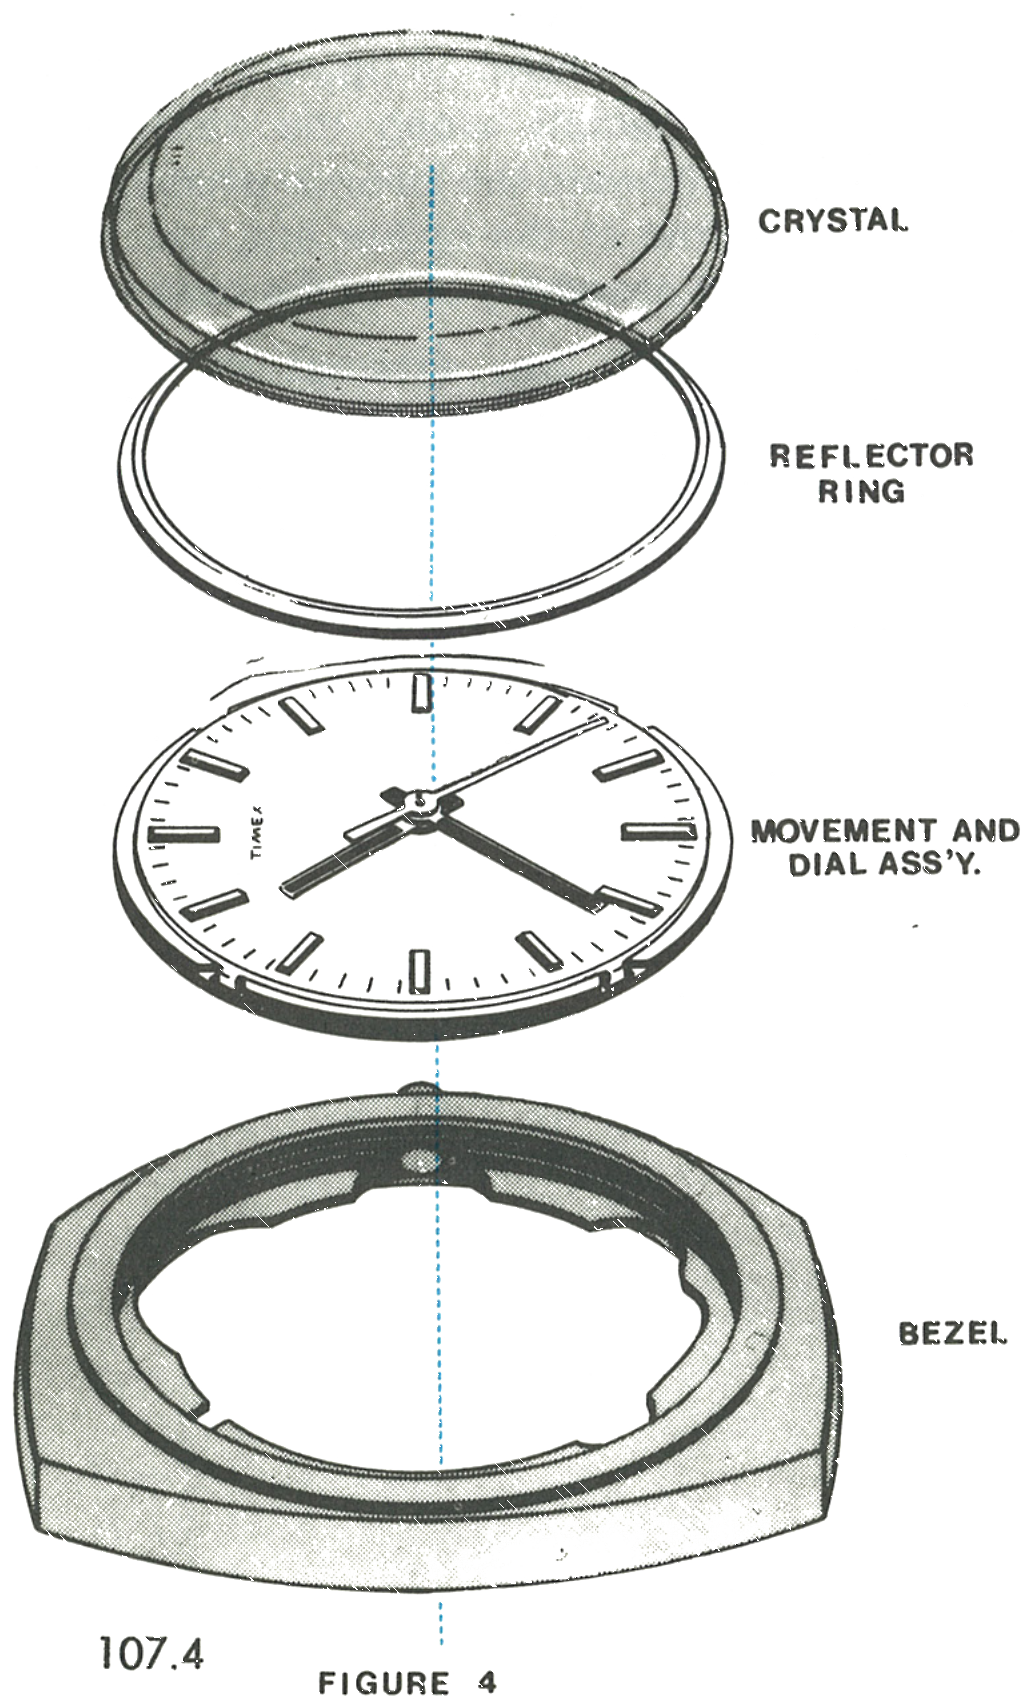
Fig. 107.4 · Figure 4
5 · The Dial Tabs
Remove all hands. Turn the assembly over and bend the four dial tabs sufficiently to free the dial from the dial rest and the movement.
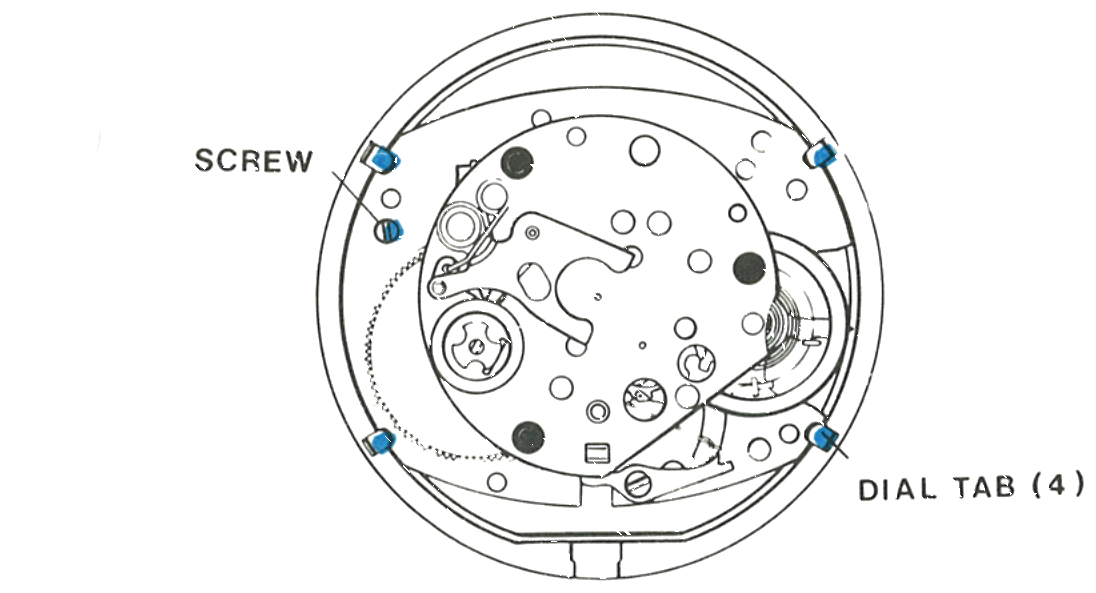
Fig. 107.5 · Figure 5
6 · Off the Dial Rest
Hold the dial in place and turn the assembly over so the dial is up, then lift the dial off the assembly.
Replace the crown and stem assembly in the movement and tighten the set lever screw to assure engagement. Release the mainspring power slowly by holding the crown in the fingers of one hand while the click is held out of engagement with the ratchet wheel, through the hole in the dial rest.
Turn the assembly over, dial rest down, and remove the screw securing the dial rest. Turn the assembly over again and lift off the dial rest and the ratchet wheel.
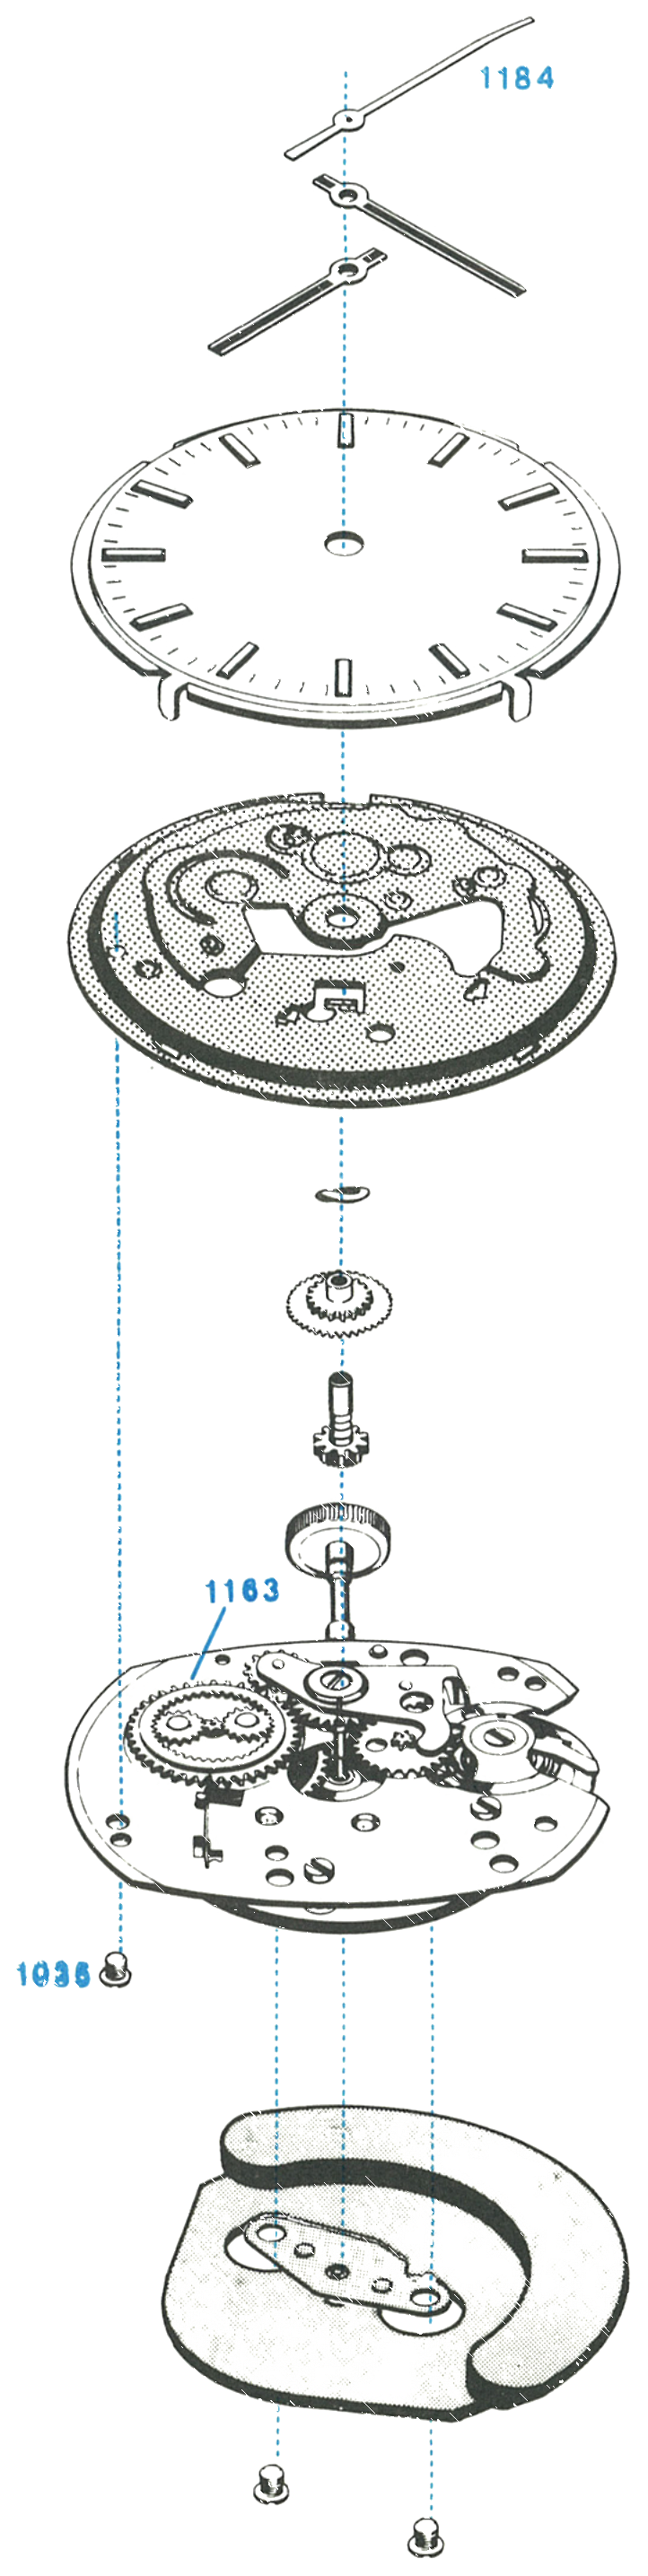
Remove the hour wheel washer (A), hour wheel assembly (B) and cannon pinion assembly (C) from the movement.
Note: With these parts removed, the basic movement may be replaced with a Timex reconditioned movement.
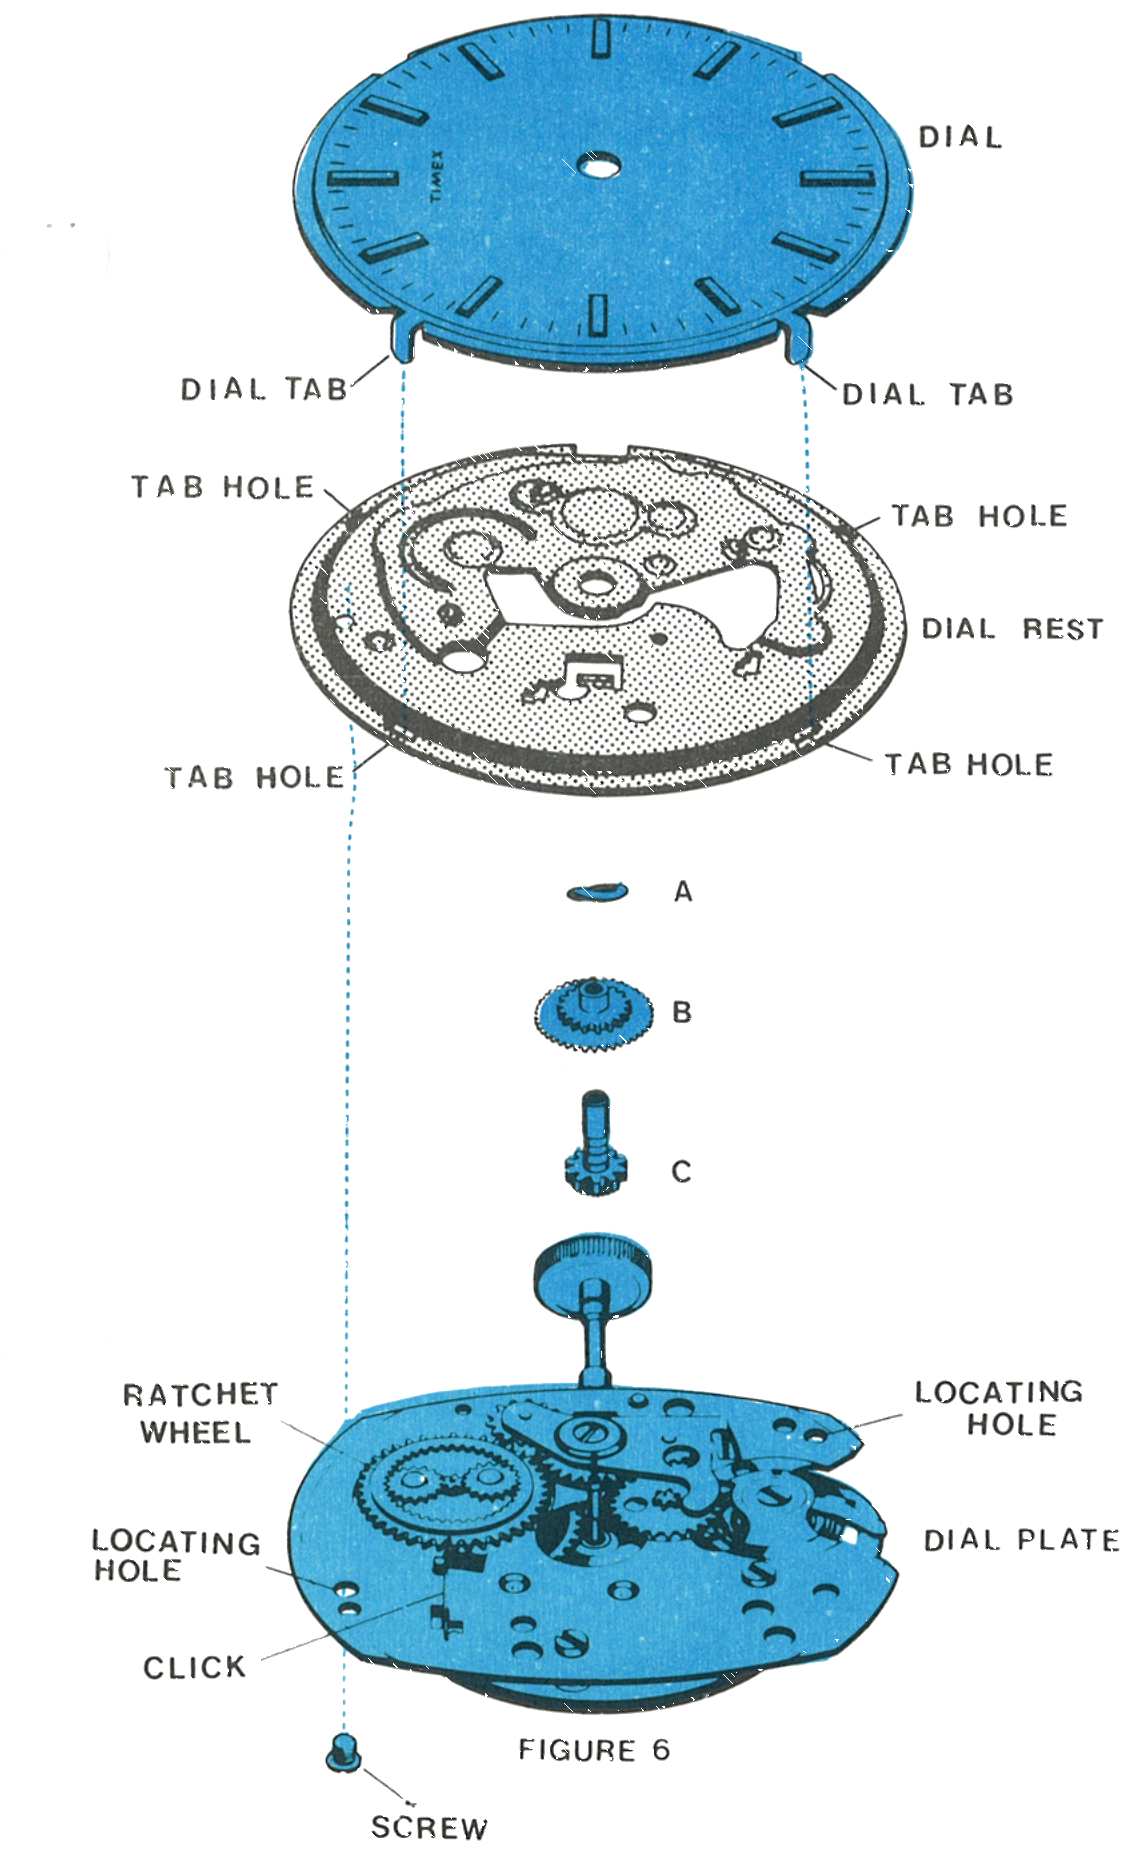
Fig. 107.5 · Figure 6
Reassembly
1 · Greasing the Rotor Frame
Apply grease, Moebius special lubricant in the factory, to three points on the rotor frame assembly. Apply grease to the rotor cam at surface A, force grease beneath the rotor staff head at B and to the underside of the rotor cam at C.
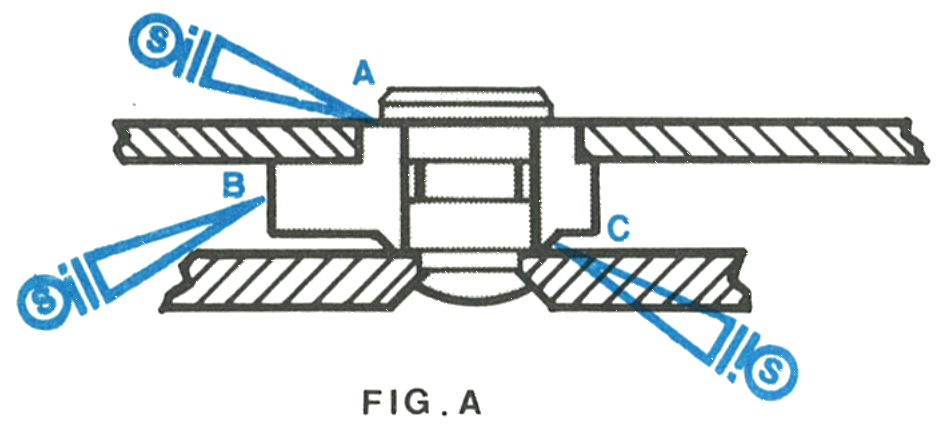
Fig. 107.6 · Figure A
2 · Oiling the Slip Tail
Assemble the ratchet wheel and dial rest and secure with screws. Rotate the crown until the mainspring and slip tail are positioned as shown, then apply a drop of spreading type oil, Woods AAAA in the factory, in the space between the mainspring and the inside diameter of the barrel, or between the slip tail and the barrel, through the opening in the dial rest.
Rotate the crown so the mainspring and slip tail make two complete revolutions within the barrel to distribute the oil properly. Release the mainspring power slowly, then remove the screw, dial rest and ratchet wheel.
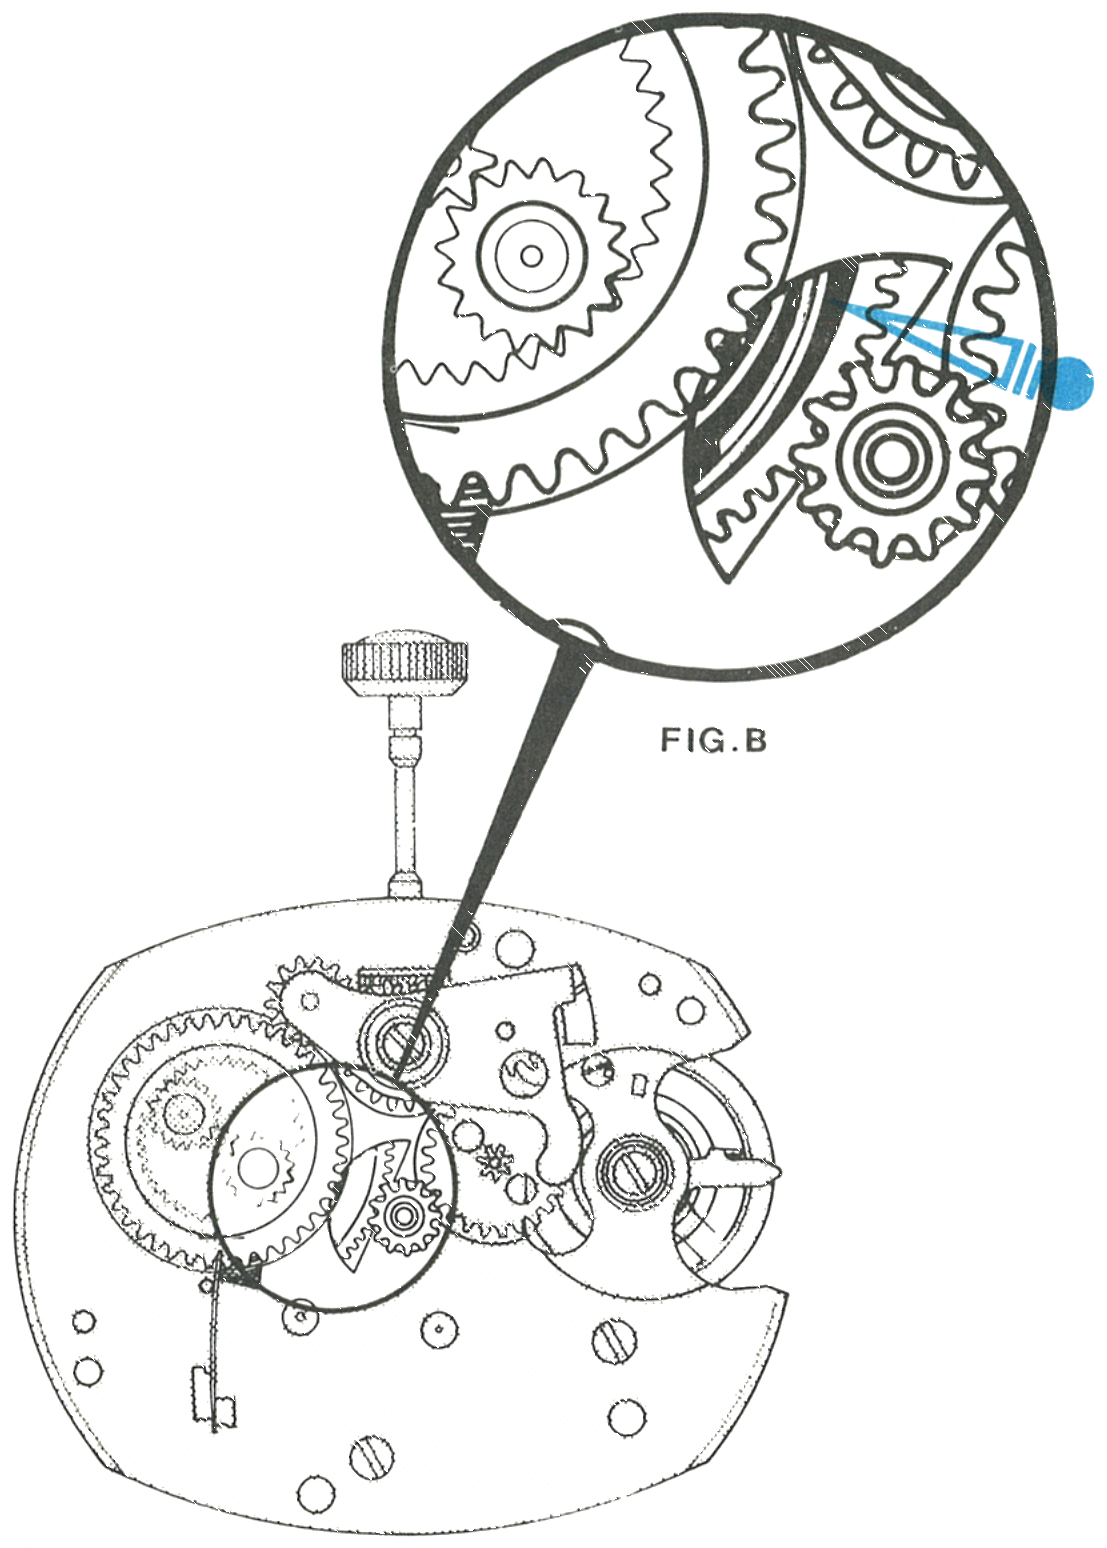
Fig. 107.6 · Figure B
3 · The Main Arbor and Ratchet Wheel
Place spreading type watch oil on the main arbor flat on one side, permitting oil to contact the root of the planet wind pinion teeth. From this point drag the oiler over the top of the planet wind pinion down to the main arbor flat on the opposite side, then apply spreading type oil to the bearing surface between the barrel hub and the movement plate.
Apply non-spreading type oil, Moebius Synt-A-Lube in the factory, to six points on the ratchet wheel and planet pinion assembly.
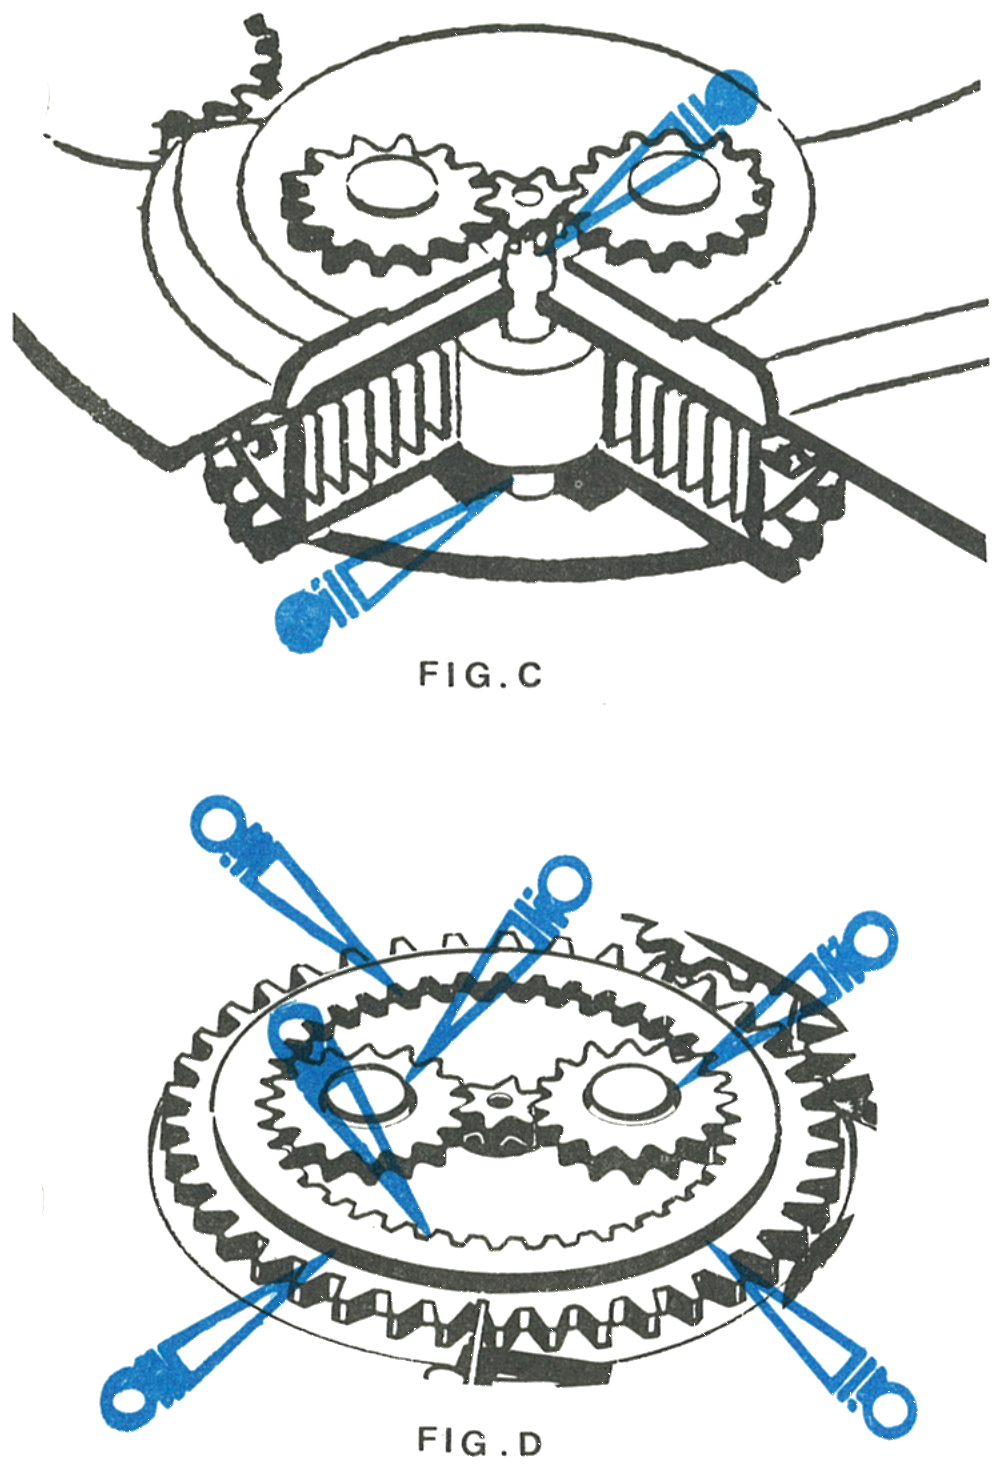
Fig. 107.7 · Figures C and D
4 · The Rocker Arm and Winding Ratchet Wheel
Apply non-spreading type oil to four points on the rocker arm assembly and winding ratchet wheel.
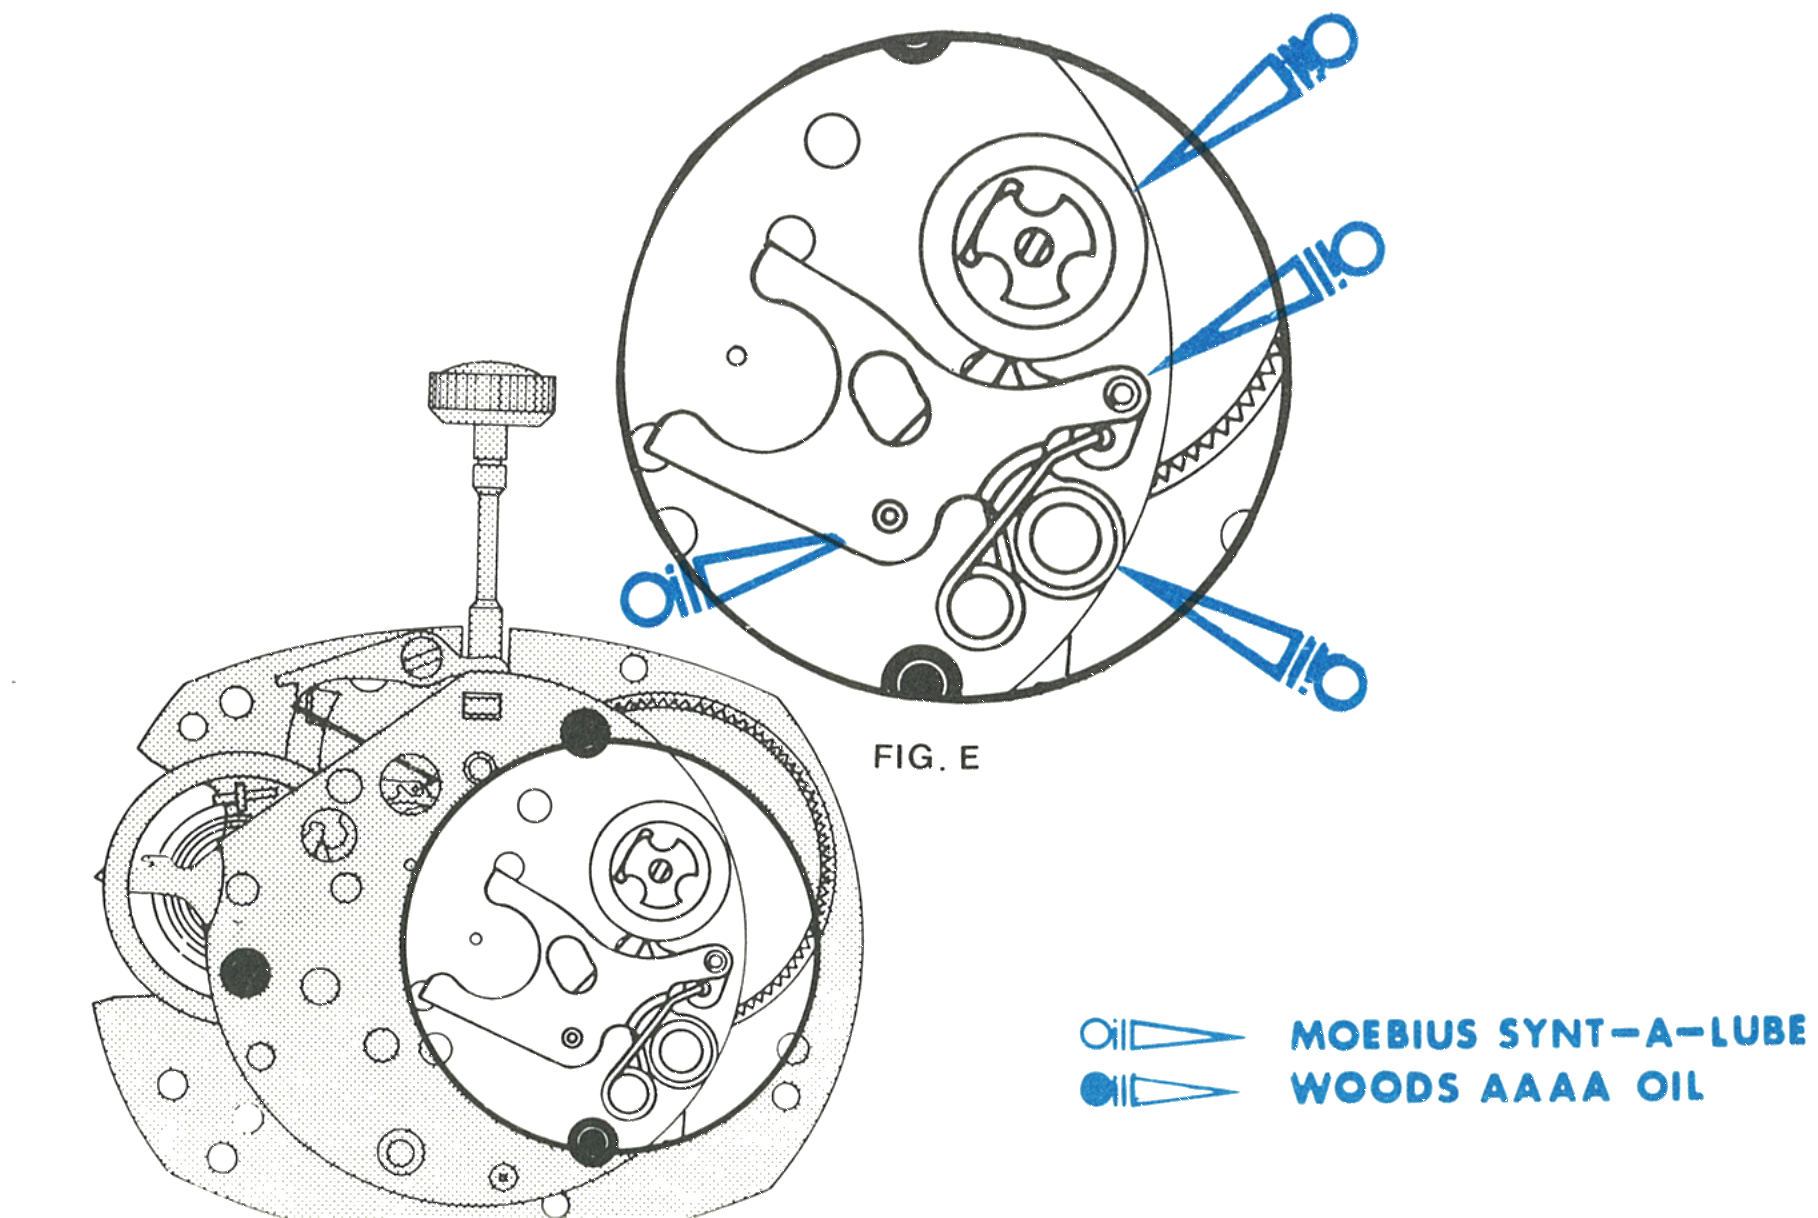
Fig. 107.7 · Figure E
5 · The Cannon Pinion
Apply non-spreading watch oil to the end of the cannon pinion.
Replace the parts on the movement in this order: cannon pinion assembly, hour wheel assembly, hour wheel washer, then the ratchet wheel, making sure it is seated and properly engaged with the click and the rocking bar assembly. Orient the dial rest with the slot at the stem and seat the bosses in the holes, hold the assembly together and turn it over so the dial rest is down, then insert and tighten the screw.
Insert the dial tabs through the holes in the dial rest. Hold the dial in position on the movement, turn the assembly over and bend the tabs firmly over the edge of the dial plate. Assemble the hands at the 12 o’clock position.
Position the dial and movement assembly in the bezel, insert the reflector ring and replace the crystal. Insert the crown and stem assembly through the bezel and into the movement and tighten the set lever screw.
Reassemble the rotor assembly by sliding it into the movement under the rocker arm, with the notch in the rotor frame pointing towards the balance assembly, and secure it with the two screws. Position the case back so the crown is to the left when the words are upright, then recheck the watch for proper function.
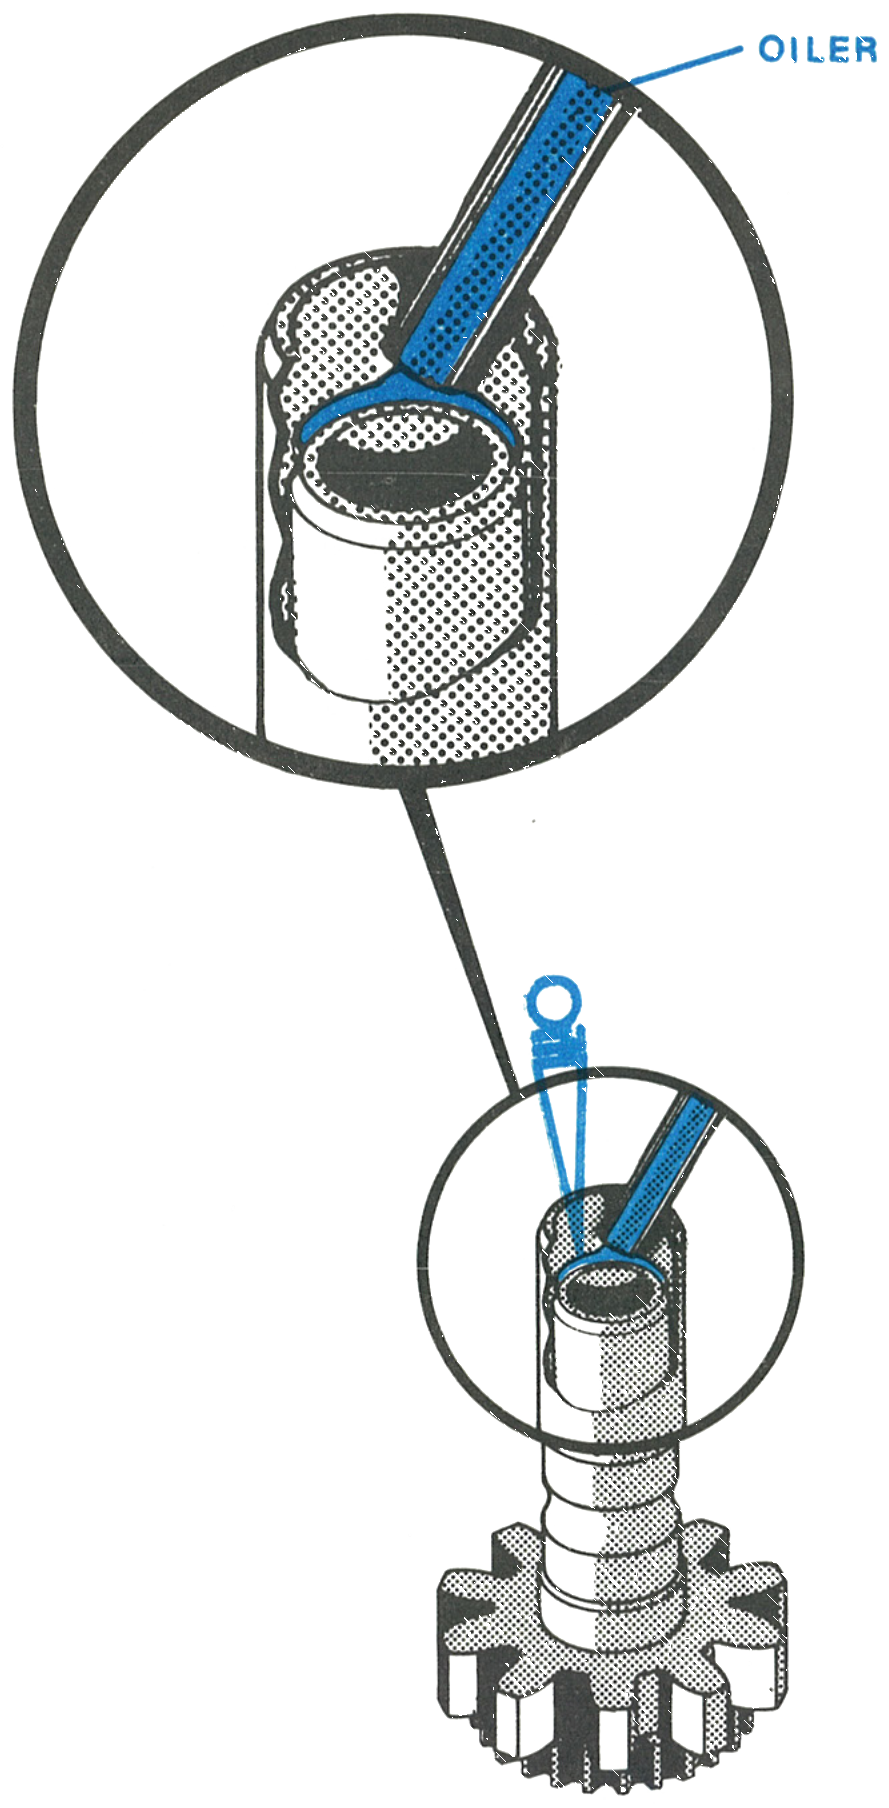
Fig. 107.8 · Cannon Pinion
Replace the parts in this order: cannon pinion assembly, hour wheel assembly, hour wheel washer, then the ratchet wheel, seated and engaged with the click and rocking bar. Orient the dial rest with the slot at the stem, seat the bosses in the holes, turn the assembly over so the dial rest is down, then insert and tighten the screw.
Insert the dial tabs through the holes in the dial rest, hold the dial in position, turn the assembly over and bend the tabs firmly over the edge of the dial plate. Assemble the hands at 12 o’clock. Fit the movement in the bezel, insert the reflector ring, replace the crystal, then insert the crown and stem and tighten the set lever screw.
Slide the rotor assembly back in under the rocker arm, notch in the rotor frame towards the balance assembly, and secure with the two screws. Position the case back so the crown is to the left when the words are upright, then recheck the watch for proper function.