A 13 ligne calendar movement on the basic construction of the Model 104, with the calendar housed between the dial plate and the dial and a fast date advance feature.
Hand-woundCalendarV-ConicFast Date Advance
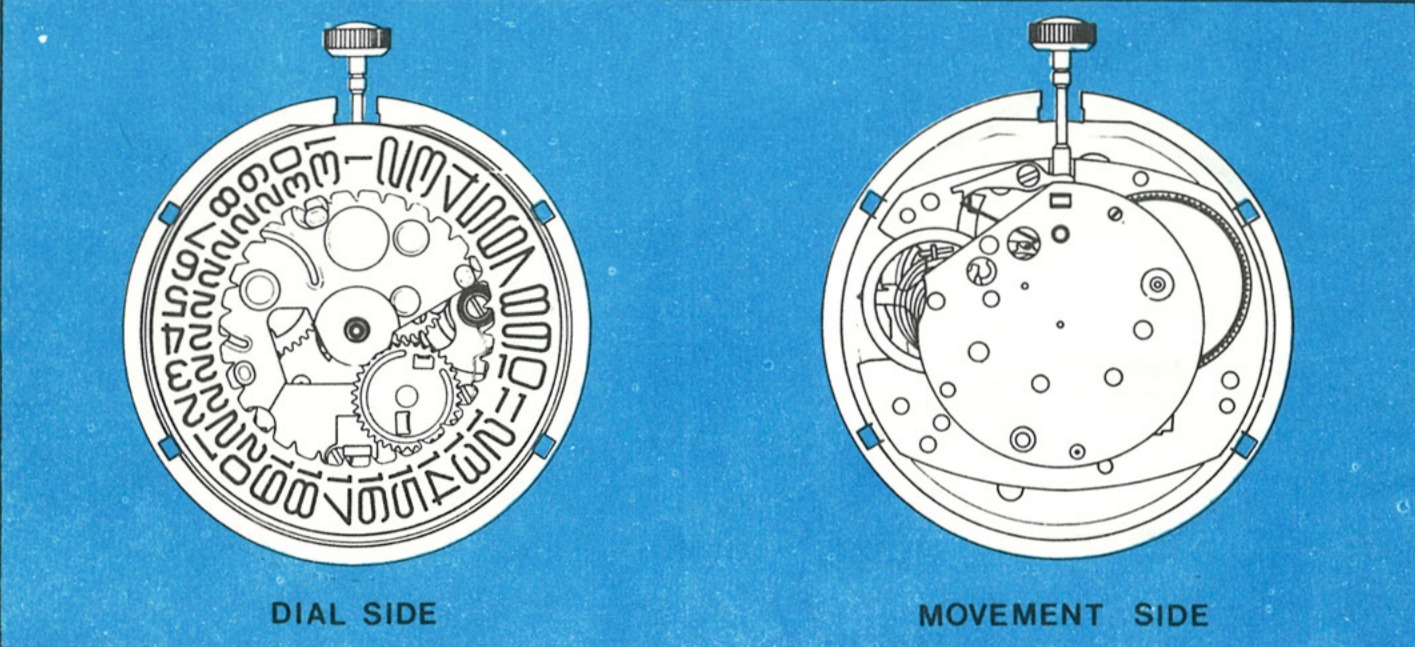
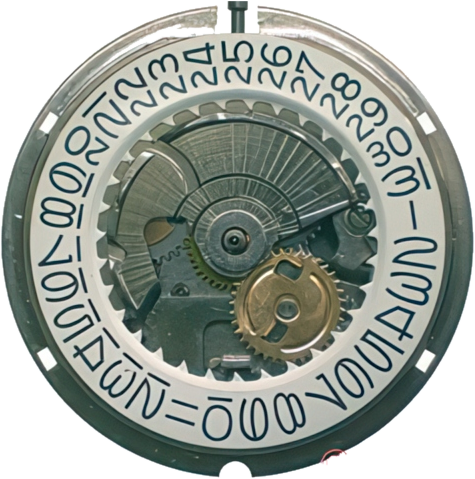
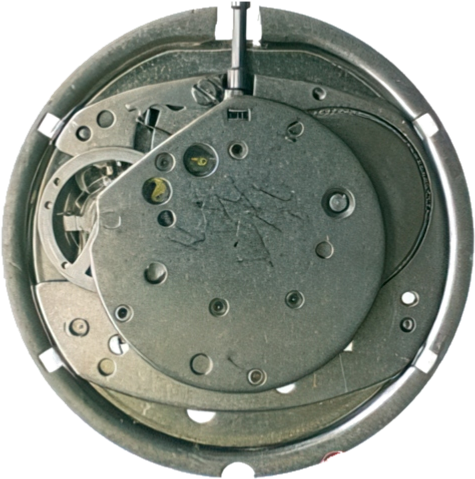
Factory Service Manual · Model 105 · Dial Side & Movement Side
Ligne13
BearingsV-Conic
ConstructionTwo plate
Basic movementModel 104
CalendarBetween dial plate and dial
FeatureFast date advance
ManualService Manual · Model 105
Size (mm)29.45 mm
Height5.00 mm
Jewels0
EscapementPin lever
Beat rate18,000 bph
Power reserve42 h
Size in mm, height, jewels, escapement, beat rate and power reserve: ranfft.org
A Calendar on the Model 104
The Timex Model 105 is a 13 ligne calendar movement utilizing the basic construction of the Model 104. Like the 104 it features the “V-Conic” bearing system and two plate design. The calendar mechanism is housed between the dial plate and the dial, and the design includes a fast date advance feature.
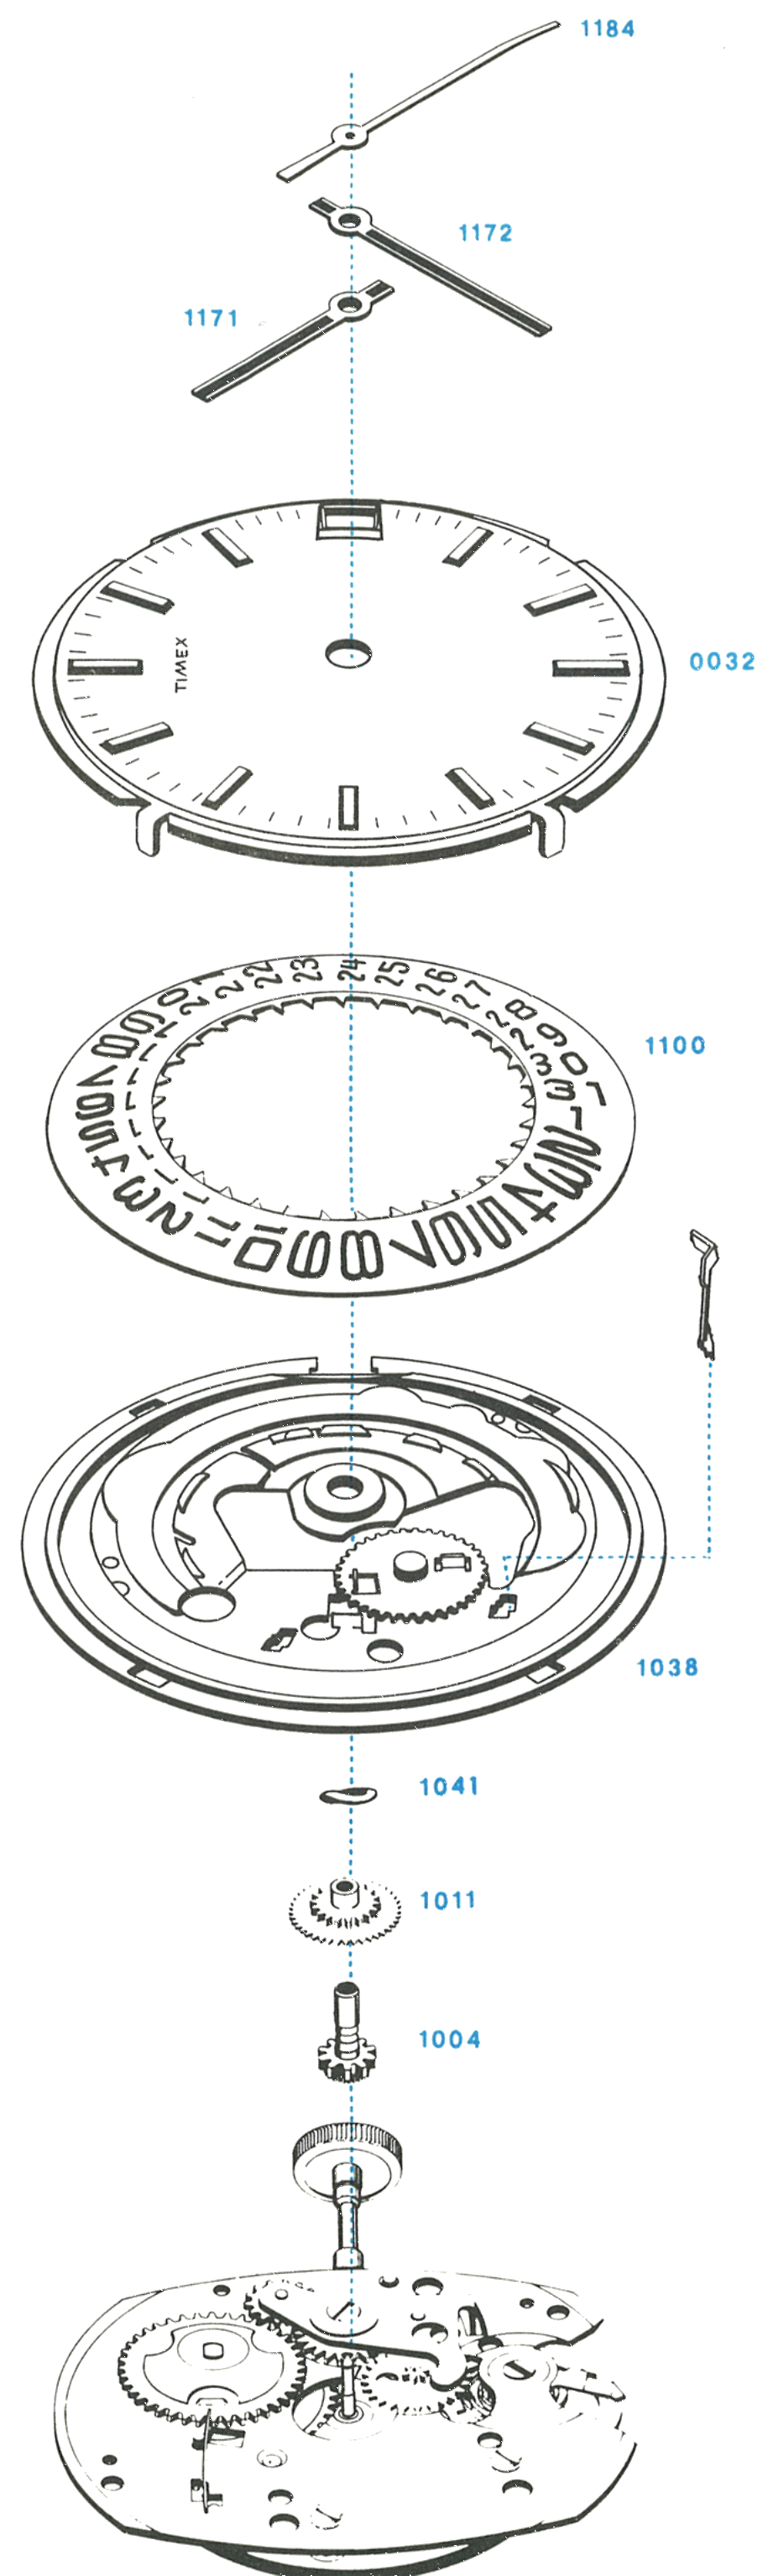
To clean the Model 105 it is necessary to remove only the hands, dial, date ring, date frame assembly and the balance wheel assembly.
Note: The movement underneath is the Model 104. For cleaning, lubrication and the base reassembly see the Model 104 guide.
Remove the case back and support ring. This is not always used.
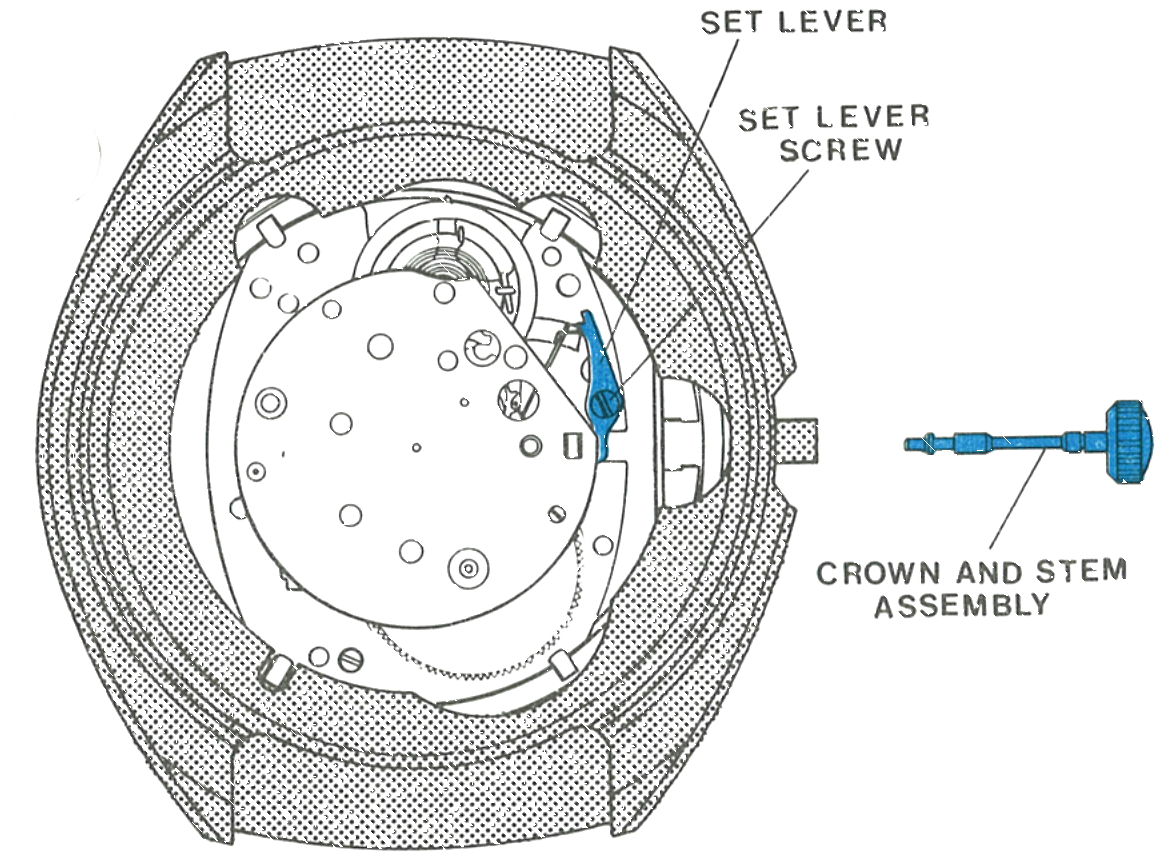
Loosen the screw on the set lever, beside the stem, to release the crown and stem assembly, then pull it out of the movement and the case.
Fig. 105.3 · Figure 3
2 · Out of the Case
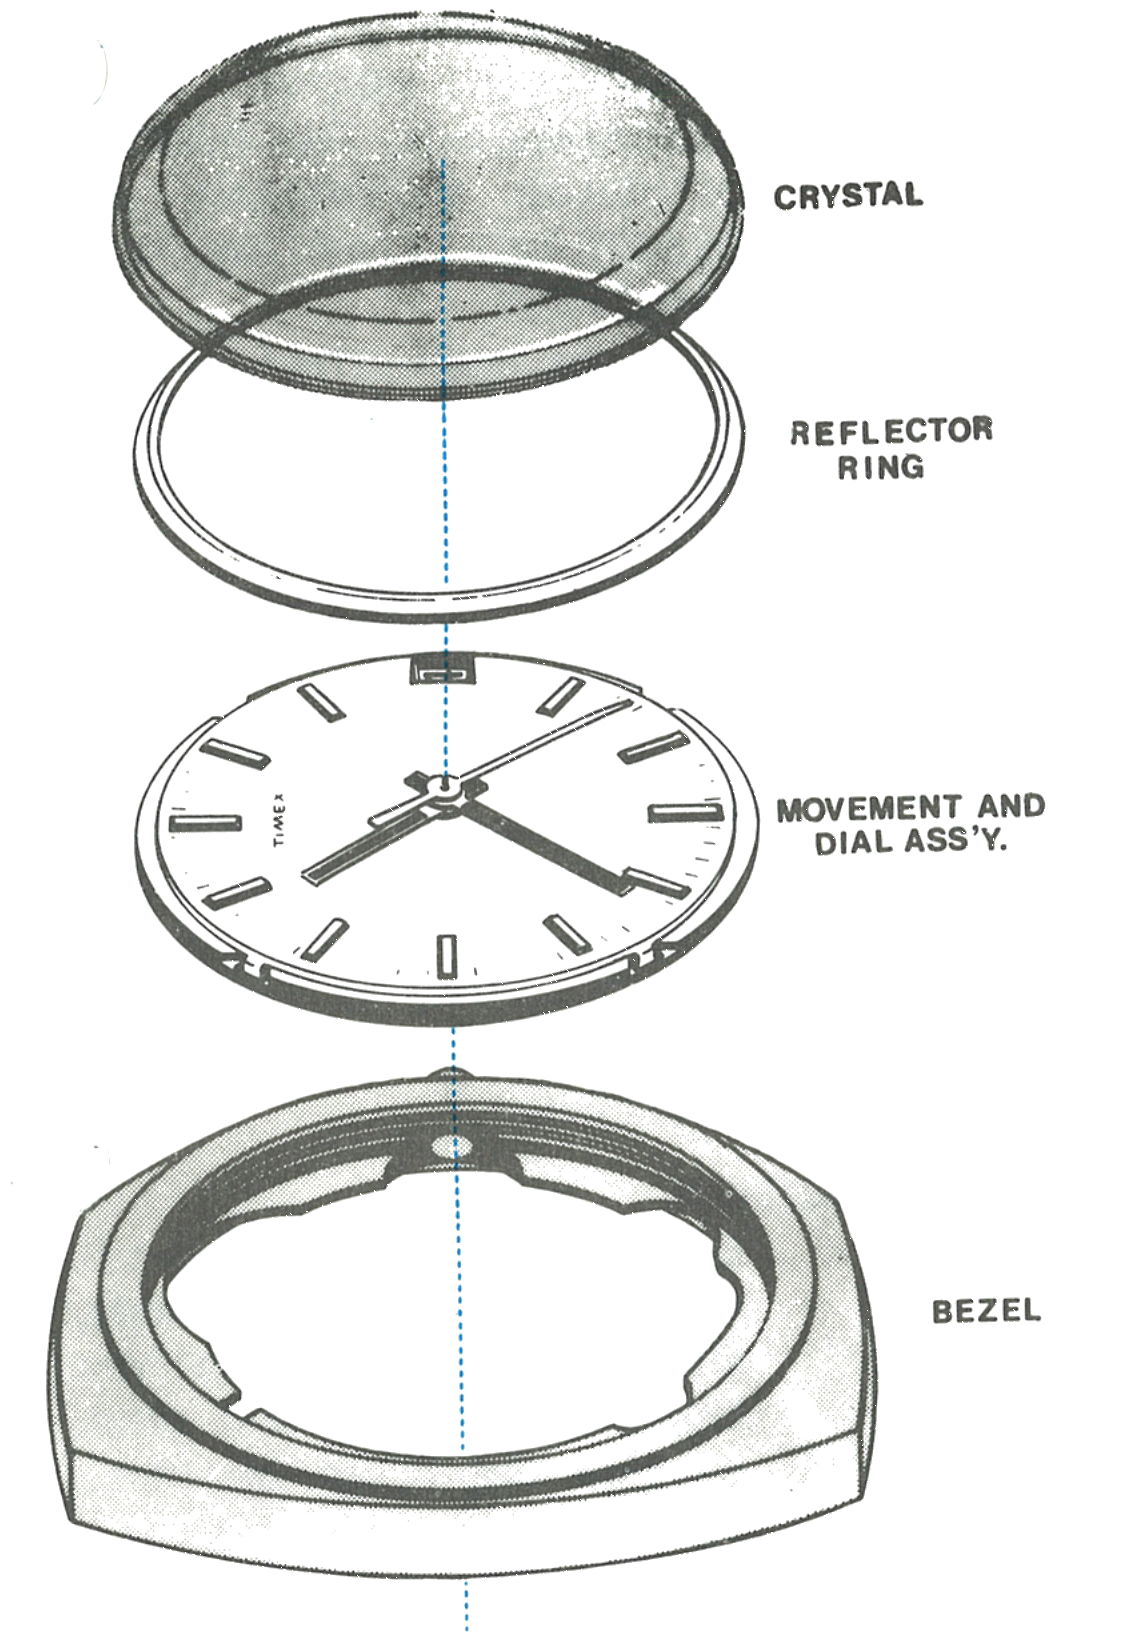
Turn the assembly over and remove the crystal using a crystal remover. The reflector ring and the movement and dial assembly can then be removed through the front of the bezel. Some designs permit removal of the movement and dial assembly through the back of the case.
Fig. 105.3 · Figure 4
3 · The Dial Tabs
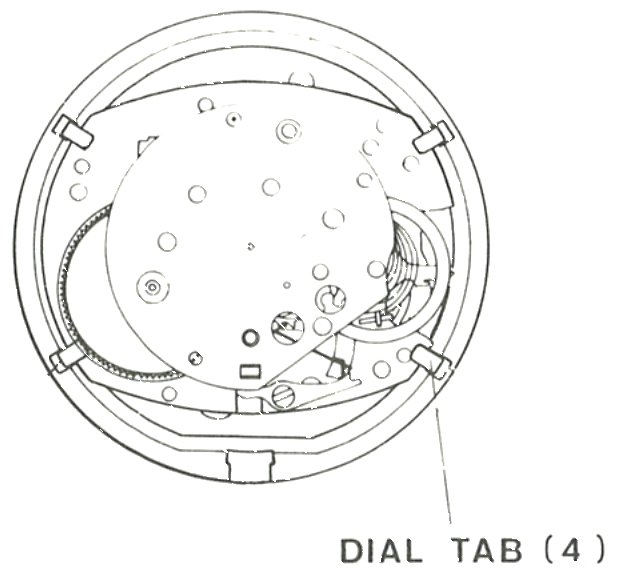
Four dial tabs pass through the holes in the date frame. Straighten them so they will clear the holes.
Fig. 105.4 · Dial tabs
4 · Lifting Off the Calendar
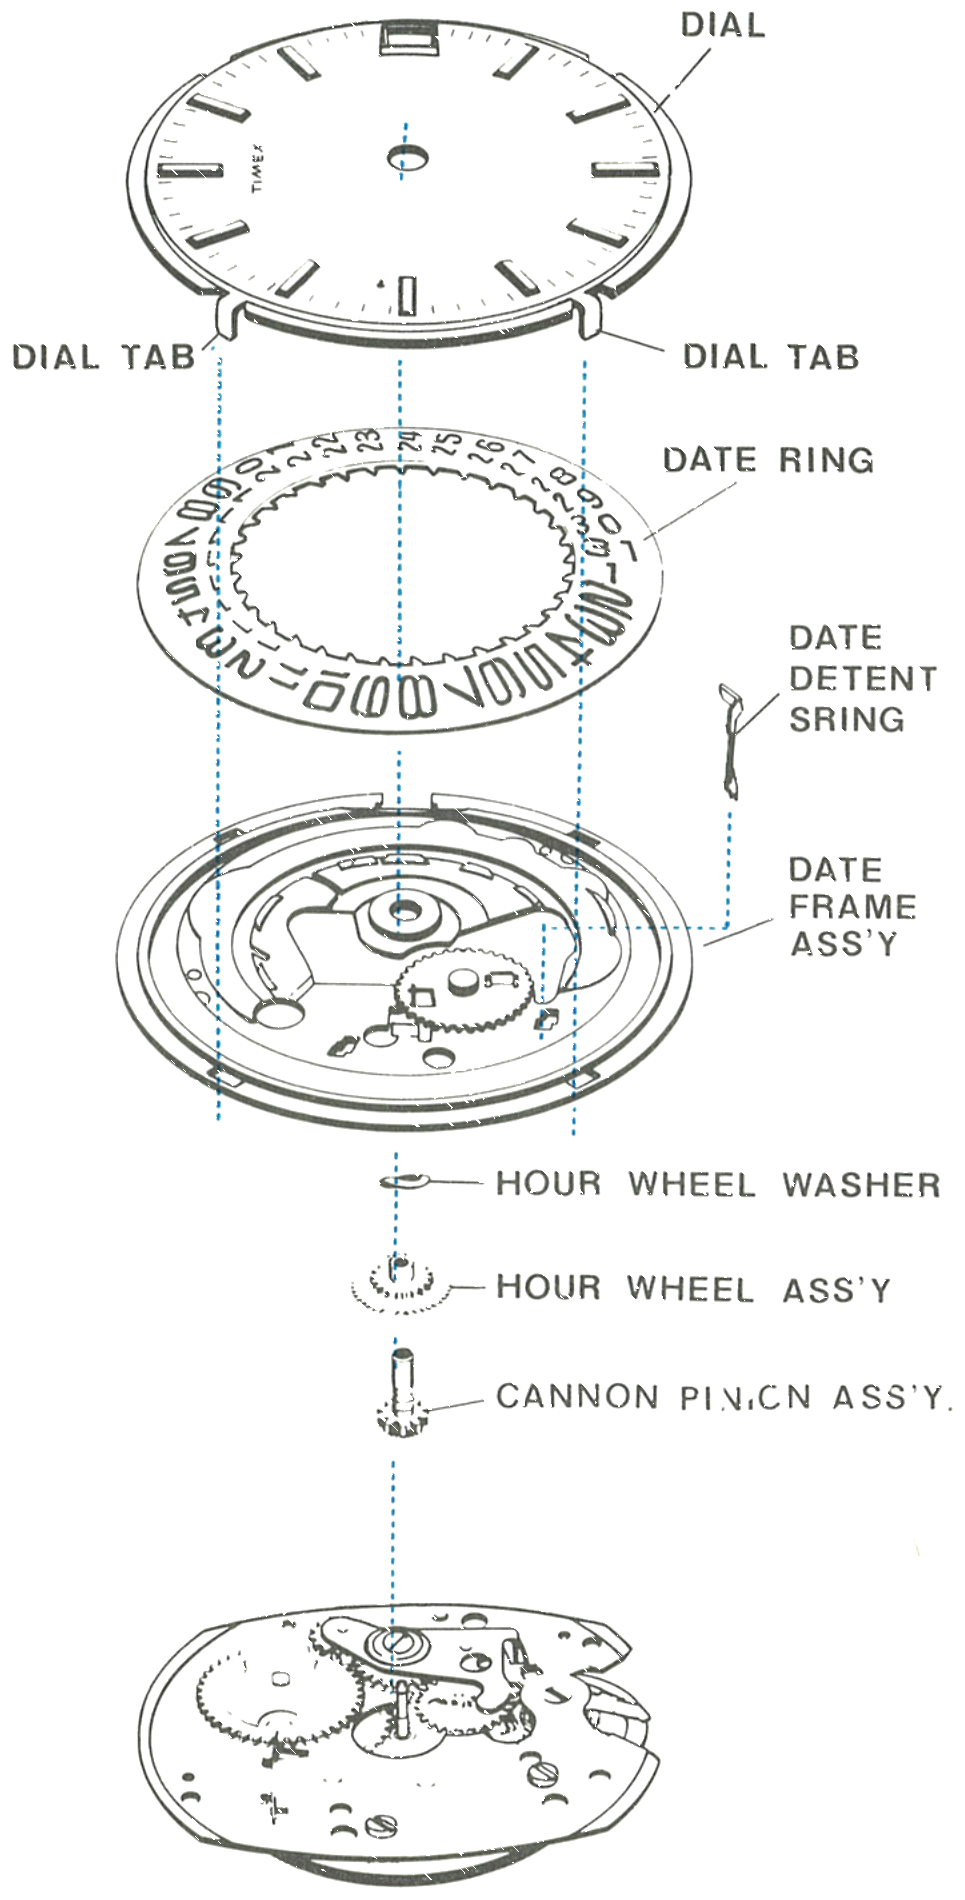
Straighten the dial tabs so they will pass through the holes in the date frame. Hold the dial in position, turn the assembly over and then lift off the dial. Note the position of parts under the dial.
Lift off the date ring, then the date frame assembly, noting the location of the bosses on the bottom, and remove the date detent spring from the date frame assembly.
Remove the hour wheel washer, the hour wheel assembly and the cannon pinion assembly.
Note: With these parts removed, the basic movement may be replaced with a Timex reconditioned movement.
Fig. 105.4 · Calendar stack
Reassembly
1 · The Date Detent Spring
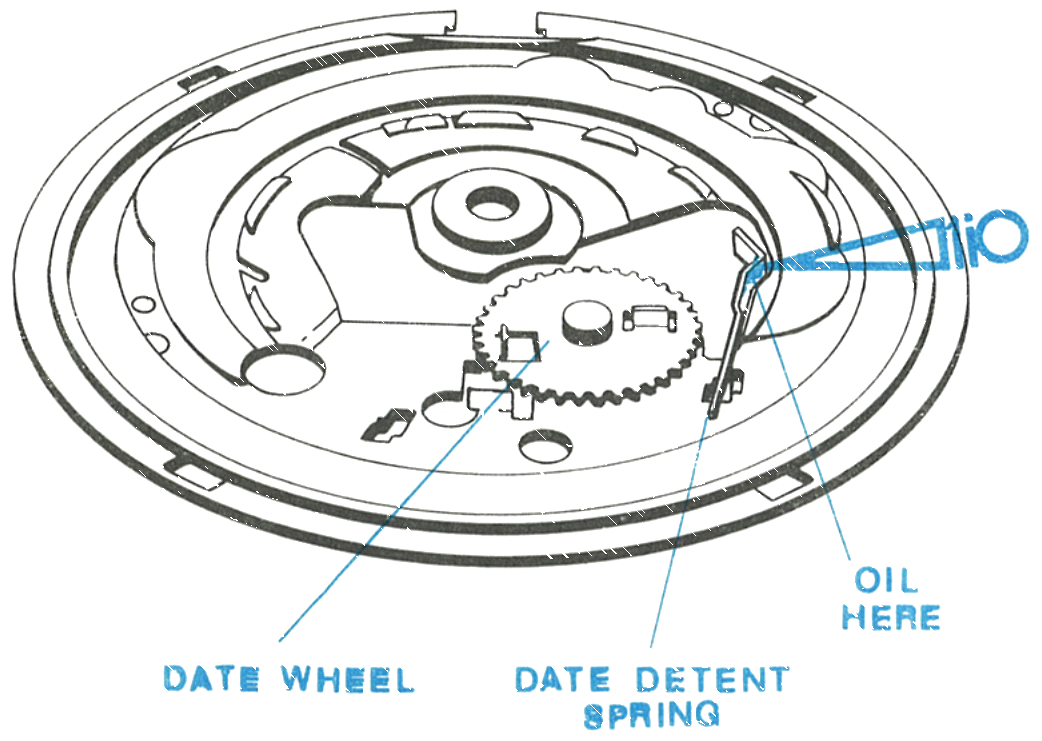
Insert the date detent spring into the date frame assembly as shown.
Lubricate the bearing face of the date detent spring with a thin film of non-spreading watch oil, Moebius Synt-A-Lube in the factory, where shown.
Caution: Avoid excess lubrication, and do NOT lubricate the date wheel area.
Fig. 105.5 · Date detent spring
2 · The Cannon Pinion
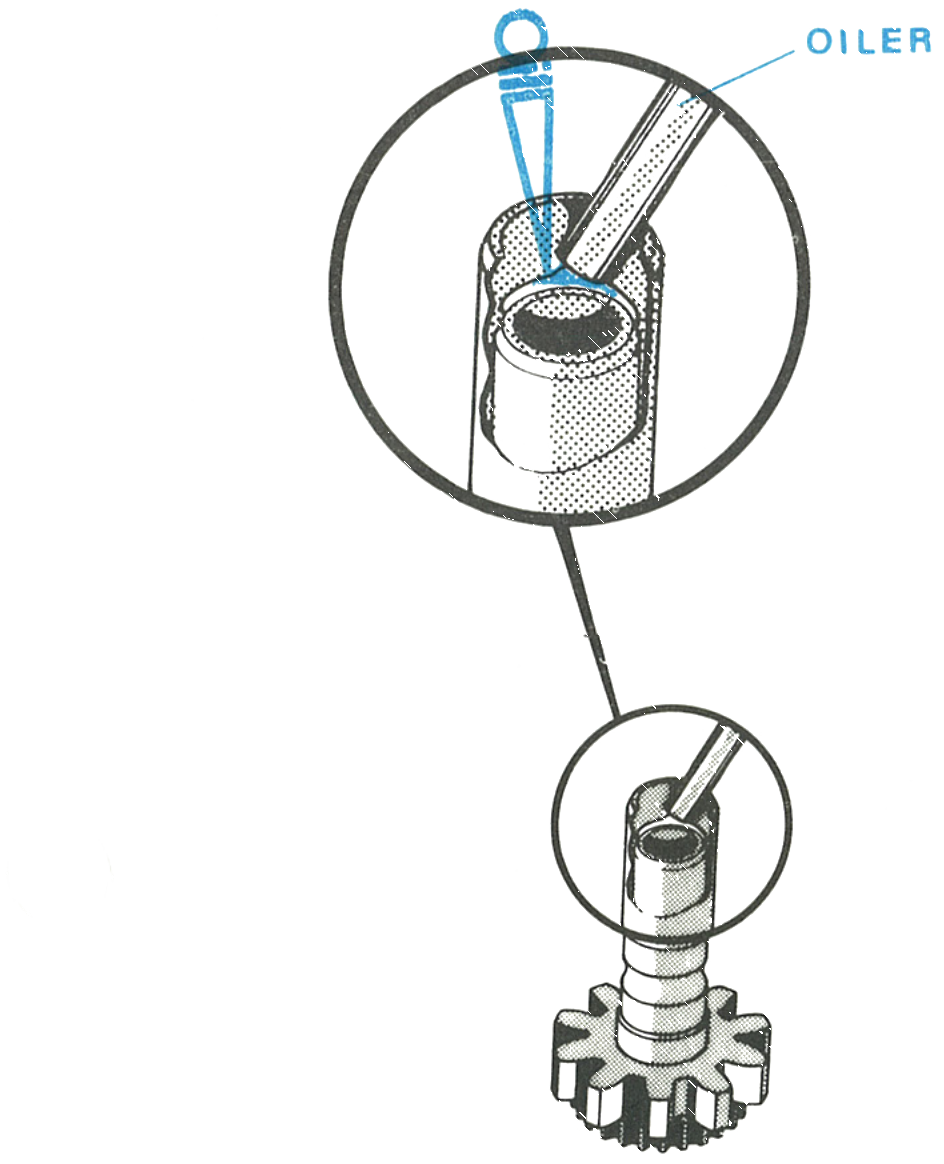
Apply non-spreading watch oil to the end of the cannon pinion.
Replace the parts on the movement in this order: cannon pinion assembly, hour wheel assembly, hour wheel washer, then the date frame assembly, orienting the frame with the slot at the stem and seating the bosses in the holes.
Position the date ring centrally on the date frame assembly. With fine tweezers, deflect the date detent spring inward until the date ring drops into place. Orient the dial with the window toward the crown and stem assembly and insert the dial tabs through the holes in the date frame assembly. Hold the dial and date frame assembly in position on the movement, turn the assembly over and bend the tabs firmly over the edge of the dial plate.
Fig. 105.5 · Cannon pinion
This guide is based on the original Timex factory service manual for the Model 105 movement.